|
|
|
Eagle- helmets in linothorax- technique (= cloth/glue- composite), Epic Empires 2014 & 2015 This page is part of the documentation of my armour; the beginning would be here: linothorax armour |
||||||||||||||||||
 |
||||||||||||||||||
|
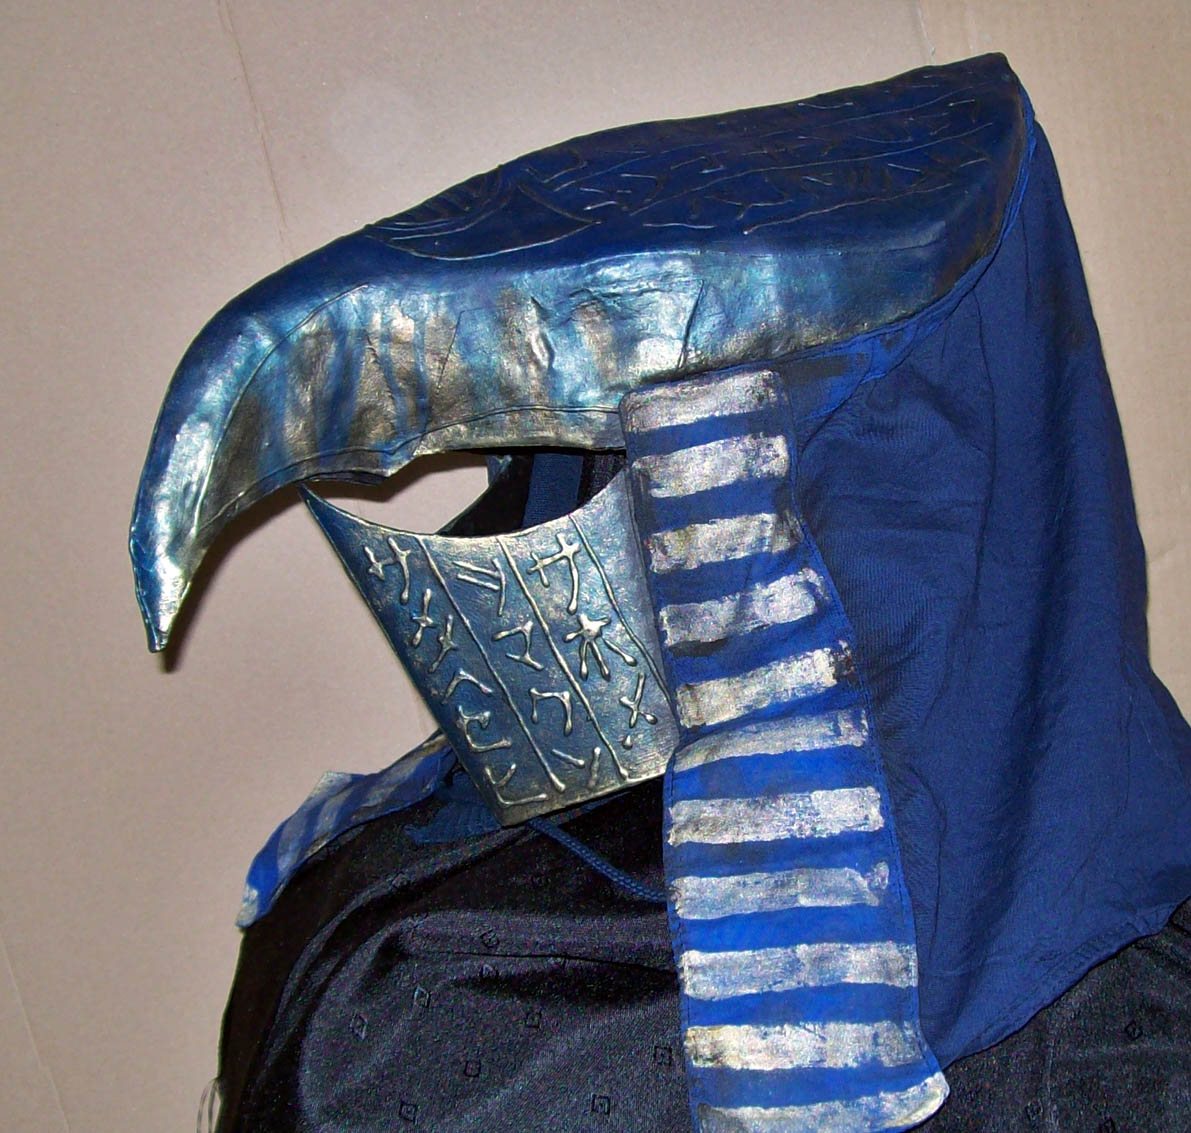
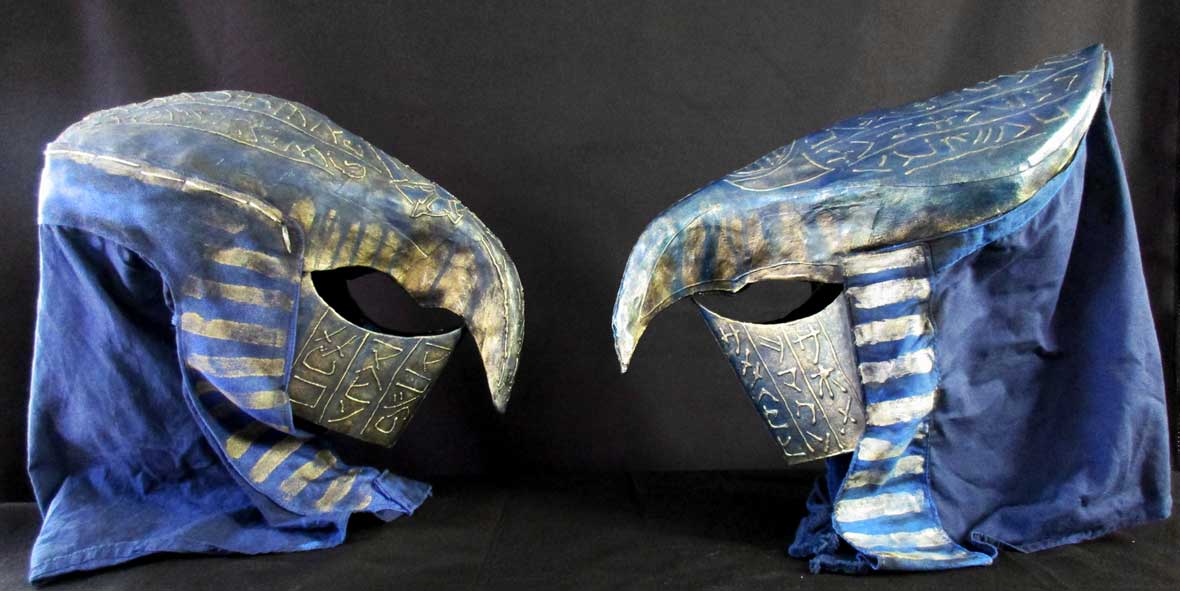
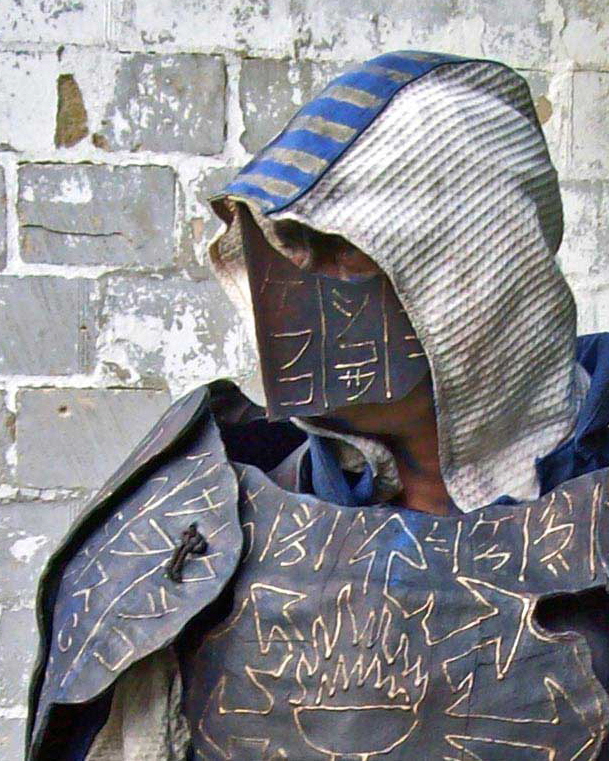
Above: The helmet on the left encloses the whole head, the one on the right was designed for very hot weather and only covers the headīs apex, thus providing much better ventilation. |
||||||||||||||||||
 |
||||||||||||||||||
|
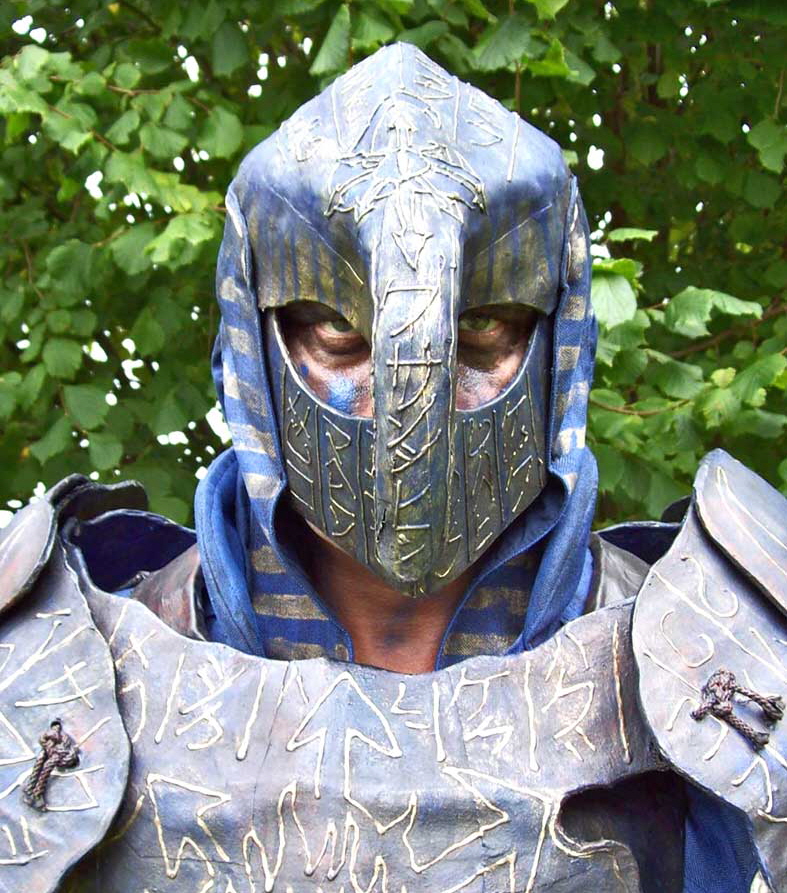
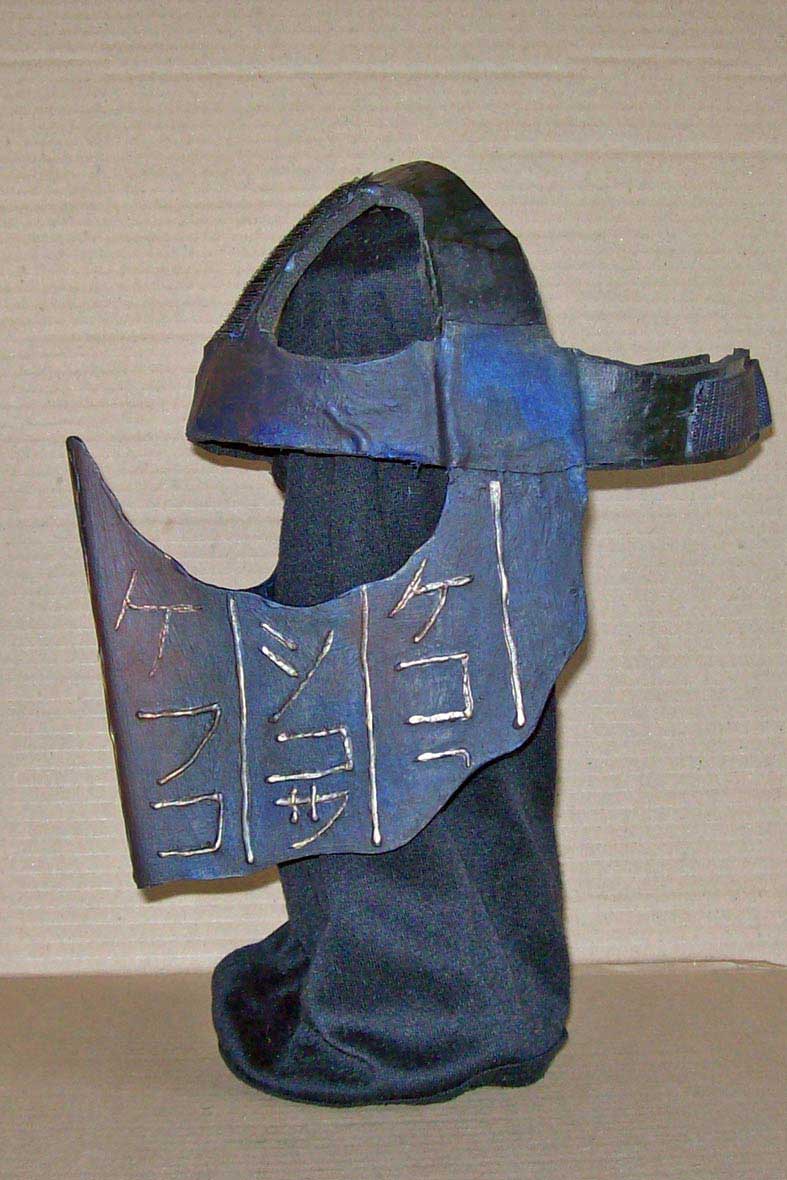
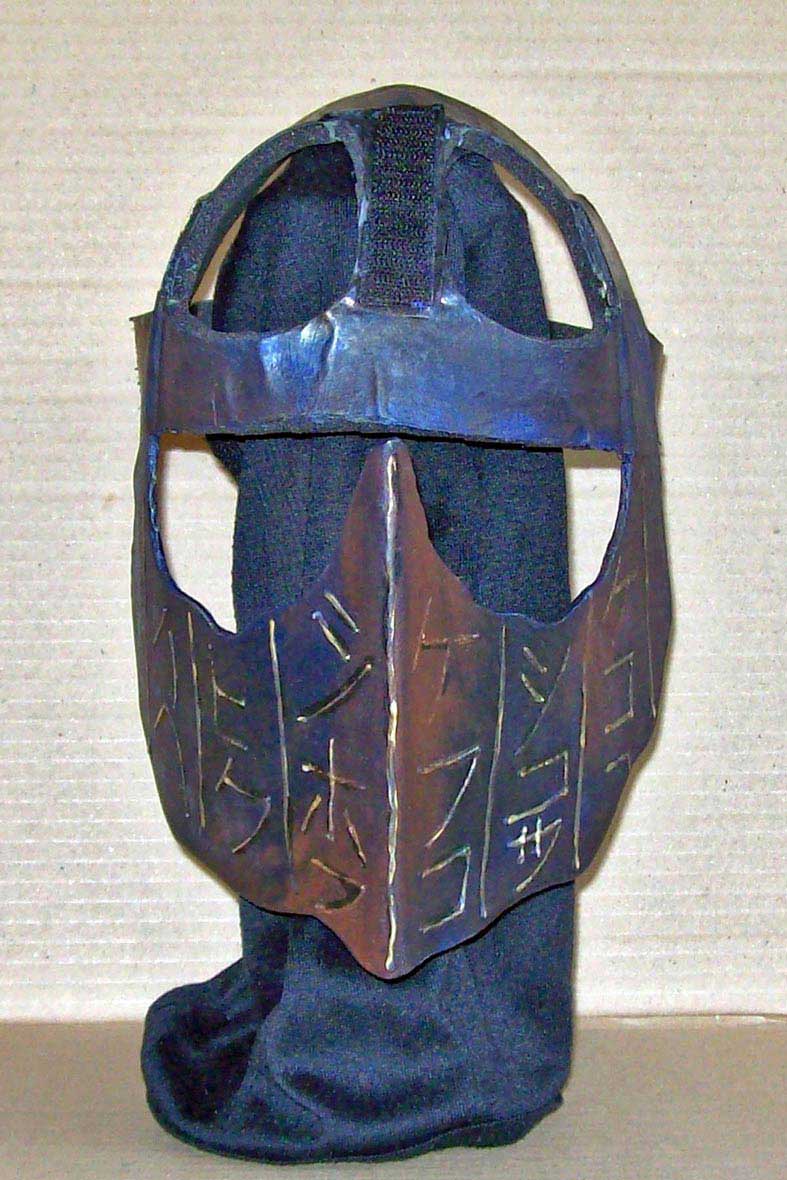
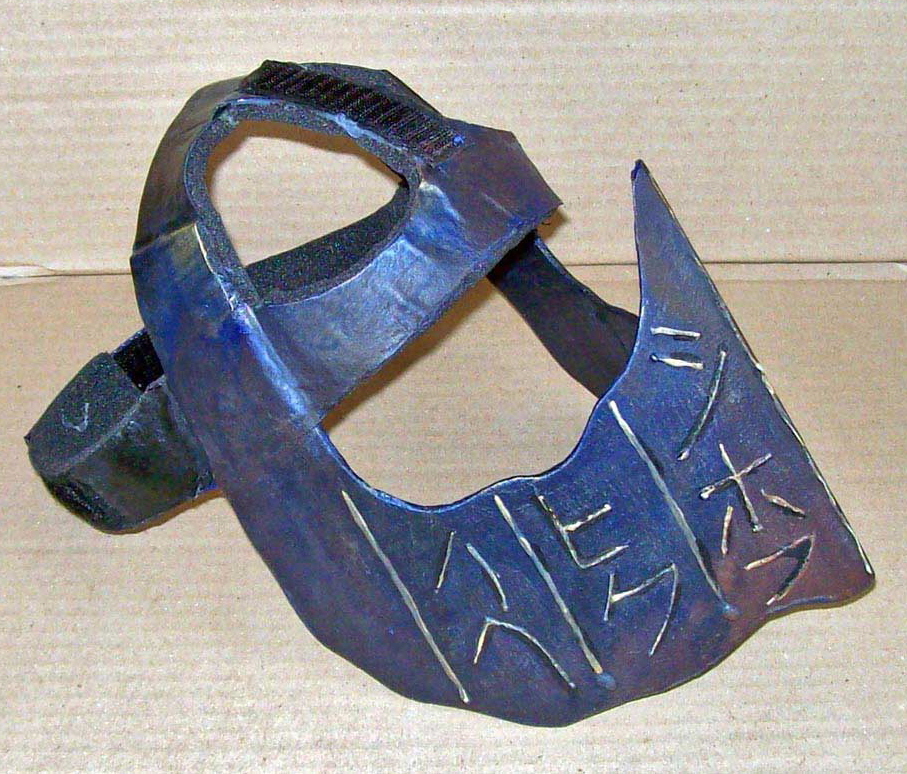
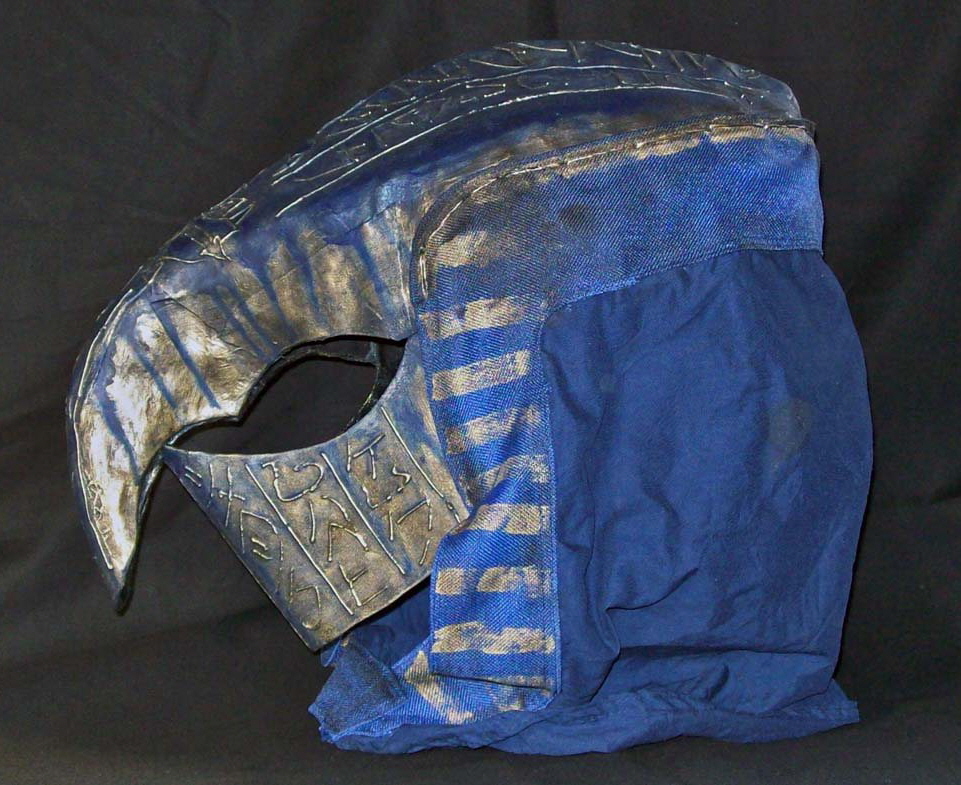
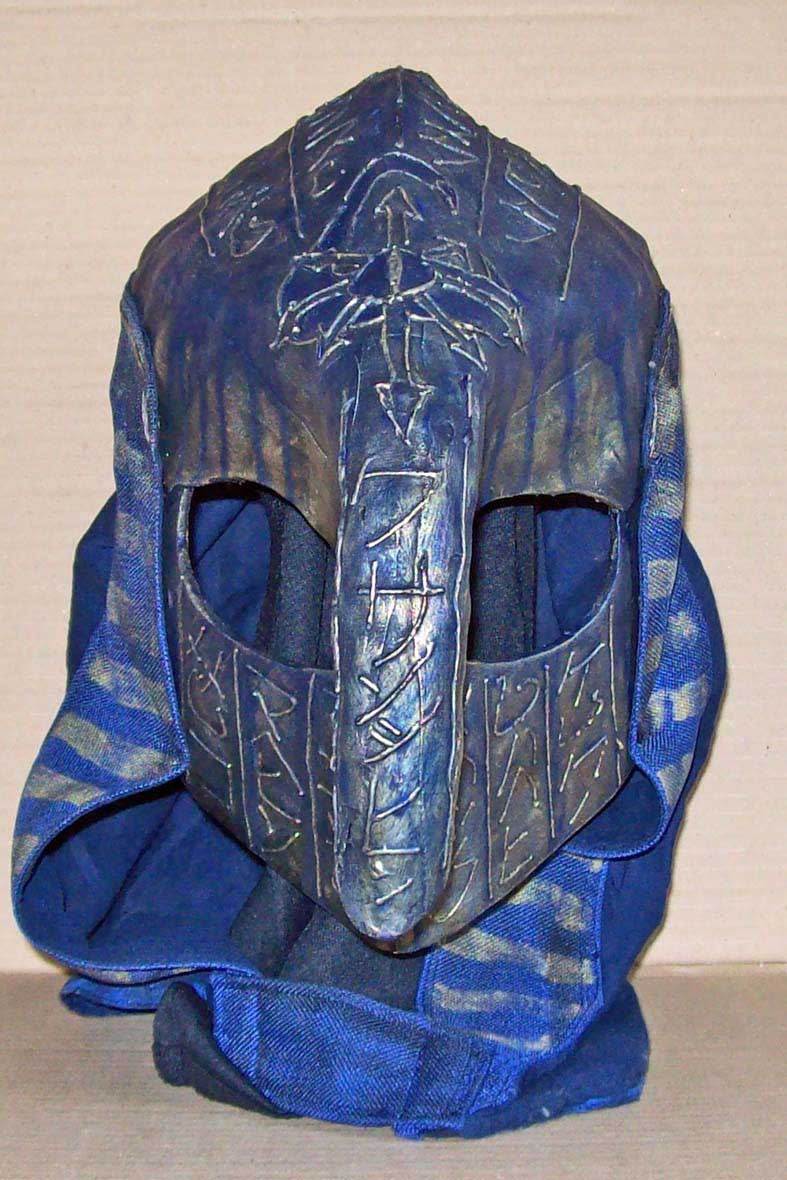
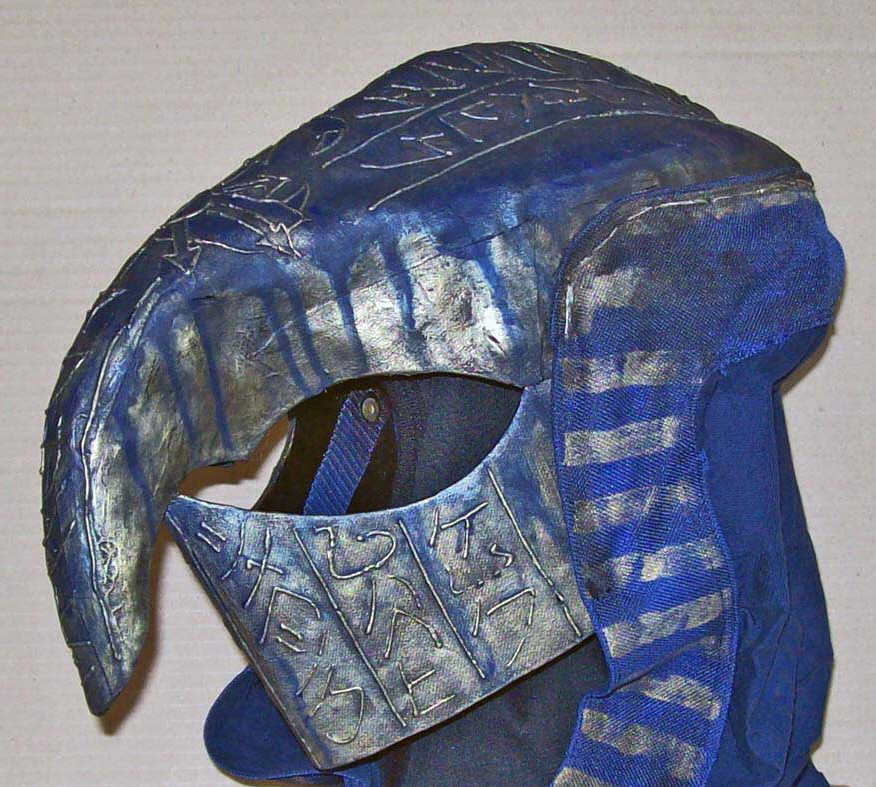
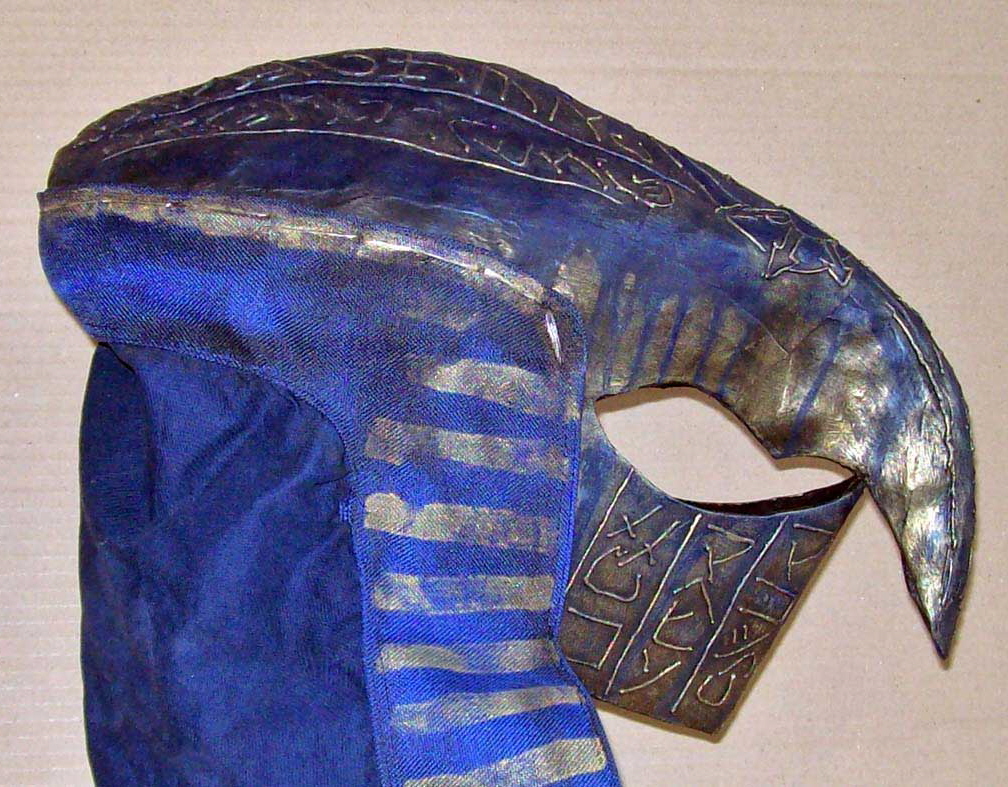
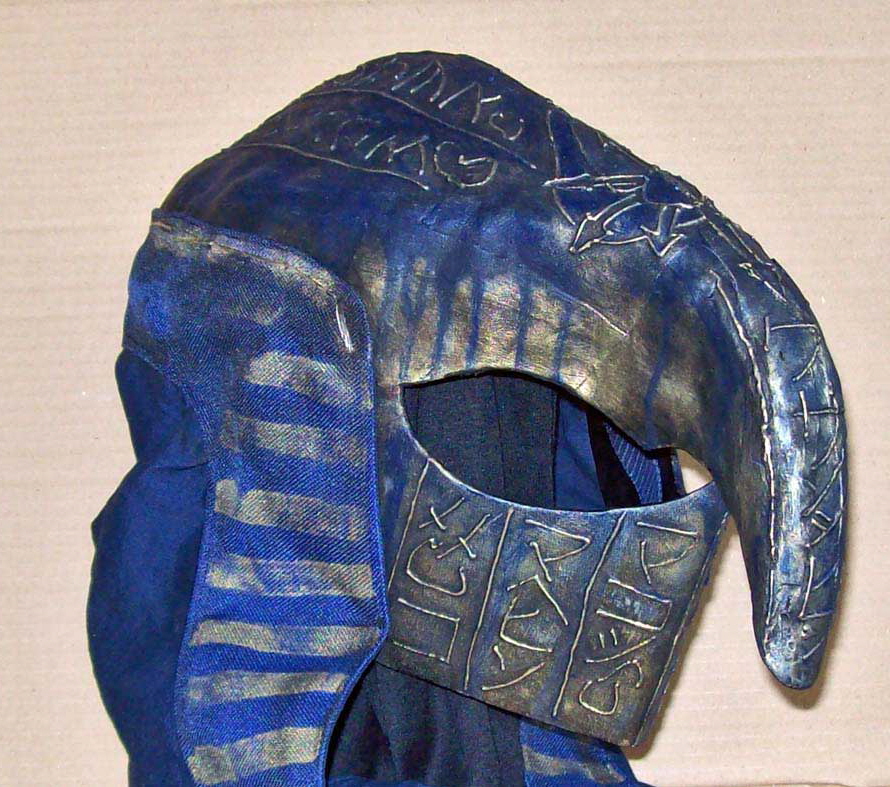
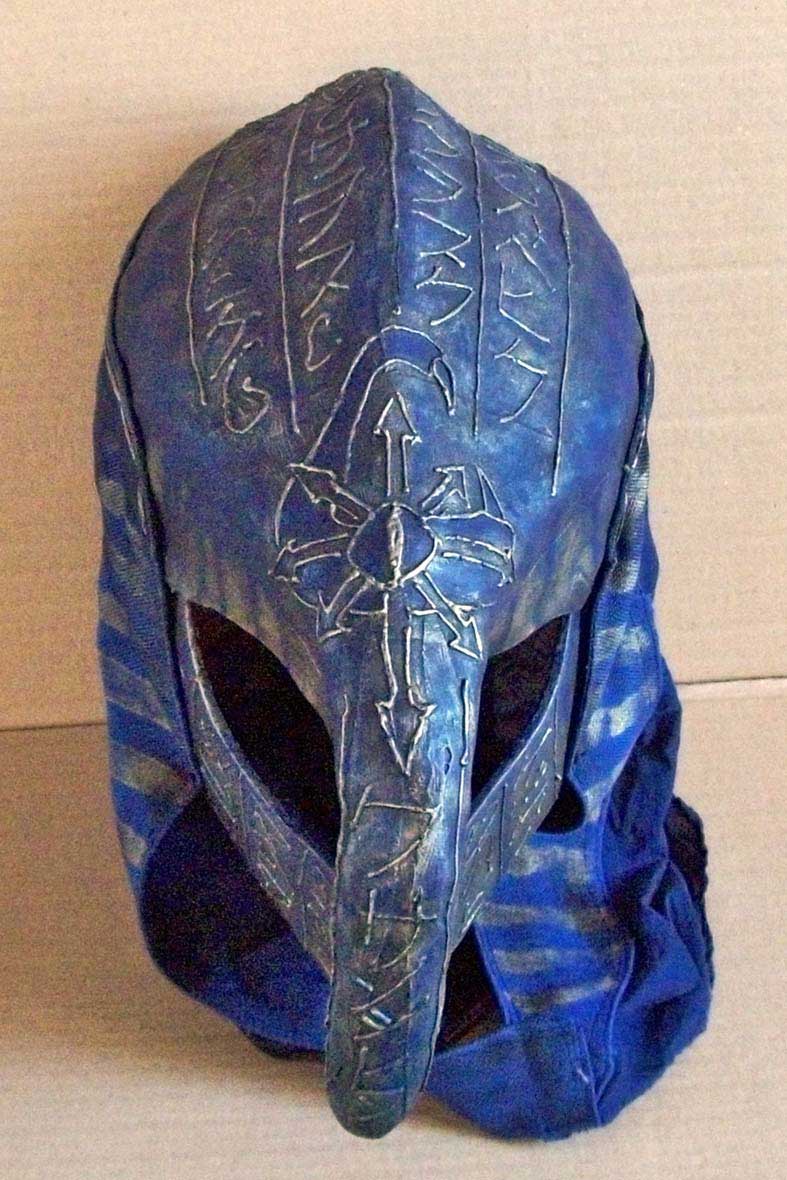
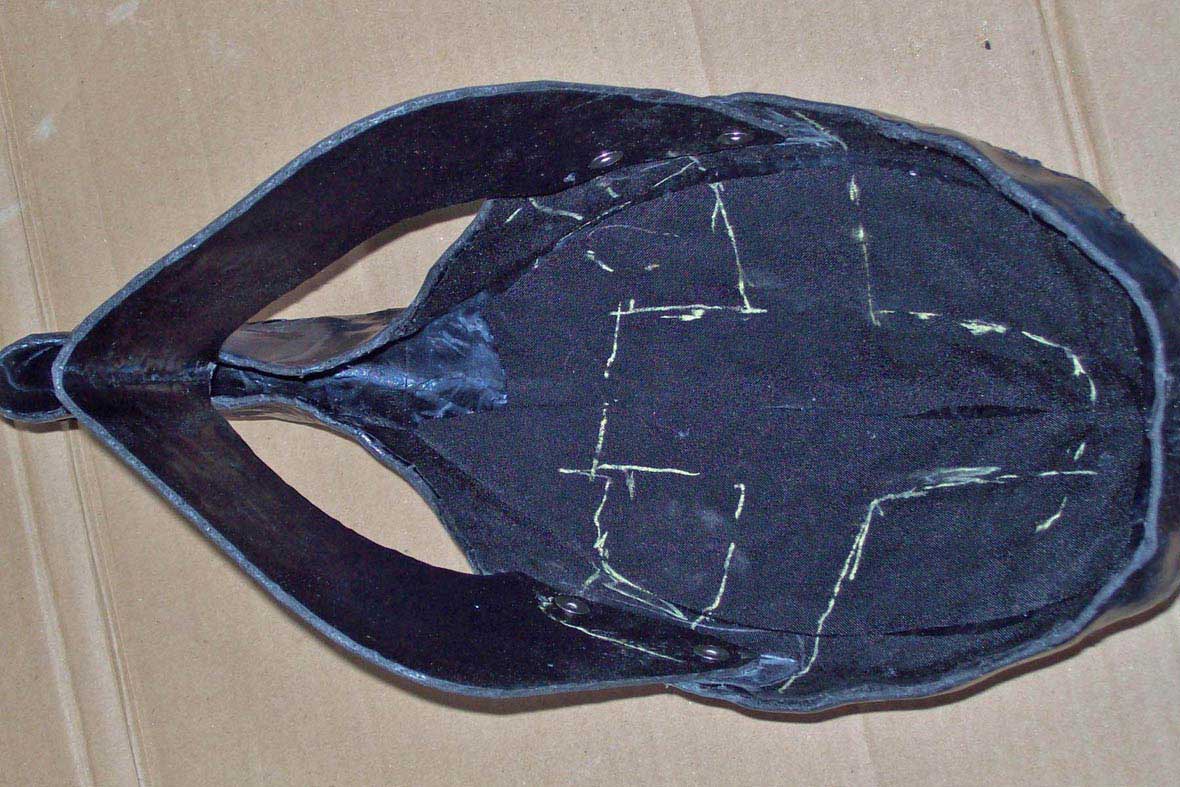
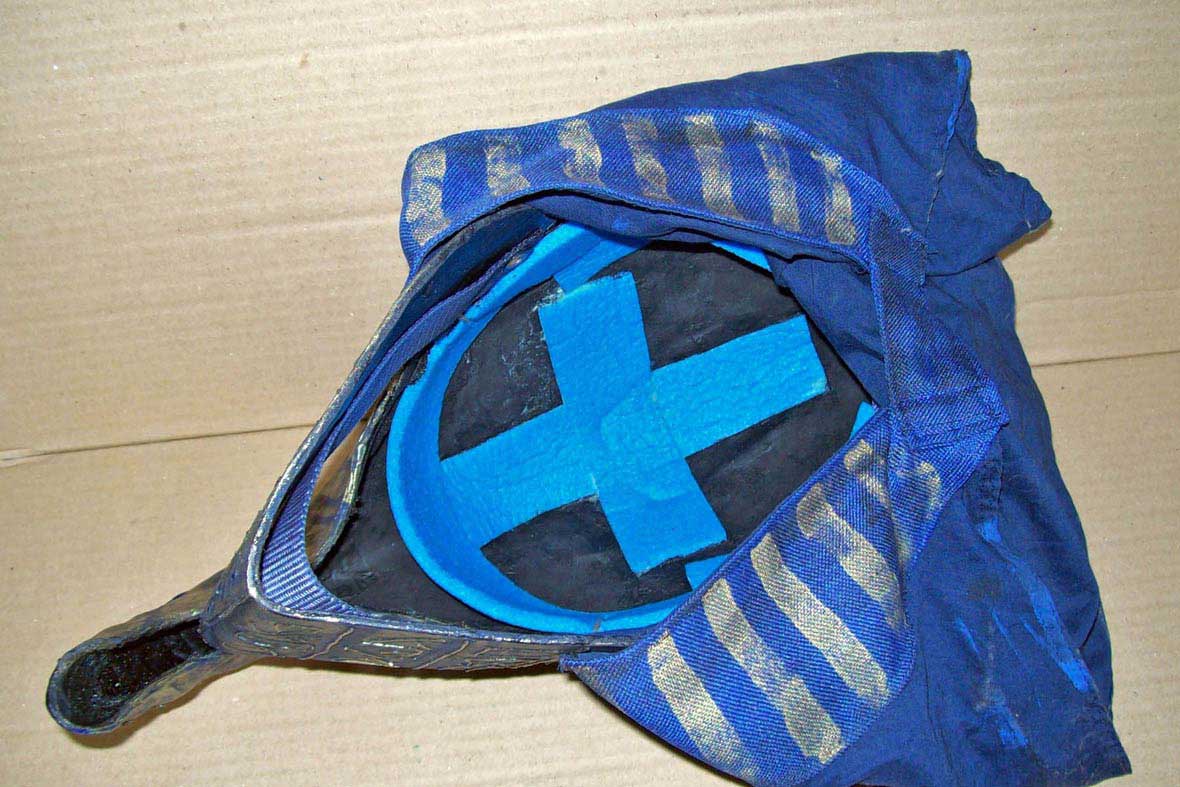
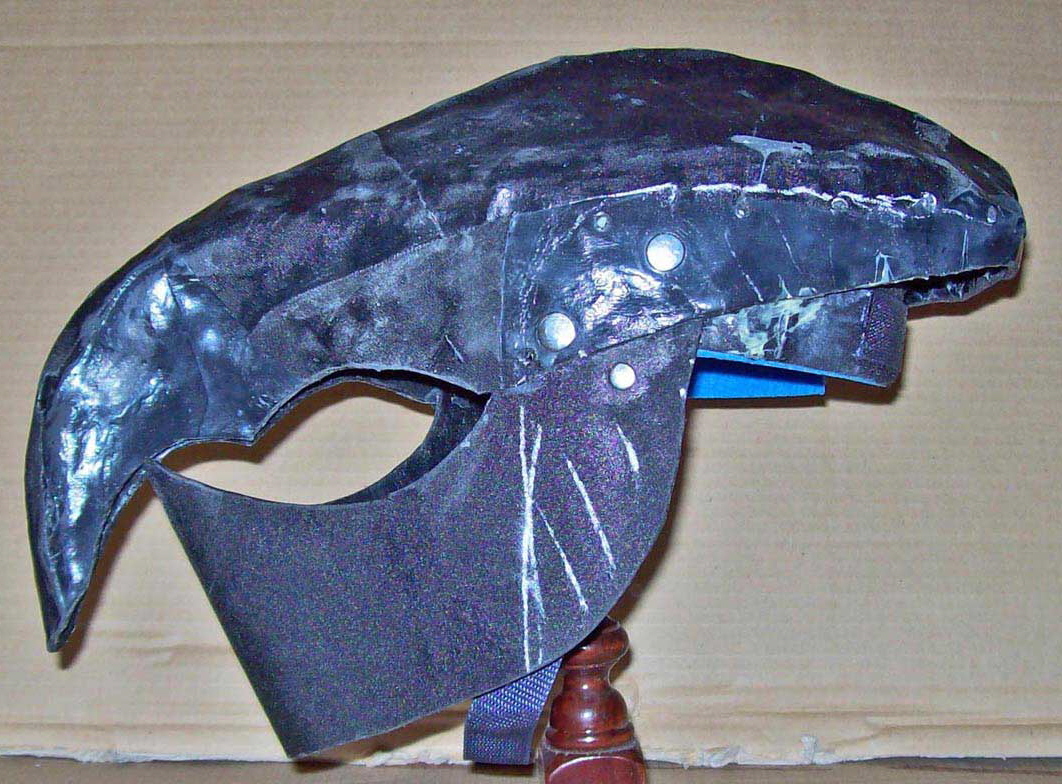
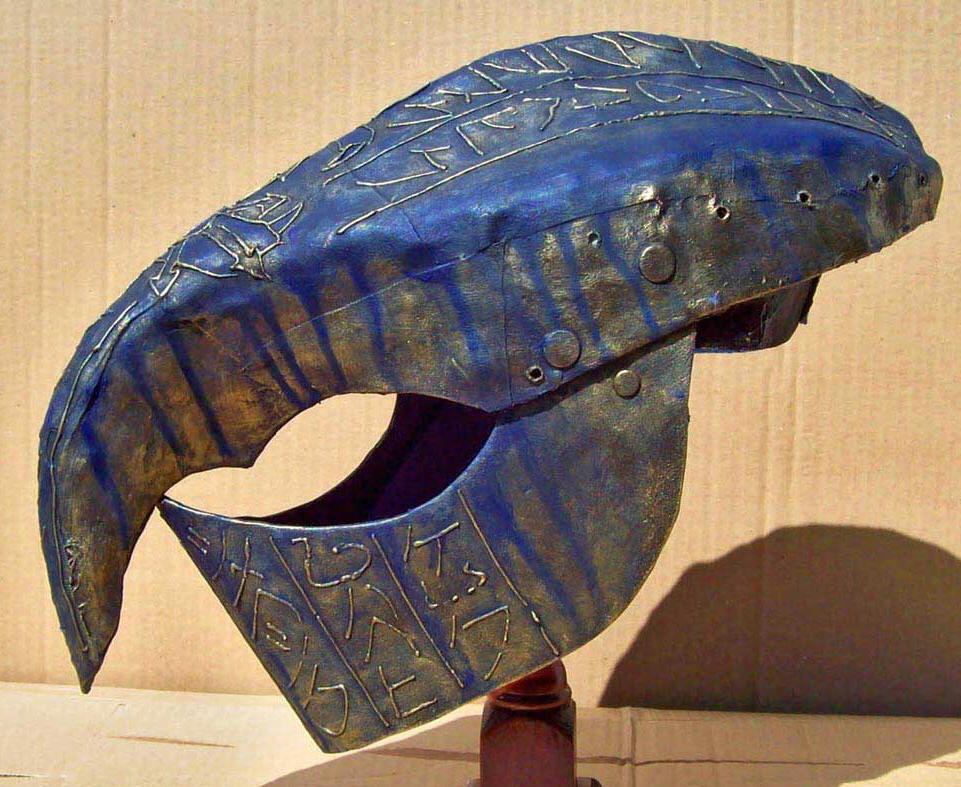
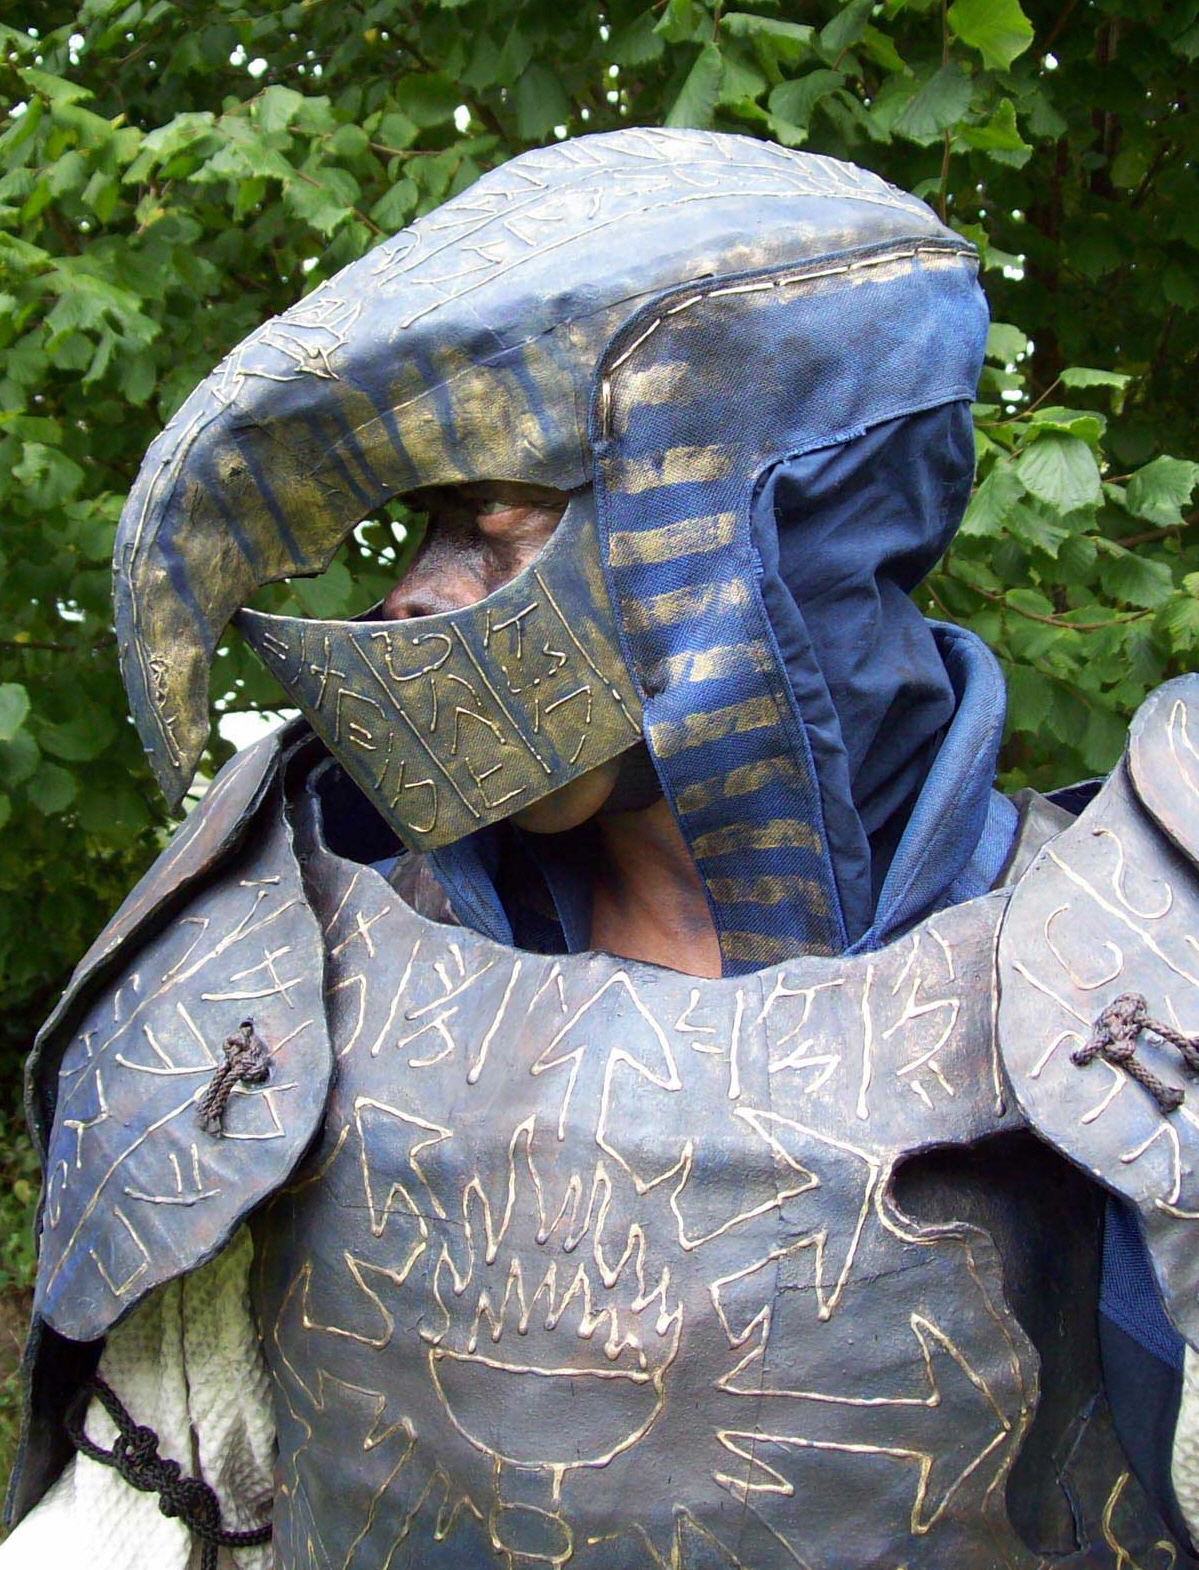
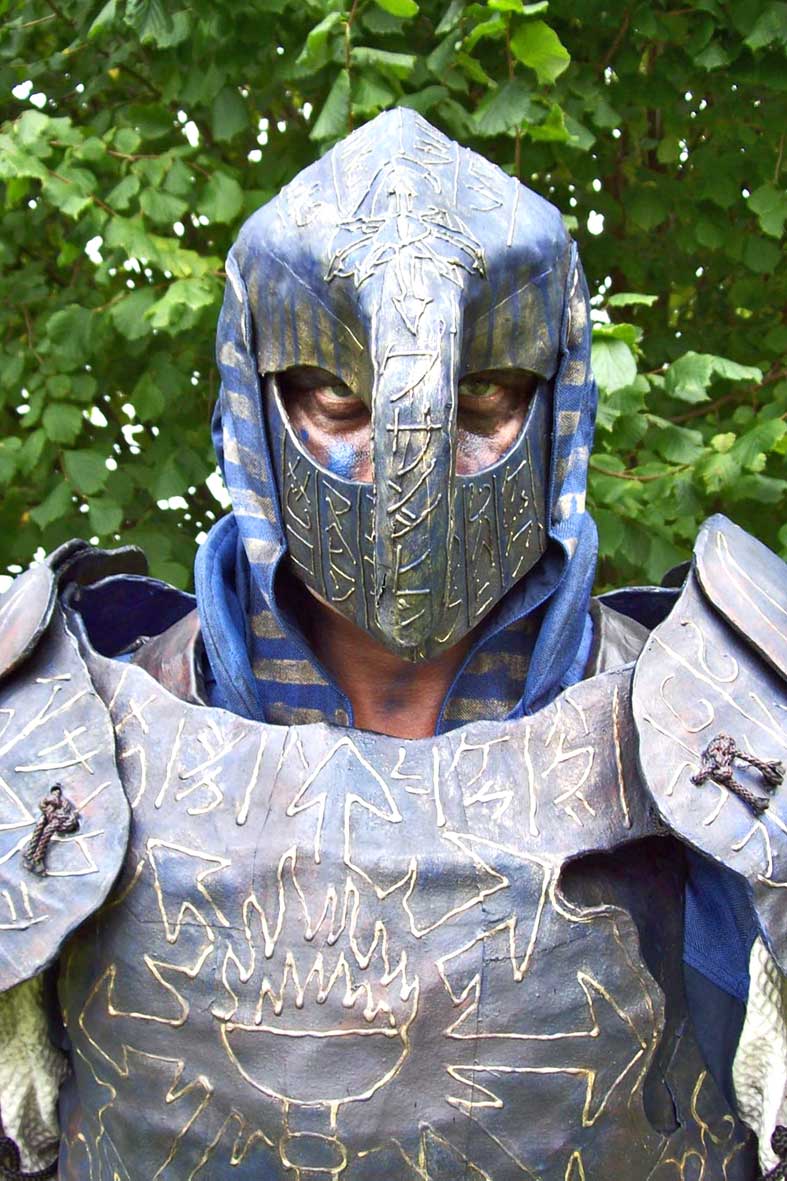
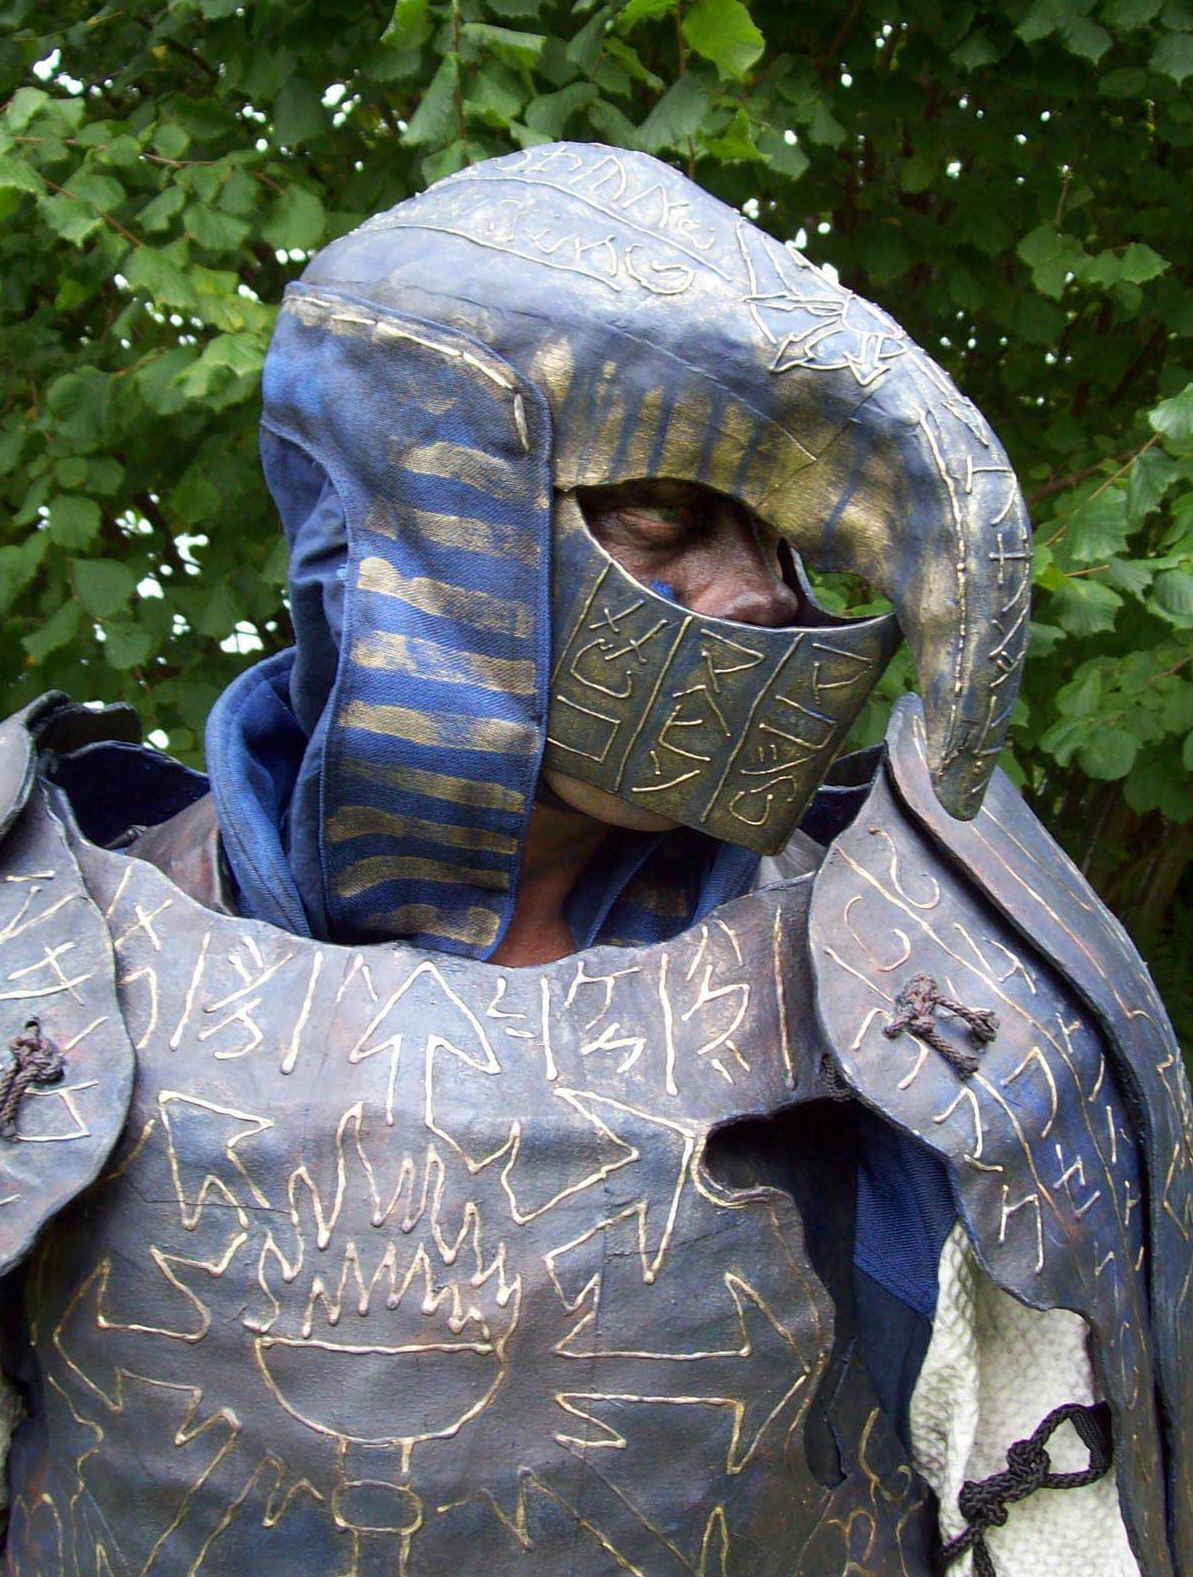
The helmetīs upper part provides real protection. The lower visor is thinner and although cut-resistant will bend slightly when hit hard; after all it must only protect against foam weapons. The eye- slits allow excellent sight but are narrow enough to stop the broad foam- heads of larp- arrows. The non- striped cloth on the back is opaque but air- permeable. Weight: under 900 gramms (my heaviest “sallet”- helmet by contrast weighs about 2.6 kg!). The helmet was the first part of the armour I built because of the way it was manufactured: building it upon a non-wearable form meant that I only could try it on after it was finished. From earlier frustrating experiences I know that helmet and harness have to work together in a way that they must not touch, thus hindering each other- which again means that I had to build the harness “around” the finished helmet, trying on the parts again and again. Linothorax composite assembly groups -like fibreglass- cannot be changed after finish- you can only cut off the edges. They also canīt be bend in another shape like sheet metal: if it doesnīt fit the work piece is lost. |
||||||||||||||||||
 |
 |
|||||||||||||||||
 |
||||||||||||||||||
 |
||||||||||||||||||
 |
||||||||||||||||||
 |
||||||||||||||||||
|
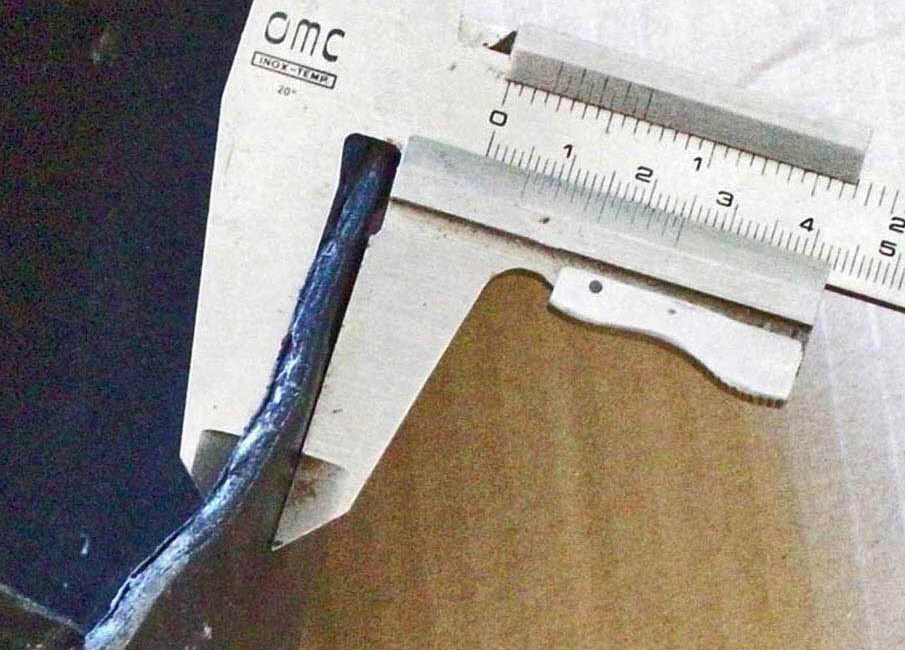
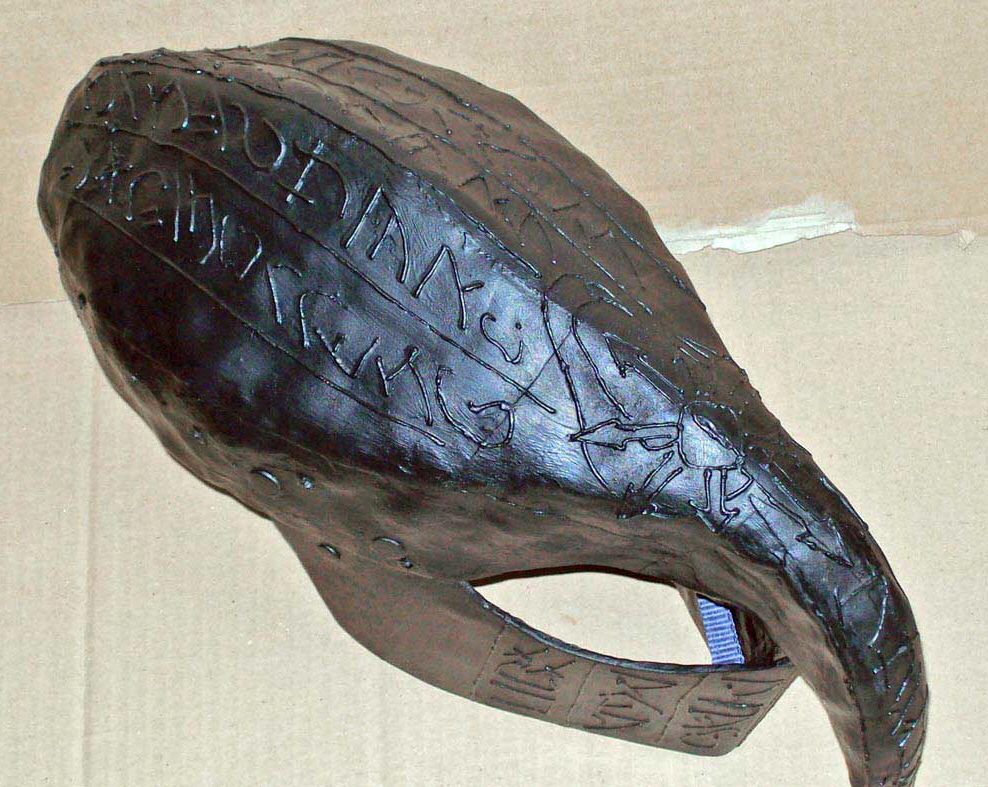
The helmet consists of 12 layers of cotton- linen. With this strength the edges can only just be cut with plate- shears while the surface is cut-proof. Overlaps that are deliberately put in strengthened areas add up to 20 layers; here plate- shears are useless. It pays to keep in mind to build only as strong that youīll be able to trim the edges without too much effort. The glue is watertight, transparent- drying D3 or H3 wood glue. Runes are window- color- contour, fixed with a mixture of 4 parts glue and one part black acrylic paint. Paint: Acrylics (also for the cloth). |
 |
 |
|
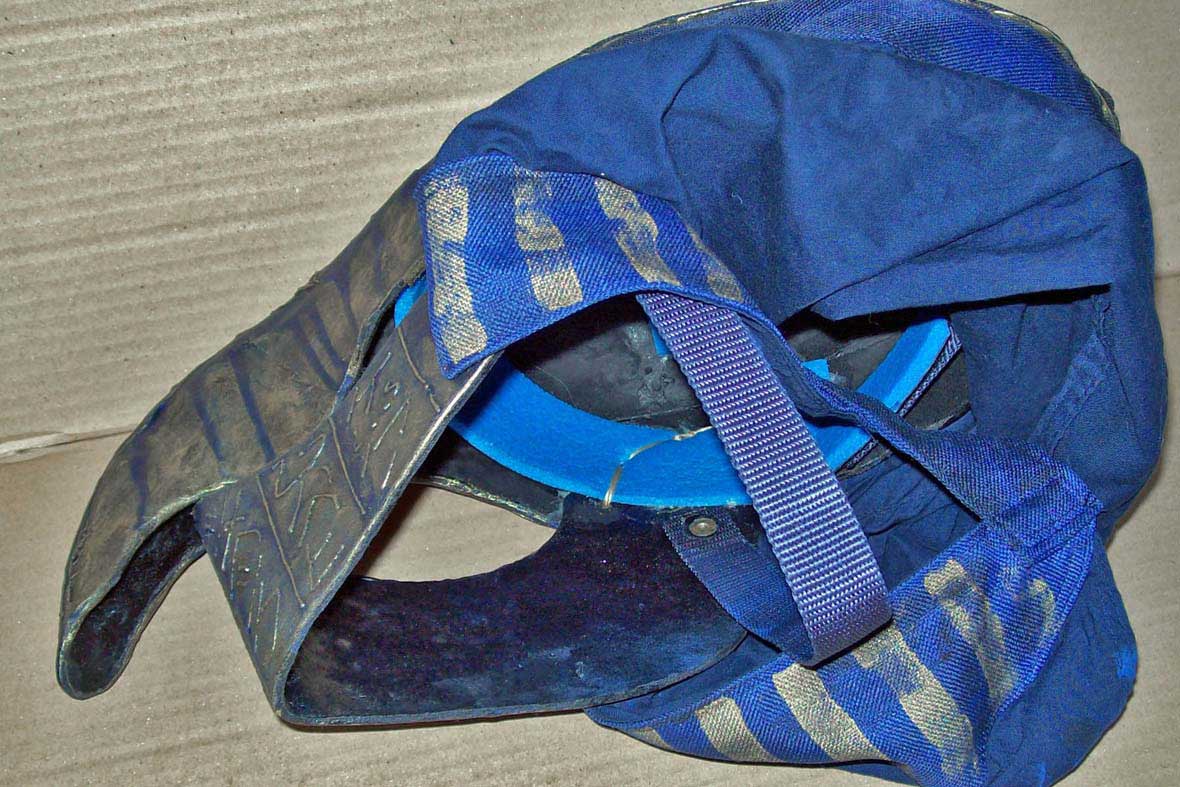
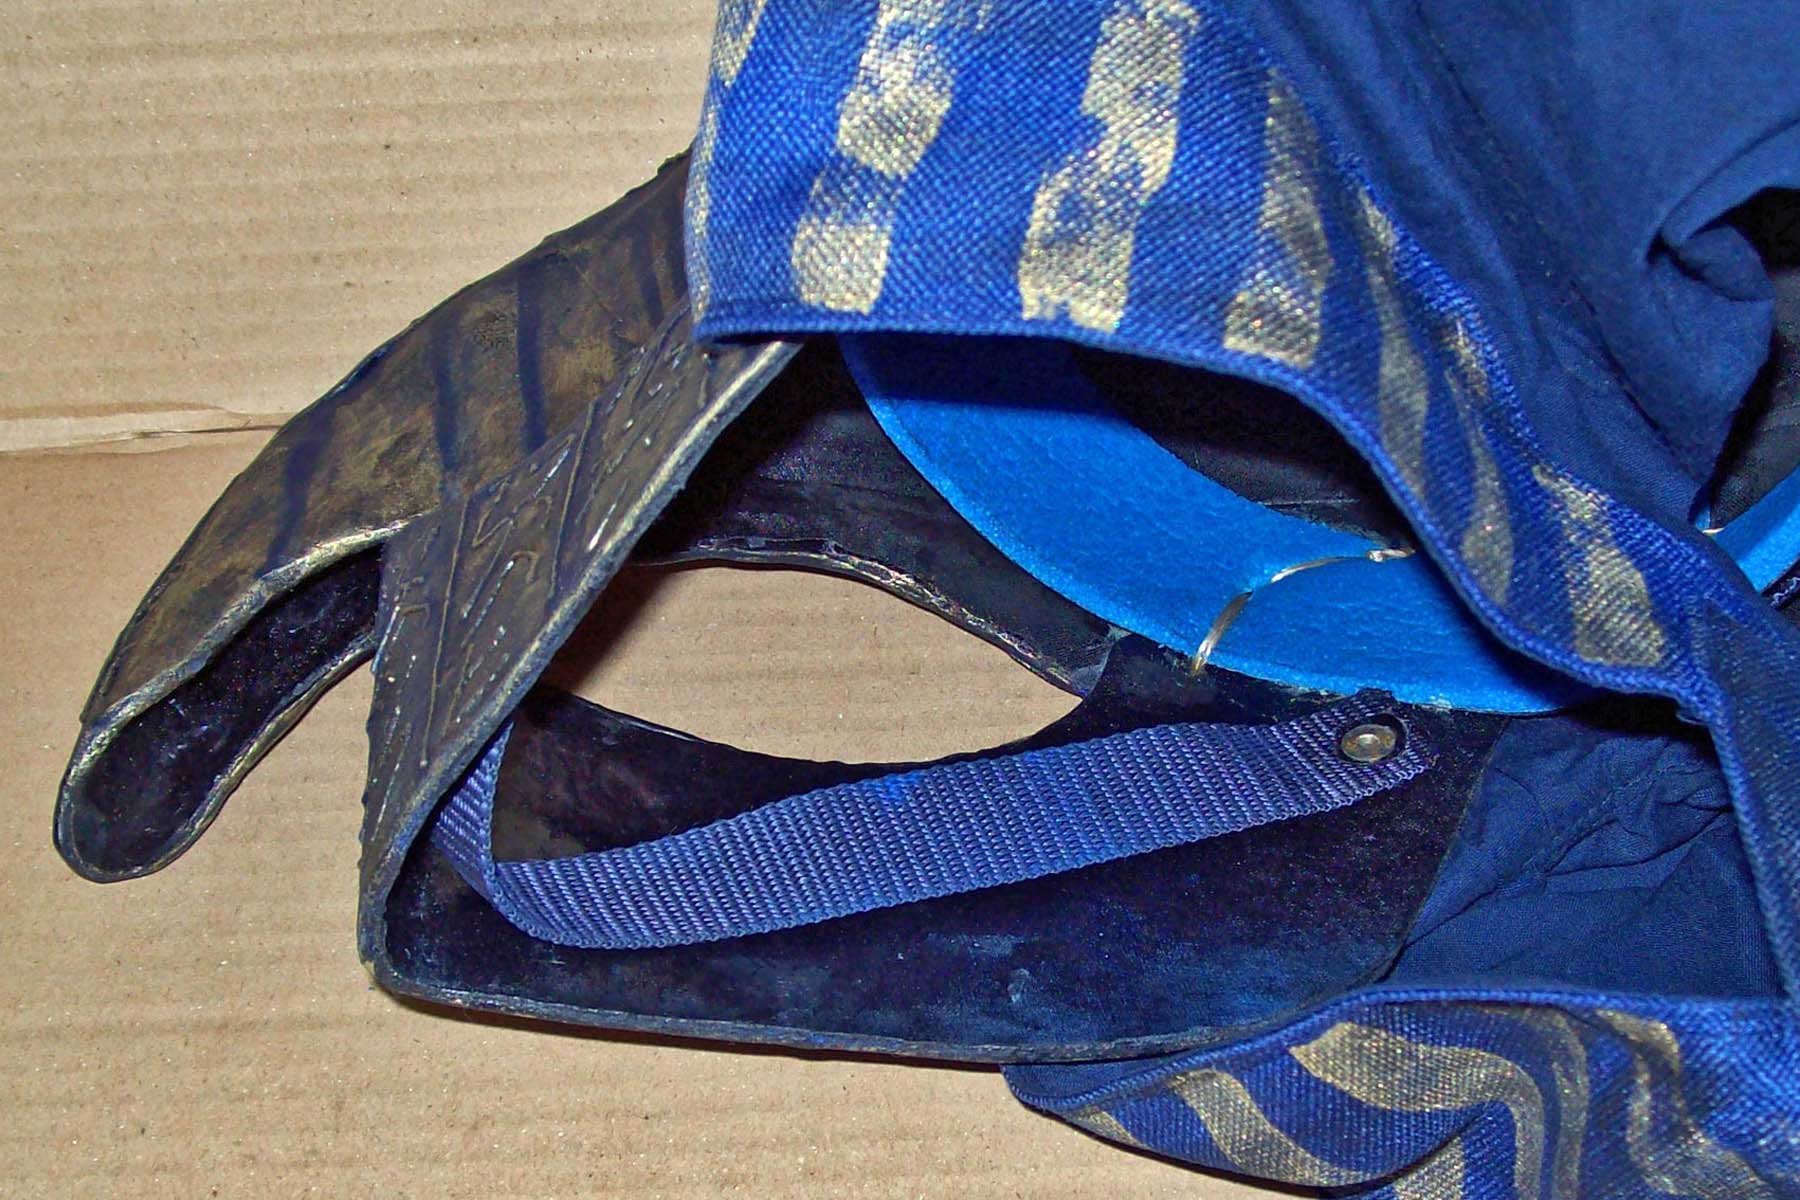
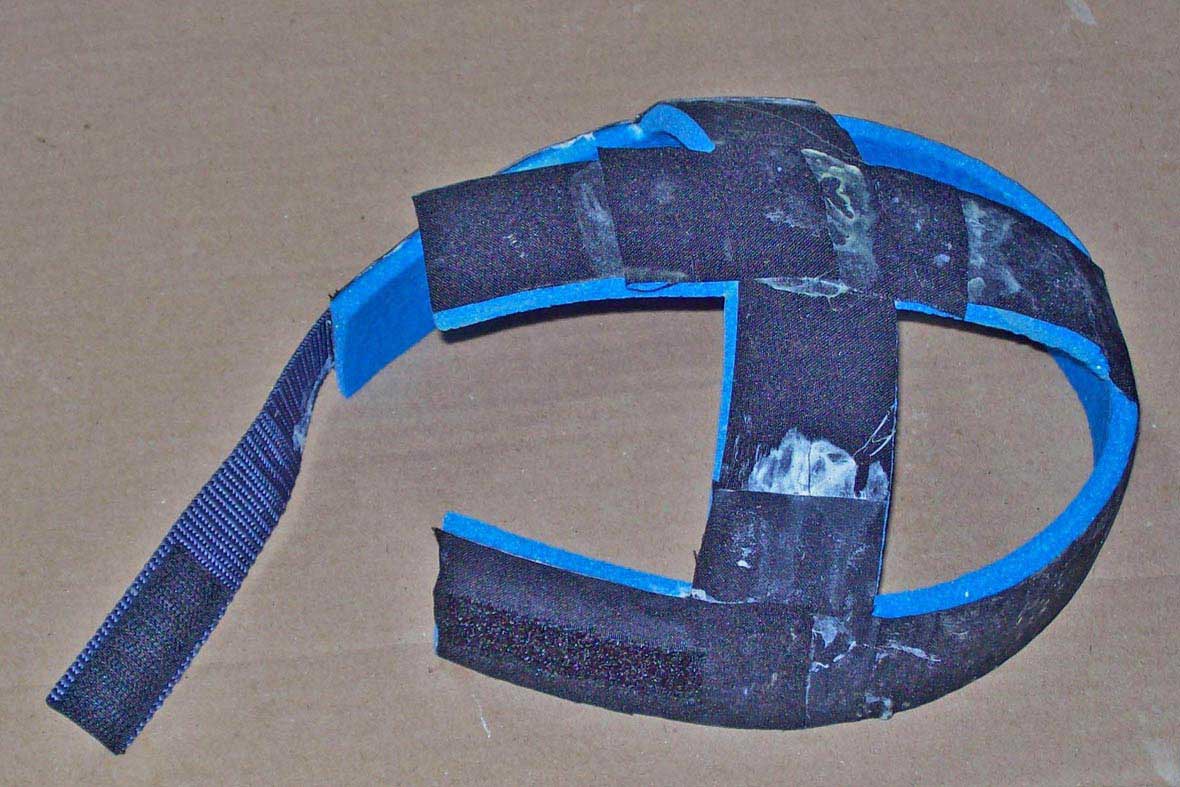
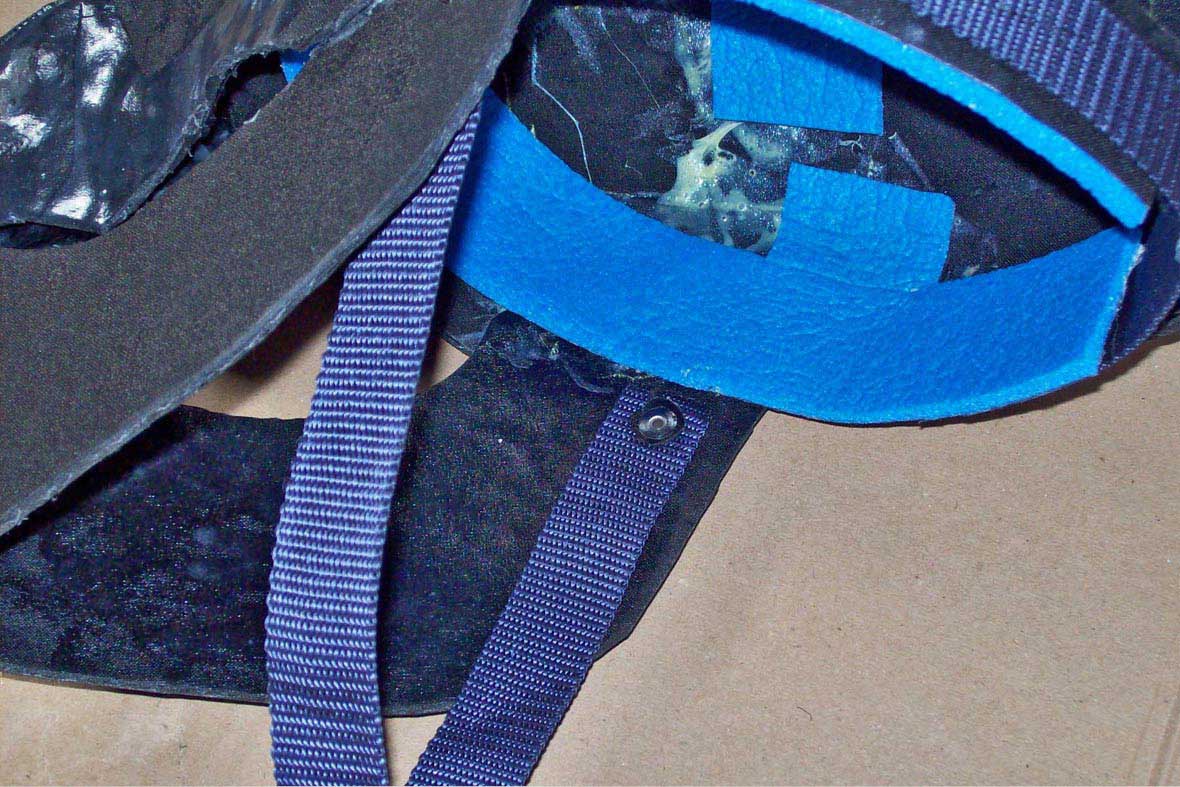
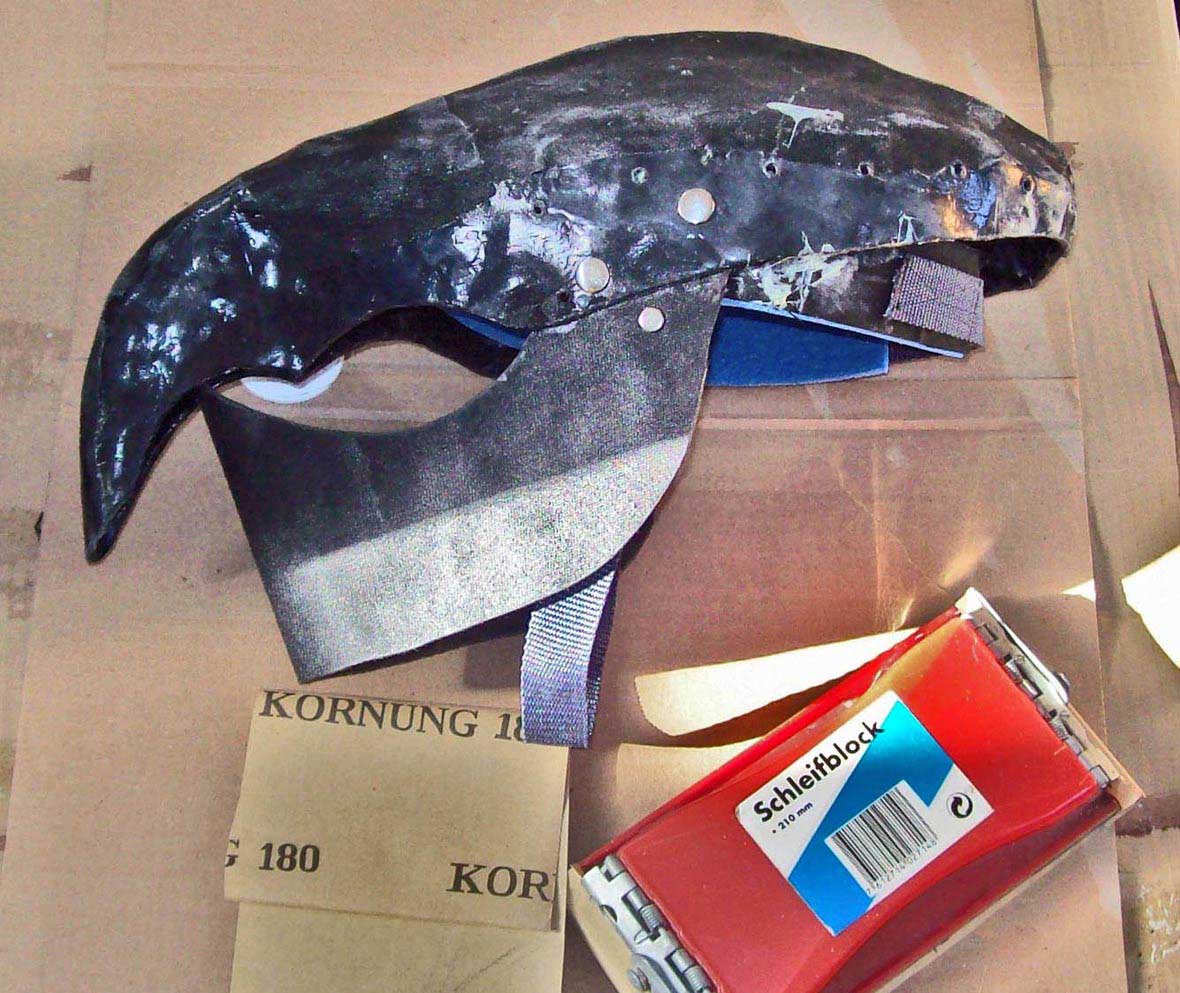
The chinstrap is made of webbing and has been attached to the visor with hollow rivets. It doesnīt have a clasp but can be moved to the front where it folds against the visorīs inside. That way the helmet can be worn with or without strap. The padding consists of strips of cheap camping foam mat which have been bonded with cloth to make it tearproof (Pattex, what else?). It is glued to the helmetīs inside. The side of the foam that touches the head is not treated in any way. Thus it can be easyly washed or even desinfected. |
|
|
|
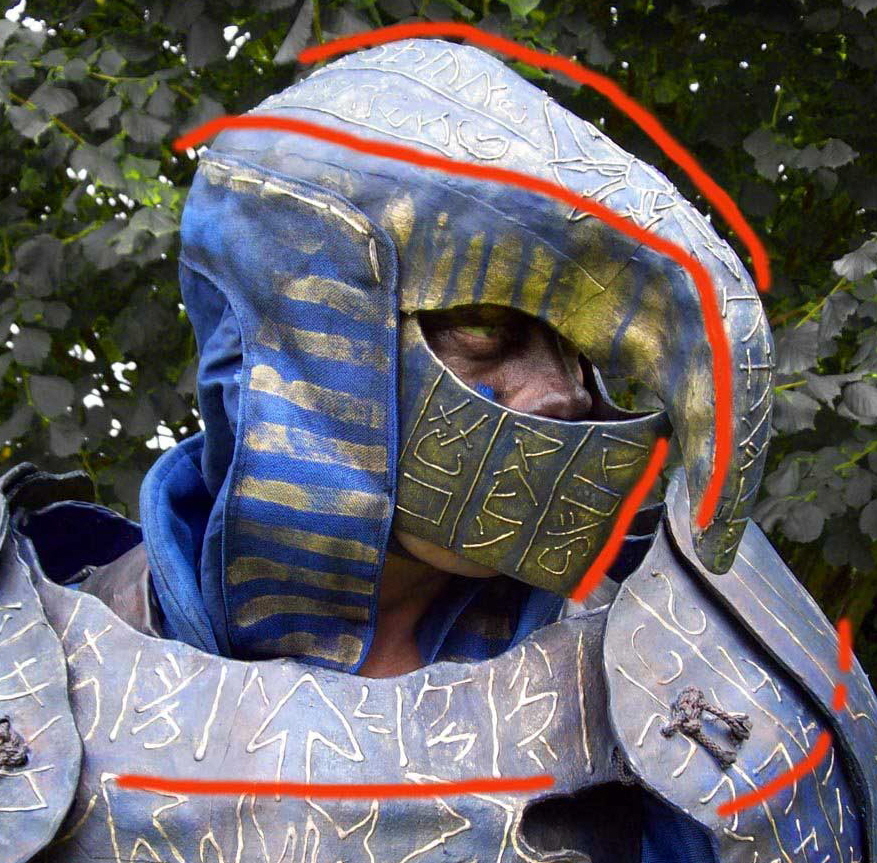
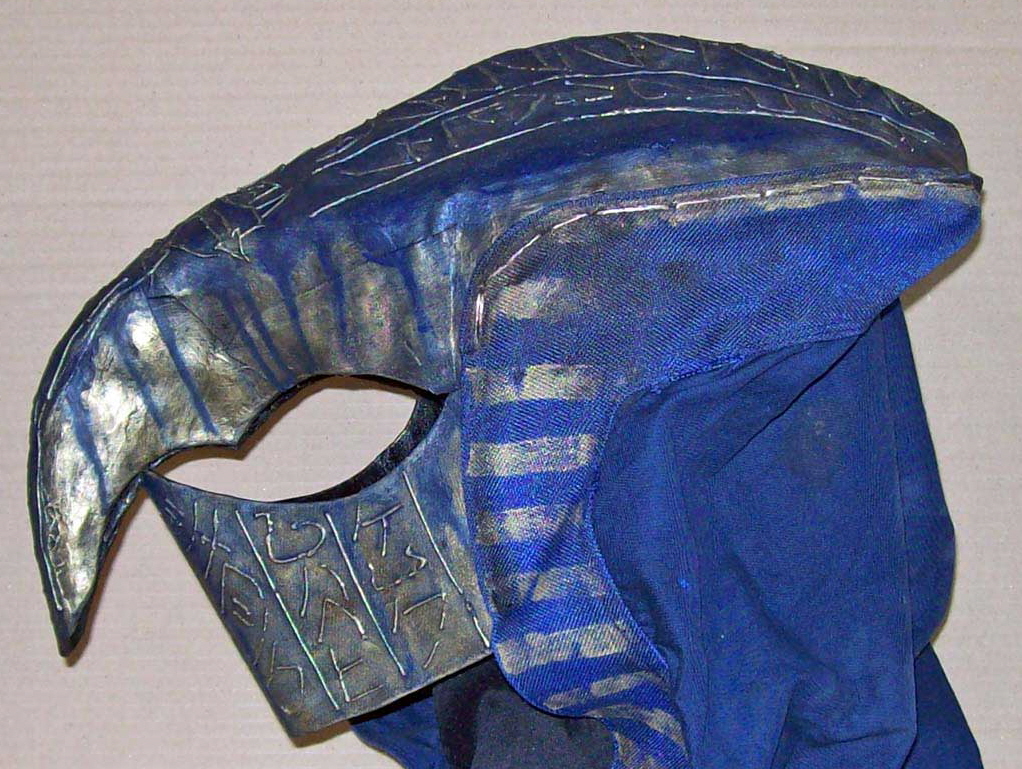
So bulletproof vests in former times sported so-called “trauma plates” made of steel on the outside above the heart- area. Todayīs versions donīt have them anymore- Iīve been told that modern kevlar fabric dispels energy so good that theyīve become obsolete... Be it as it may- to cope with the linoīs flexibility will be a main problem if you undertake to build real armour out of the stuff. The greek had less problems with putting armour directly on the skin because their swords were quite light and an arrow hasnīt enough mass to dent plates- it will either penetrate or not. Medieval weapons have much more momentum or worse - like maces- work solely with their impetus and this has to be taken into consideration. Thatīs why my armourīs plates are not only arched but in certain places also sport “ridges” (see the red lines). A ridge on an arched component forbids it denting in against these angles and sufficiently increases stability to overcome the materialīs flexibility. This shape would be very cumbersome building in metal or leather but was no problem here. In the rear the helmet projects further out from the back of the head than would be necessary for a tight fit to create a counterweight for the protruding “beak” at the front. Thus the helmet is balanced and not “beak-heavy” even with quick motions. In fact it behaves better than a steel helmet. The beak (which started as a design element for the armour because of the avian attributes of the warriorīs deity) proved way less cumbersome than I feared: |
|
|
|
Both canīt happen with a beaked helmet (the ancients knew that and built “snouted” helmets not only to deflect projectiles and stabs but also to keep armour away from the face). Altogether not entirely bad for a fantasy- helmet, innit? These features have to be planned in advance: the emerging work- piece is a mono- composite- component that cannot be changed during manufacture. Iīm talking so much about the features of the armour because this thing is more than a costume: the aim was to build real armour only from glue and cloth that nevertheless will withstand impacts from real weapons. Iīll explain the working principles of the other components as well before their respecting building- documentations. Mentioning documentation: This is how the helmet was built: First step: form- building The helmet is an arched 3D- construction that canīt be built with flat plates. So a 1/1 model is built and covered with layers of glued cloth; each layer is allowed to dry before the next is applied. |
 |
||||||||||
|
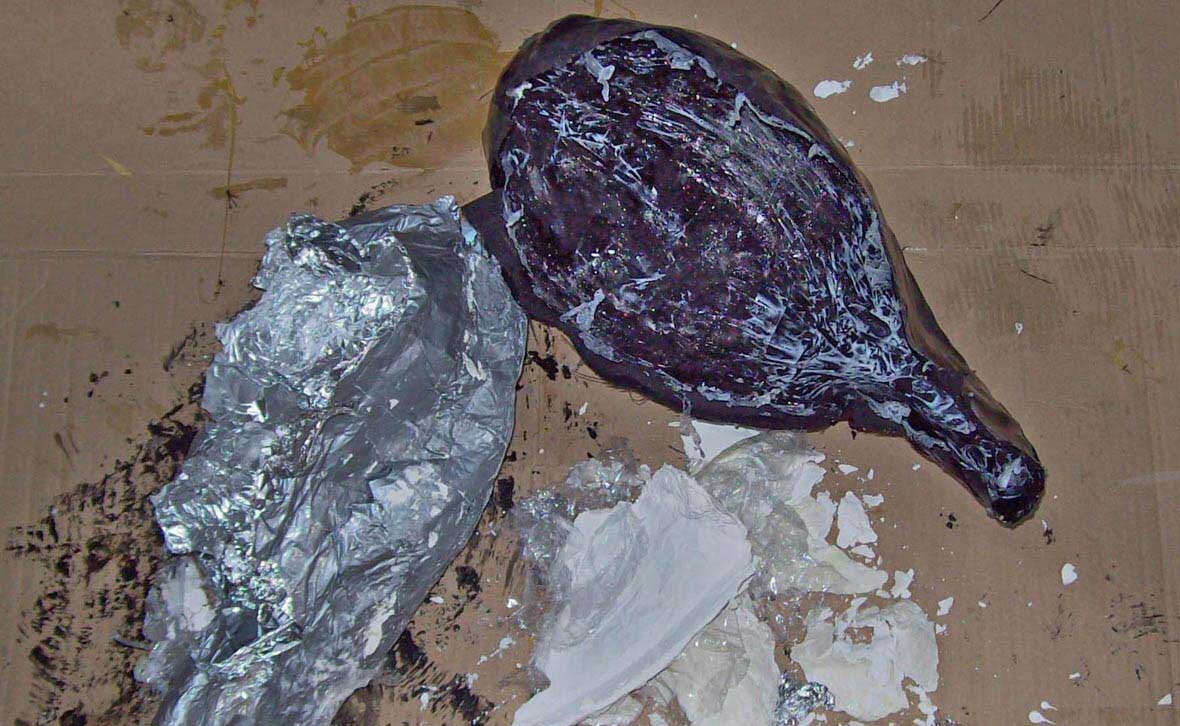
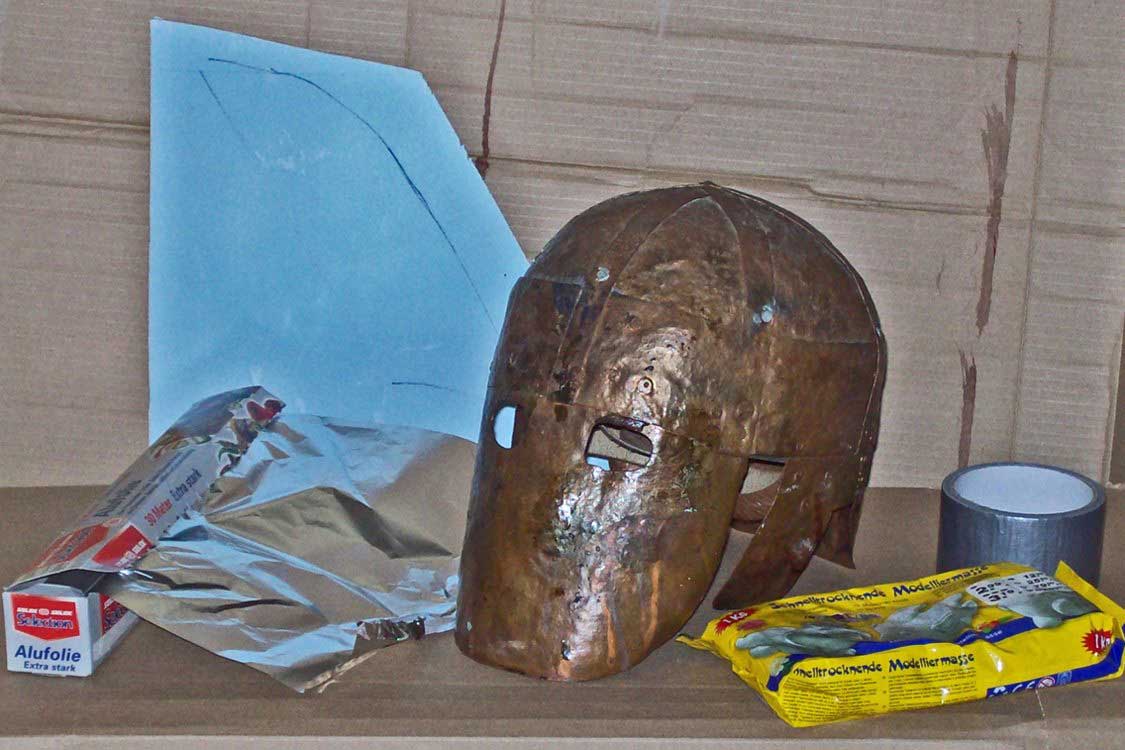
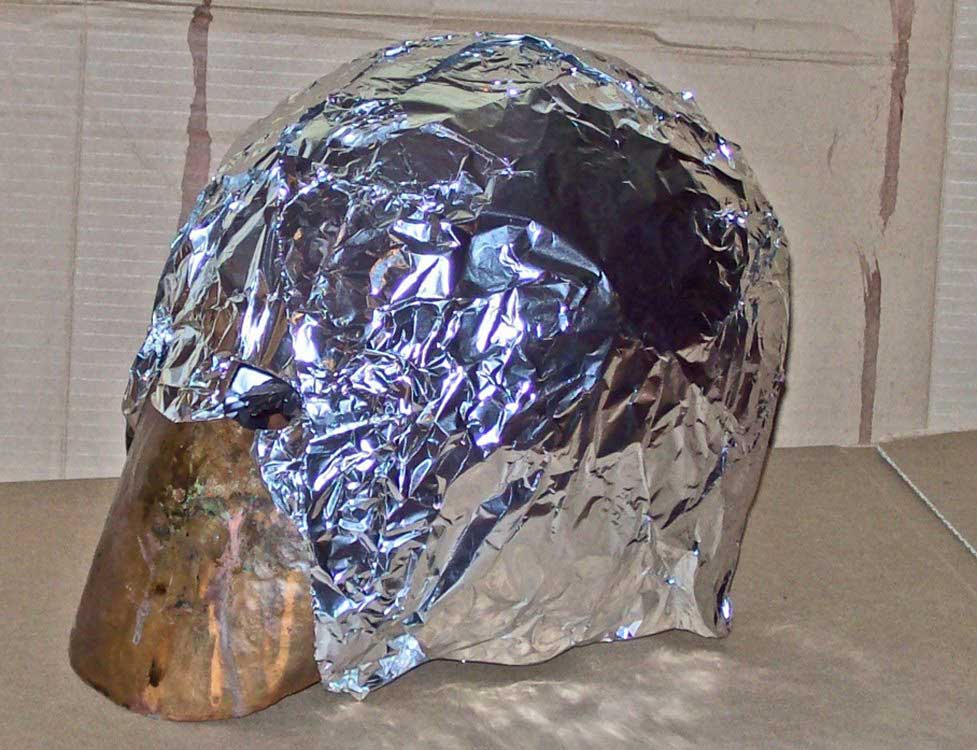
Above: a very old copper helmet that long since doesnīt fit any more serves as stable fundamental form because it has an important feature: helmets I build onto it fit me exactly now -inclusive lining & padding! He who builds his tailormade helmet directly onto a cast of his head without plannig space for padding gets something damned uncomfortable. Around are the building materials: the blue foam is called styrodur (for cutting the silhouette), aluminium foil, tape and cheap air- drying modelling clay. |
||||||||||
 |
 |
|||||||||
|
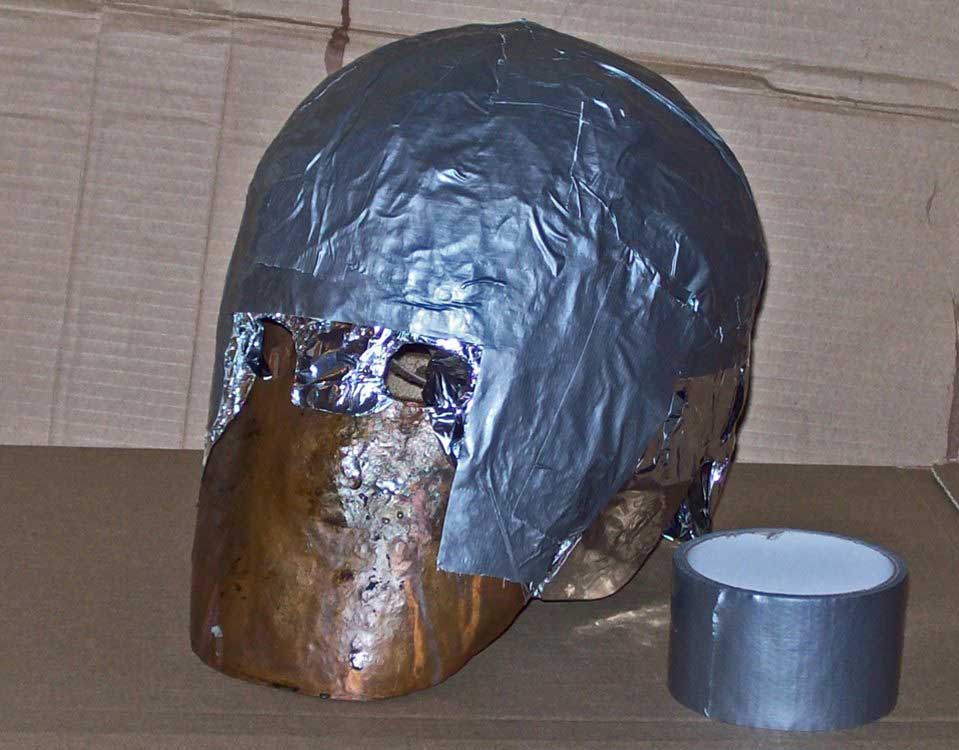
Above left: the helmet is covered with aluminium foil so that later everything can easily be detached from it. Above right: tape smoothes the surface and stabilizes the foil. The eye- holes are not covered for better to determine the new helmetīs rim. |
||||||||||
 |
||||||||||
 |
||||||||||
|
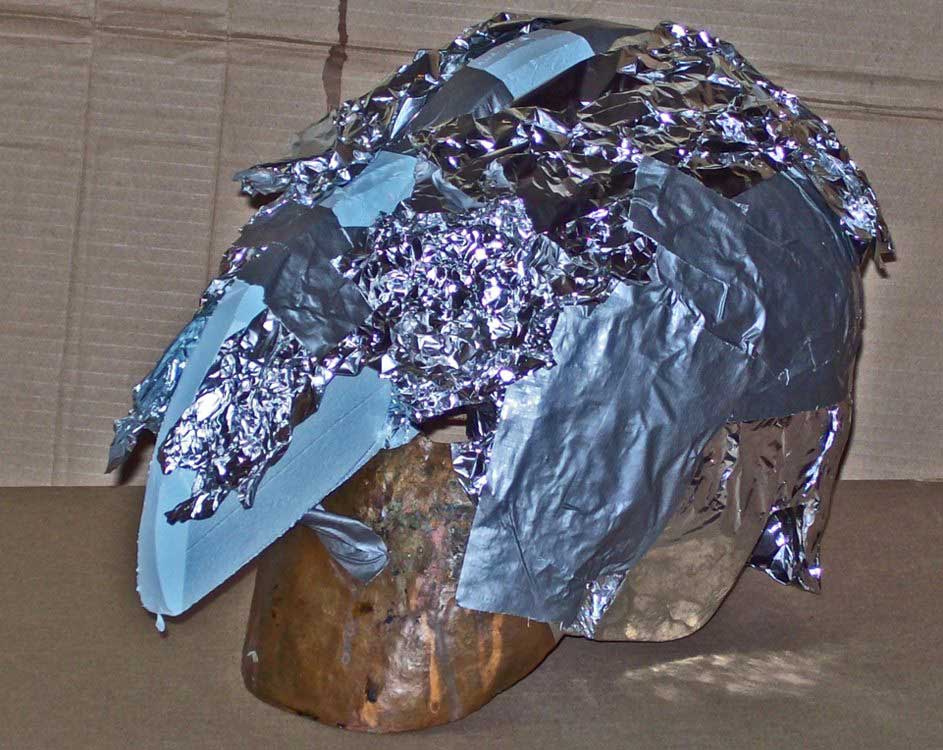
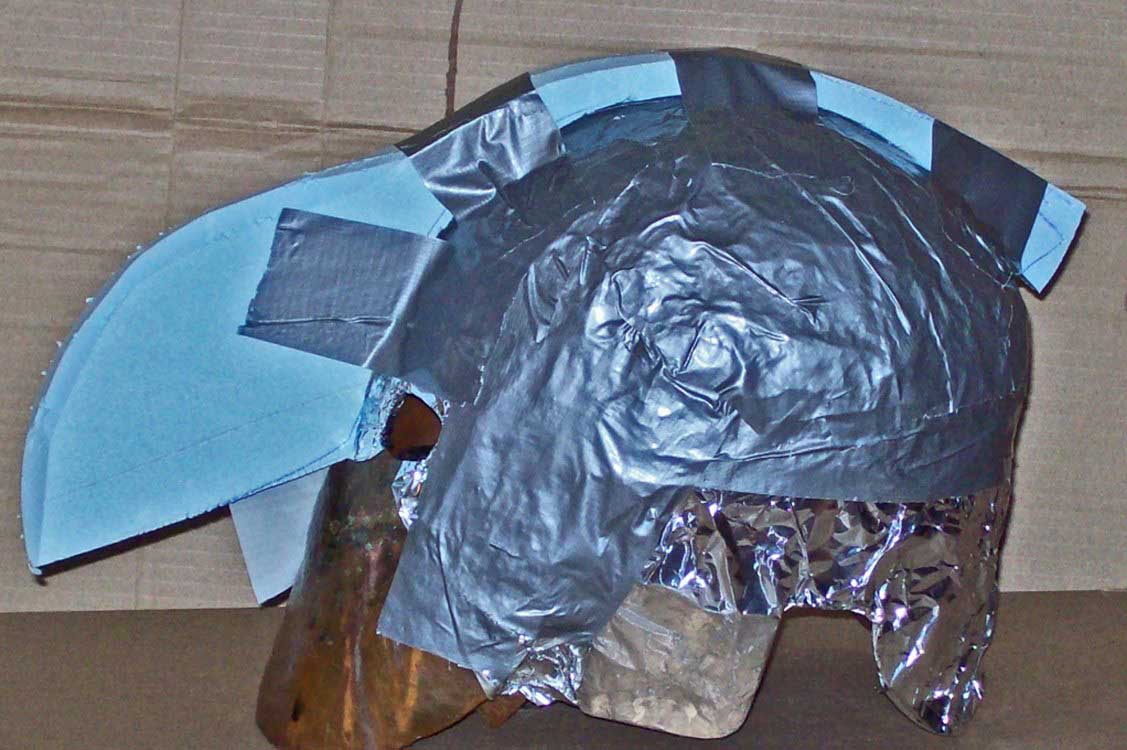
Above left: silhouette made of Styrodur and attached with tape. |
 |
|||||||||||||||||
 |
|||||||||||||||||
|
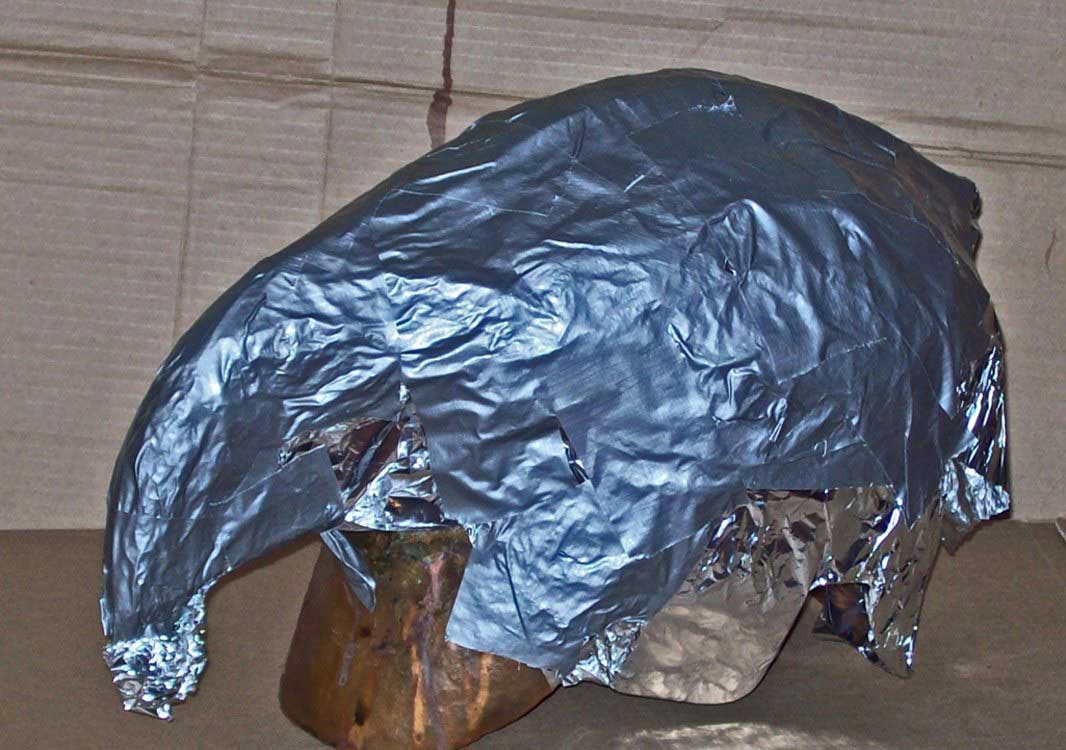
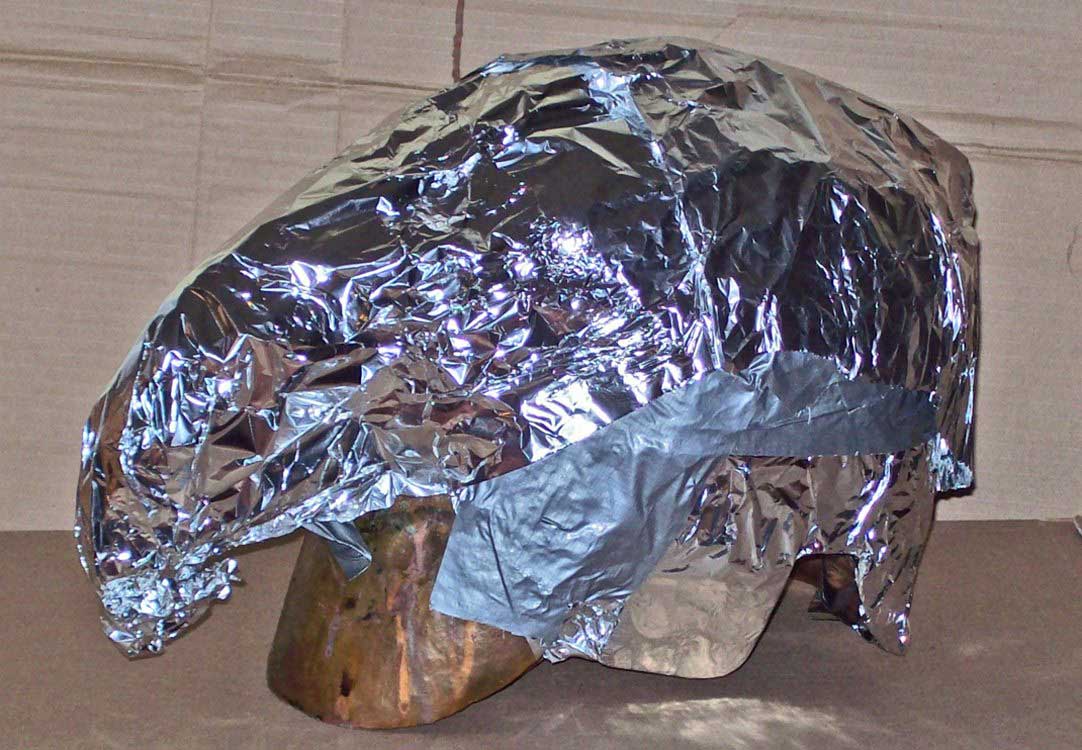
Above left:: a final layer of aluminium foil smoothens and stabilizes the crumpled areas. |
|||||||||||||||||
 |
|||||||||||||||||
 |
|||||||||||||||||
|
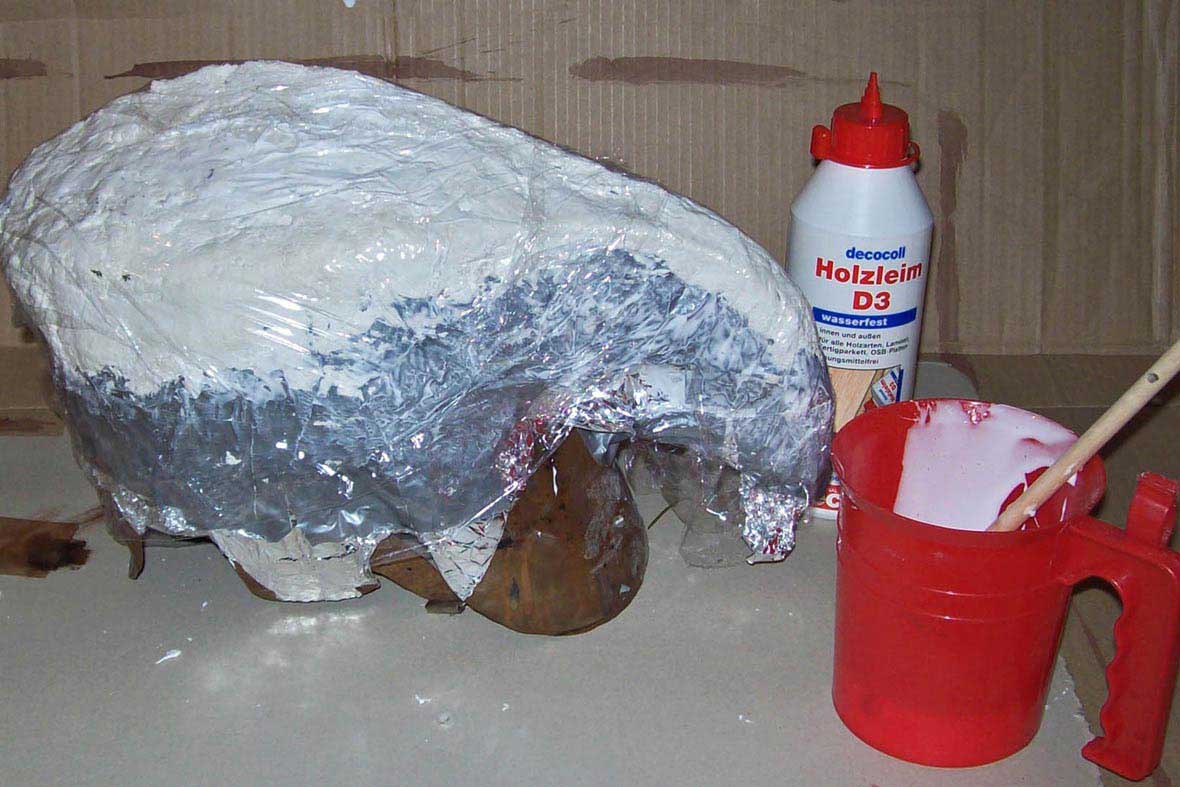
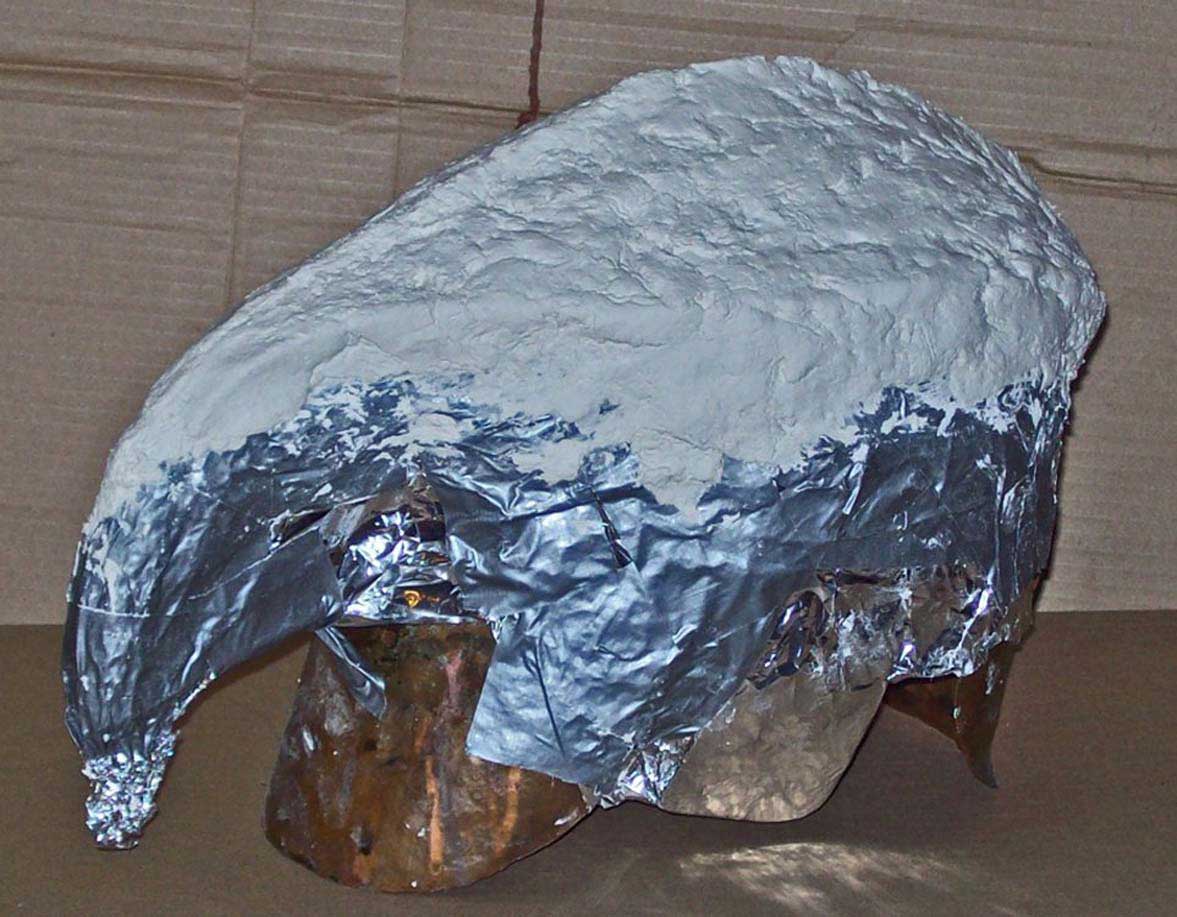
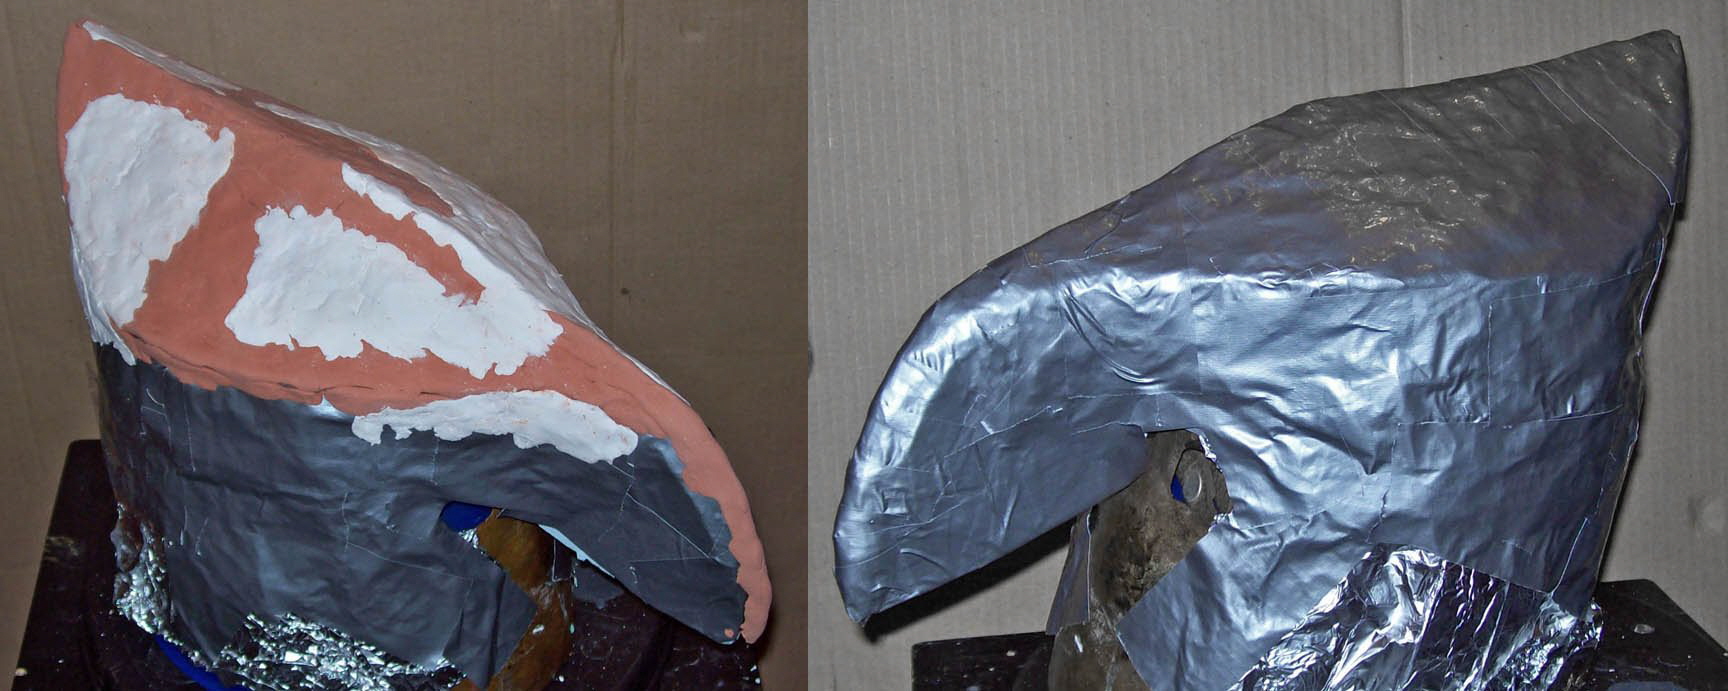
Above left: now the actual surface is created with air drying modelling clay. It is not necessary to smoothen it completely- the compositeīs cloth will do the job later. Above right: clingfilm. It dosnīt show up clearly, but the clay surface has been covered with clingfilm because otherwise the composite will adhere to the model, thus making it very difficult to dislocate. footnote; 1 year later: Meanwhile I renounce the clingfilm and just tape all surfaces that will later be covered with composite. Should have done it here also... Firstly tape sticks much better to the model than glued clingfilm and second a taped surface makes a much smoother underside of the composite than building composite onto clingfilm. Below: helmet number 2 (a lighter variant for hot weather; this form tapers off at the back and the helmet gets more air- permeable cloth at the sides. On the left pic below see the helmetīs upper side made of air- drying clay (erroneously bought in two colours) on the right the taped form onto which the composite will be built directly. |
|||||||||||||||||
 |
|||||||||||||||||
|
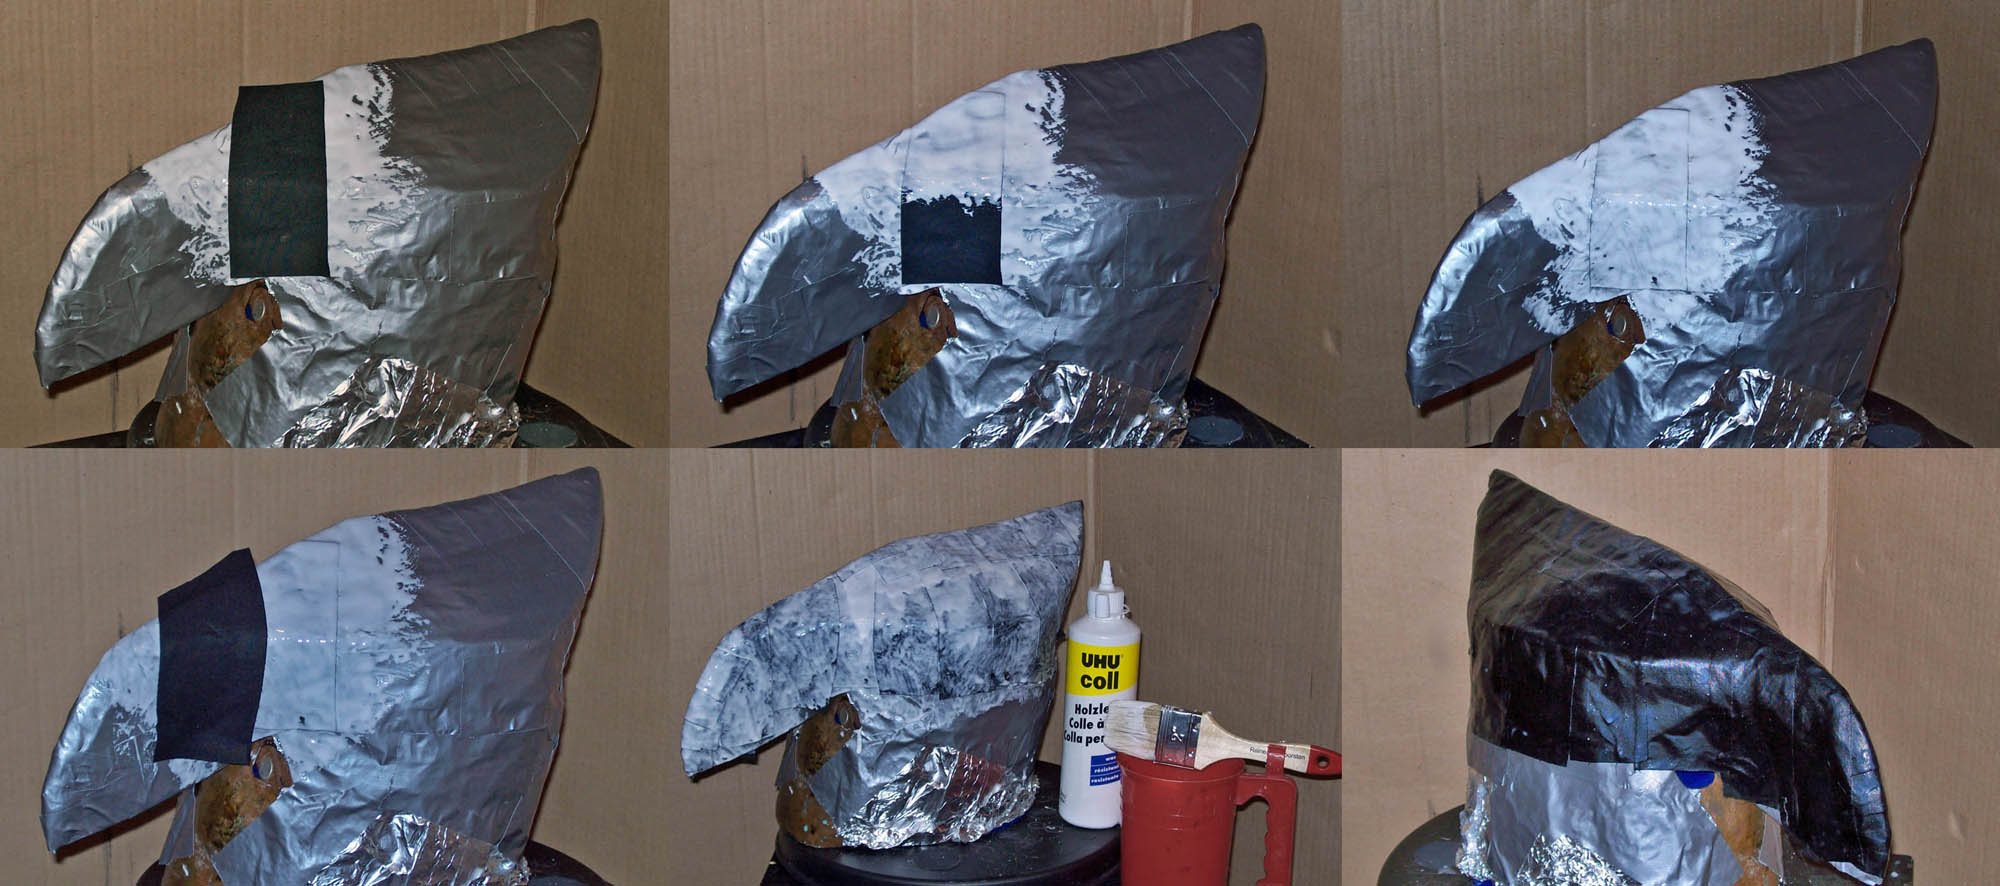
Below: start of the construction: the first patch of the bottom layer. Repeat until the form is completely covered with glued cloth patches. Let it dry, then build up the next layer. Then repeat. |
|||||||||||||||||
 |
|||||||||||||||||
|
Ok, so far the parenthesis, back to the original helmet: Second step: layers of cloth/ glue. |
|||||||||||||||||
 |
|||||||||||||||||
 |
|||||||||||||||||
|
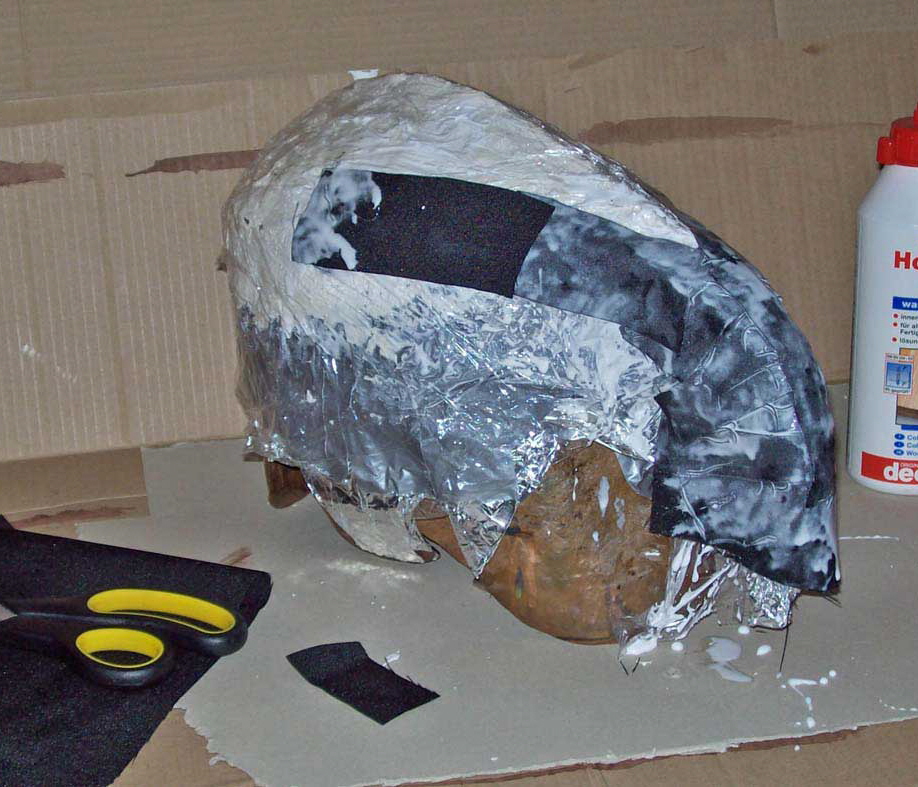
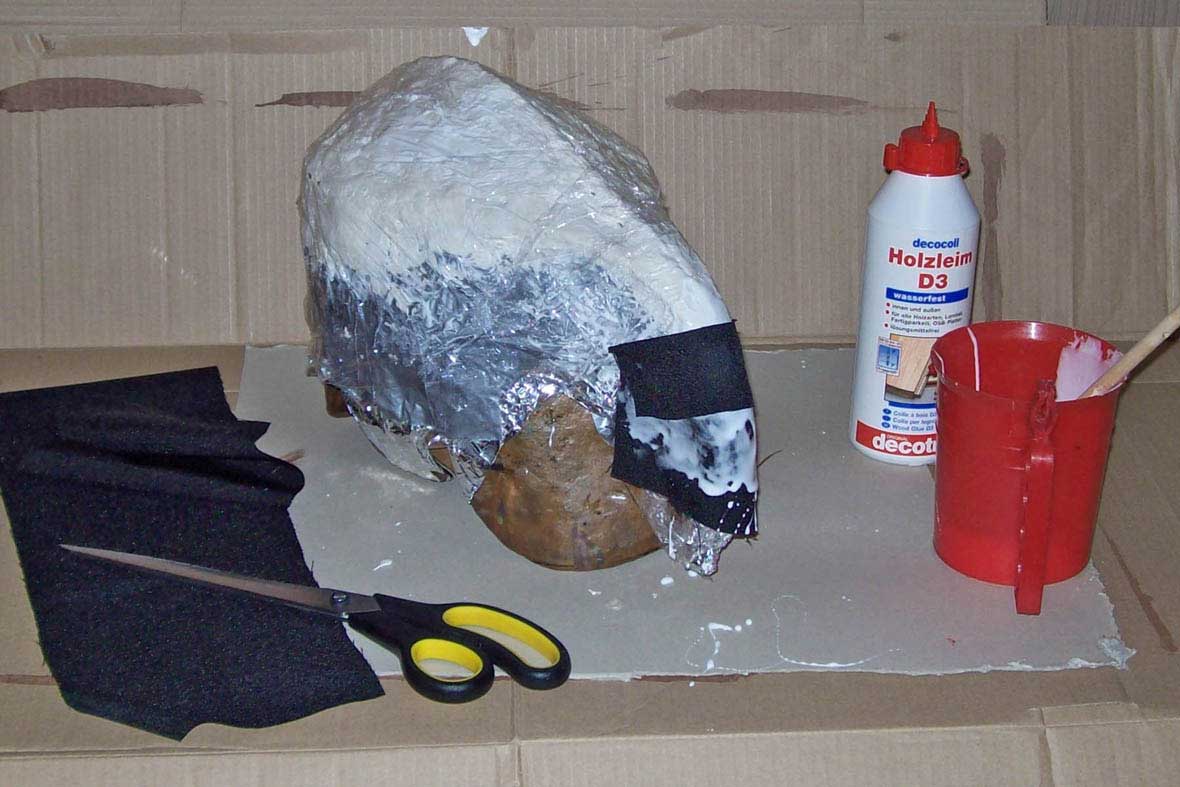
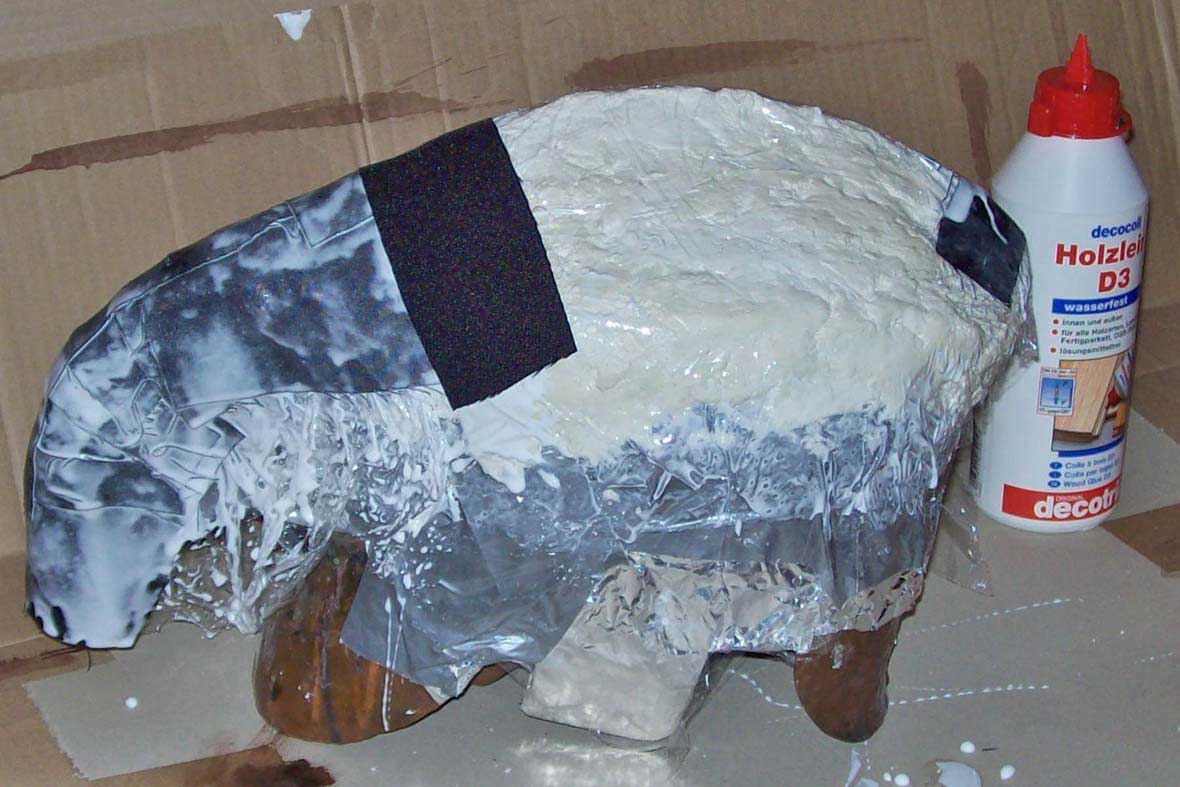
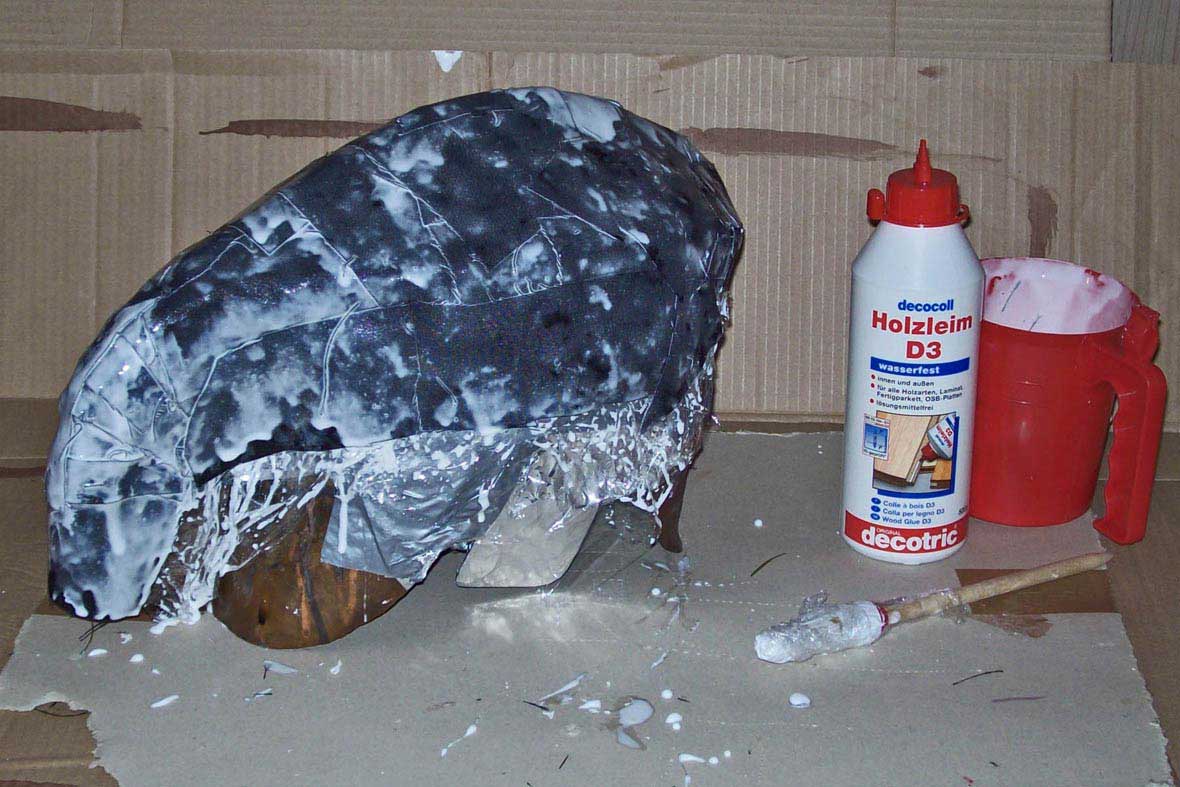
Above left: the the domed “beak” cannot be covered with a single patch. So in order to get a wrinkle- free surface I glue on overlapping smaller patches. Every overlap adds one layer to the workpiece, so they have to be distributed wisely to ensure a smooth surface. Alternately overlap zones can be used to deliberately strengthen areas of the workpiece: medieval armourers seemingly produced plates that were thicker in the middle and thinner on the outsides- this can be easily achieved with patches of cloth to produce a composite workpiece of various thicknesses in different areas. The working rythm is: glue, cloth, glue. Donīt use as much glue as possible but as little. This reduces the incurrence of glue “tears” on vertical surfaces. I found it practical to portion glue in a painterīs plastic mug and apply it with a brush. Above right: from the beak on outward, glue, cloth-patch, glue, next patch. |
|||||||||||||||||
 |
 |
||||||||||||||||
|
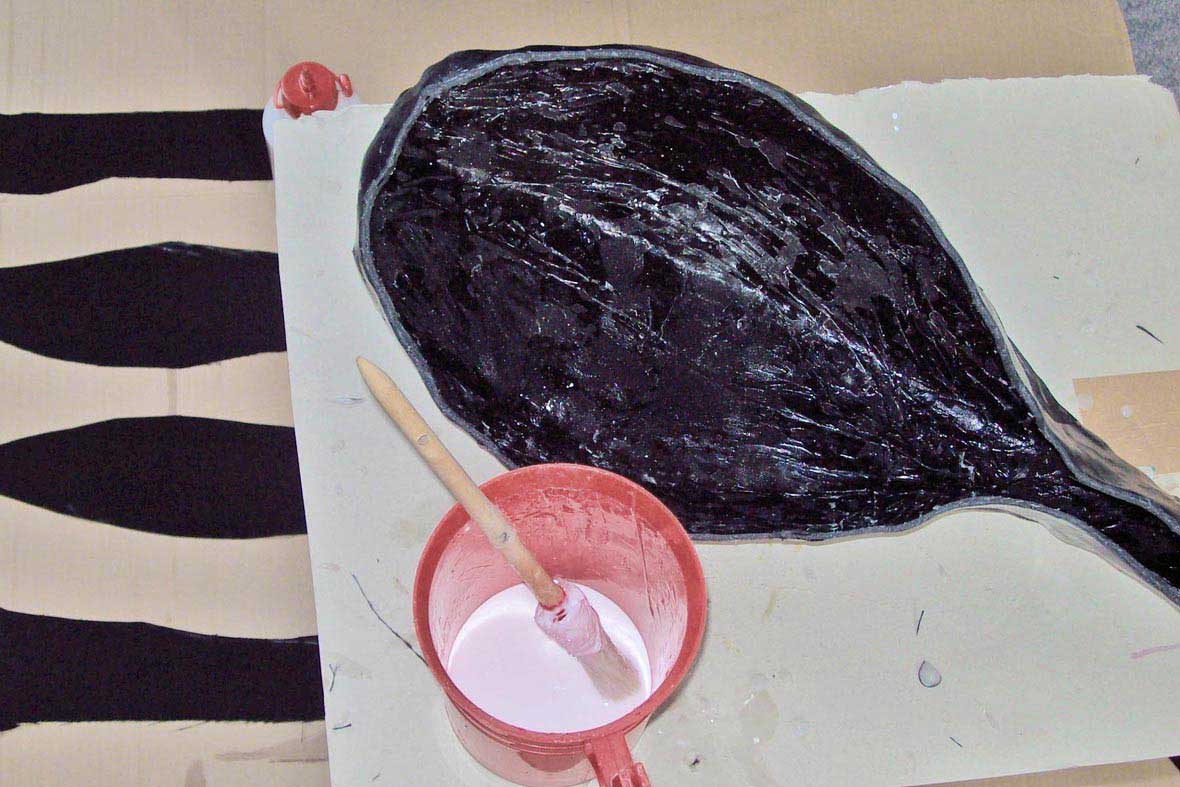
Above left: donīt worry, I wonīt show you each separate patch but only the beginning of the first layer. The cloth doesnīt adhere well to the surface (which is ok because when dry Iīll have to peel it off from it again) and one dislocates patches when brushing wrong: above left for example the patch lying onto the already glued ones of the beak should first be brushed into the direction of the already glued patches, then into the uncovered areas. Do it like that and the patch stays under control. Why do I cover the patches with clue instead of just pressing them one onto one another and leave the surface “cloth”? ( Iīll do this deliberately later on the helmetīs underside). But then the overlaps tend to get not enough glue or the cloth is soaked through- which is what we want by the way- so better glue the patches from the upper side too. Above right: the first layer is finished.Wrap the brush in clingfilm to keep it fresh for the next round. |
 |
 |
|||||||
|
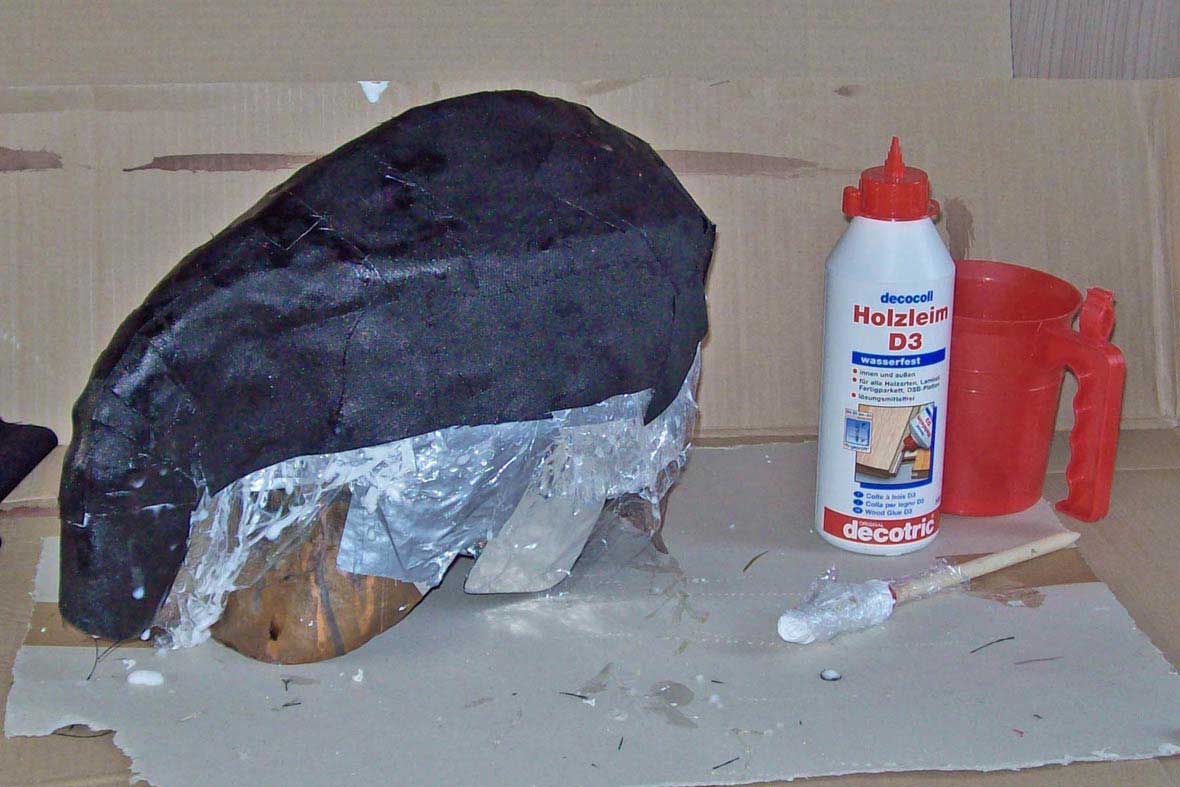
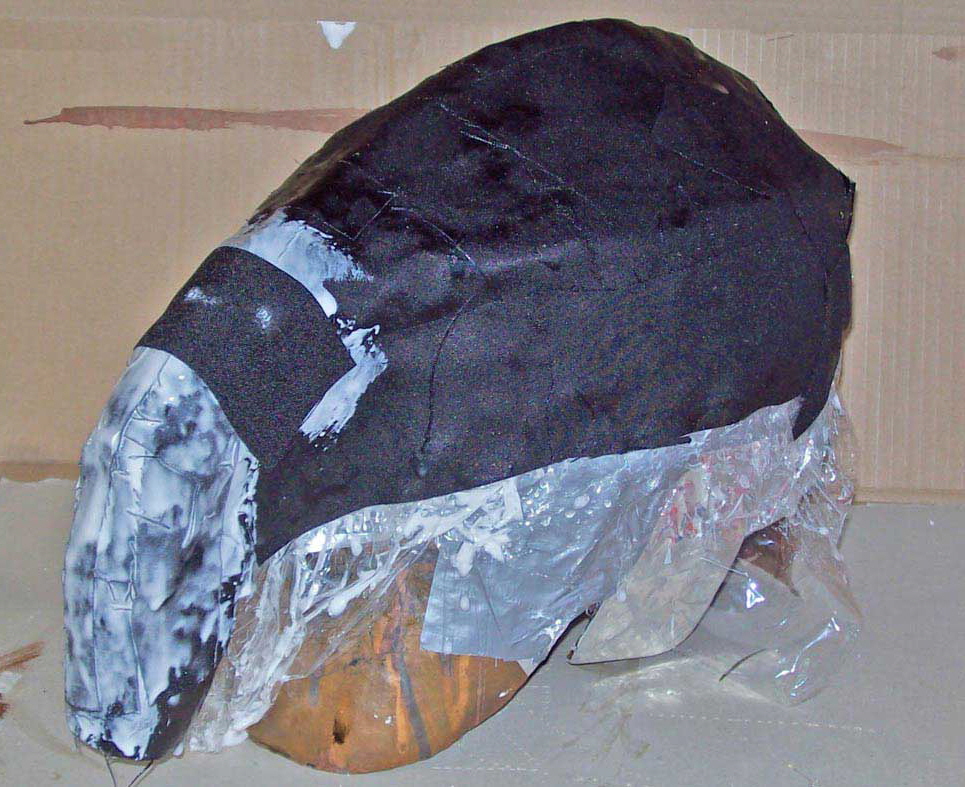
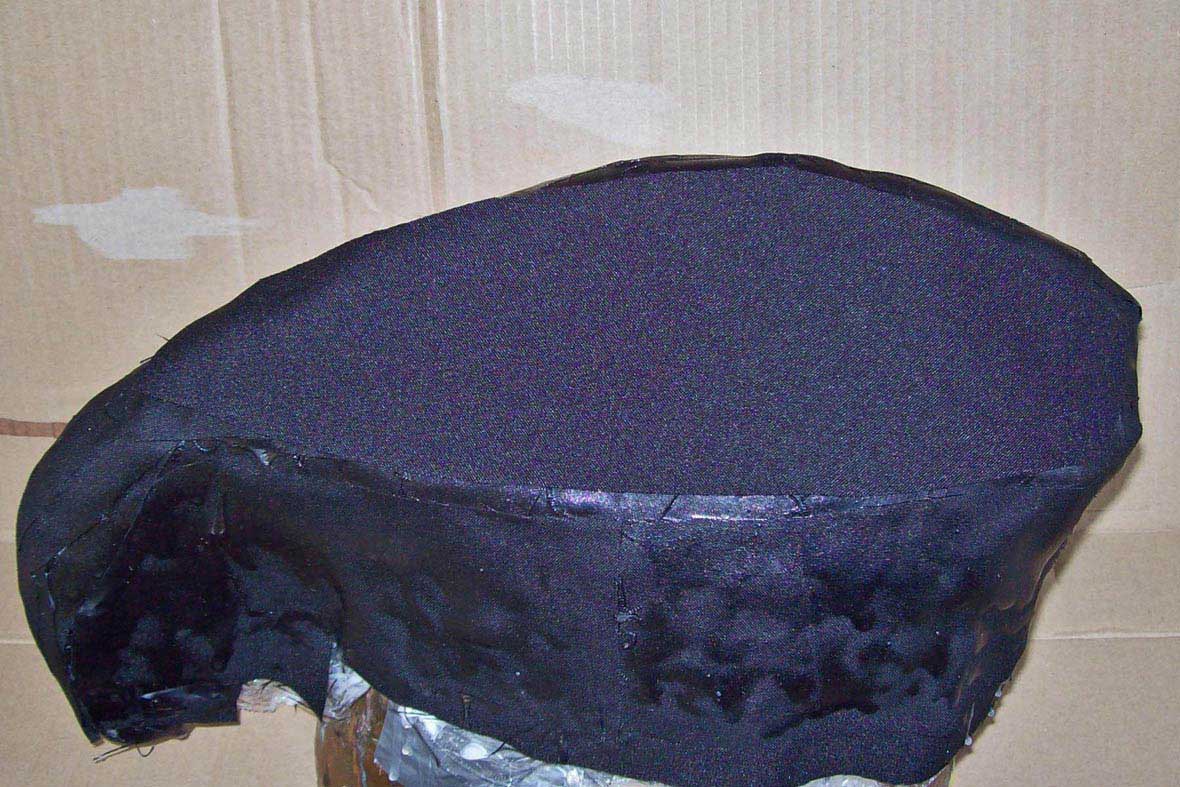
Above left: the first layer is dry. The transparently drying glue lets the material appear black. My choice of the clothīs colour is no coincidence: I want an “all black” workpiece so that when later colour rubs off the black will appear. Thatīs why I would advise against using up the old rose/ flowerpatterned cloth from the last patchwork project. |
||||||||
 |
||||||||
 |
||||||||
|
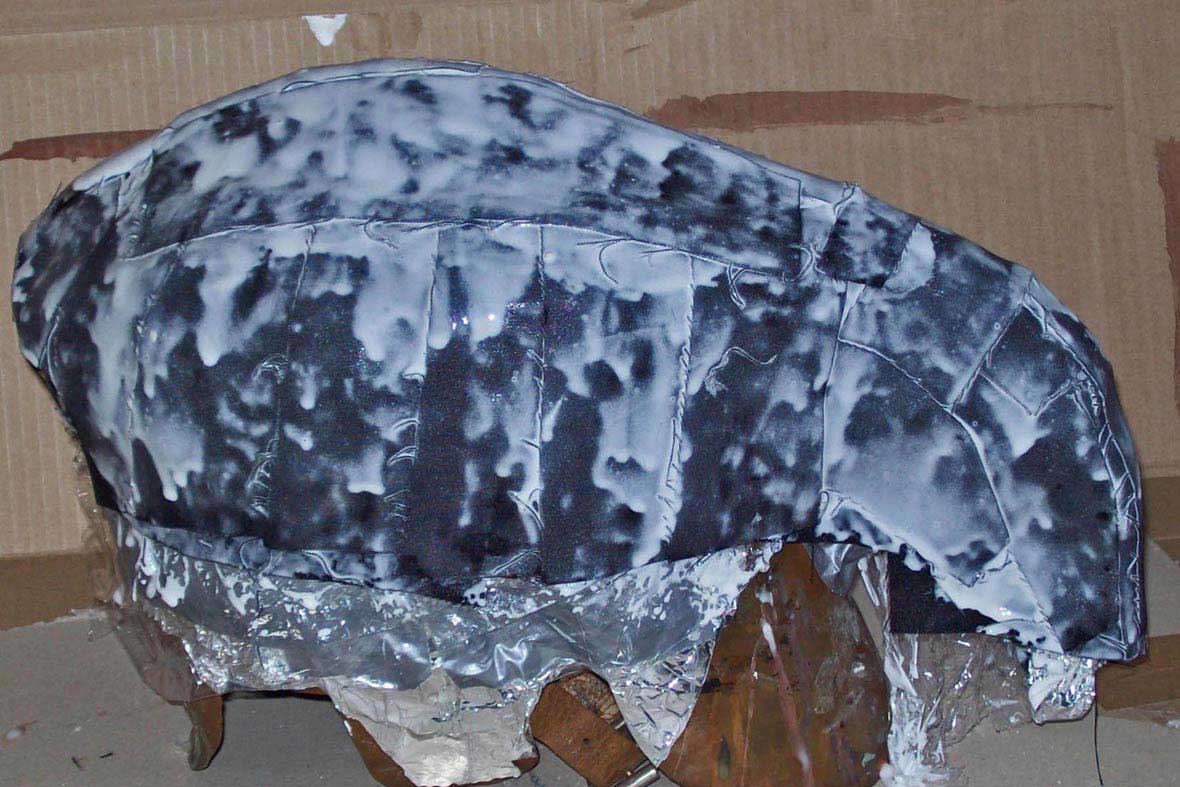
Above left: and so on. The more layers, the more stable the workpiece gets. and the bigger the patches, the better the surface, but the more considerate the overlaps have to be placed. Here they are along the sideīs “ridges”. |
|
|
|
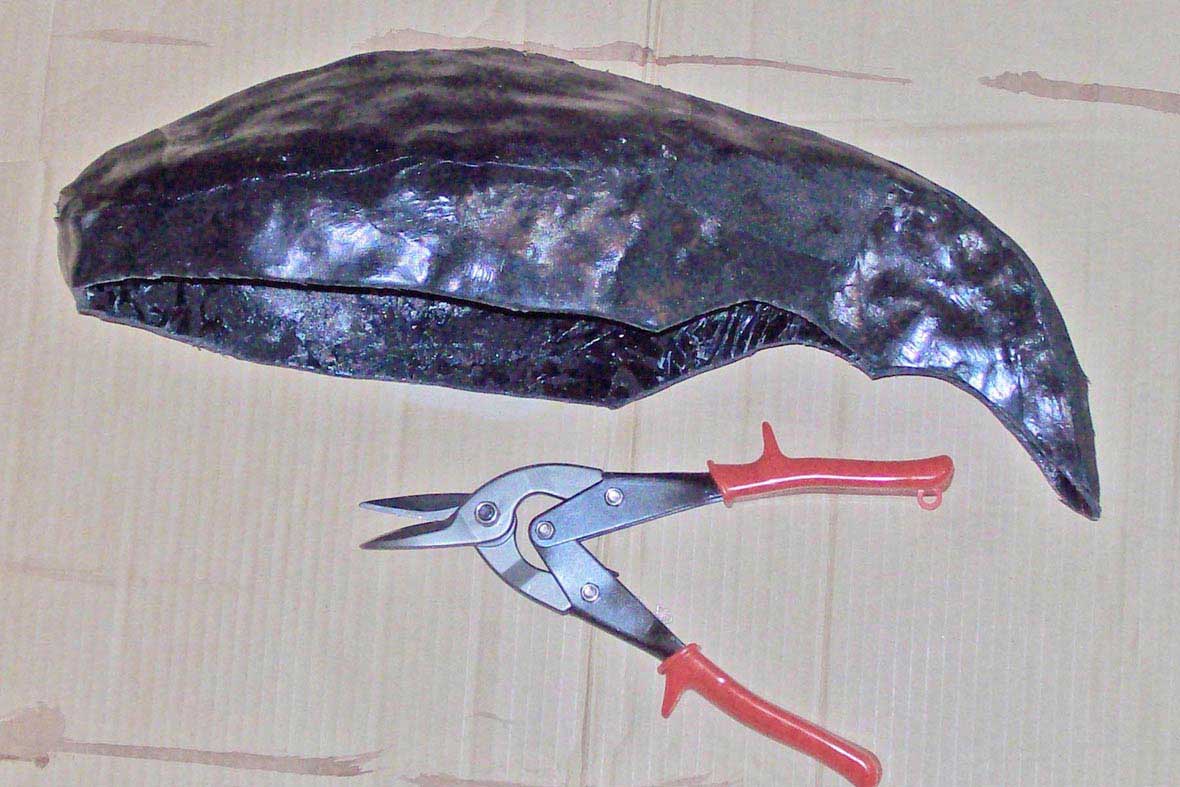
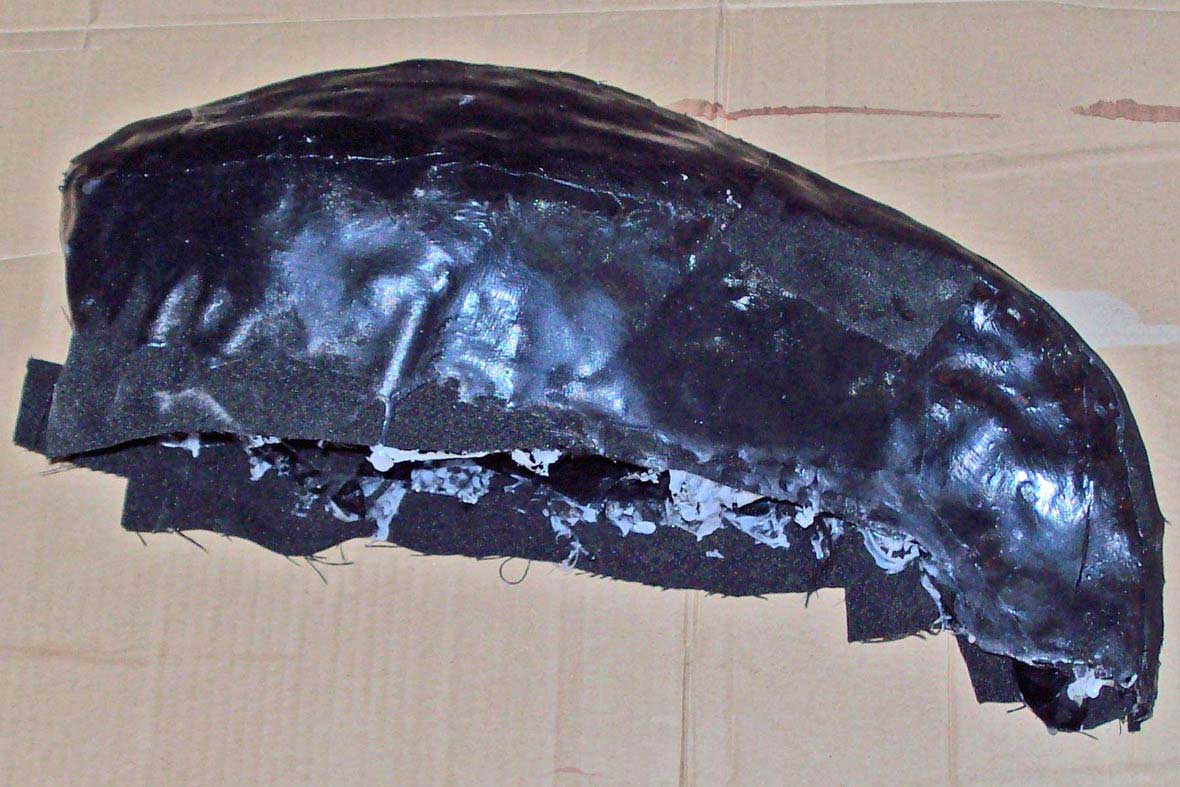
The workpiece should nevertheless always rest on the form during the production process in order not to lose its shape. For this helmet though I finished all layers because I anticipated the breaking of the mould. When building the harness and the add- ons (which are all arched but have “easier” shapes) I disengaged the workpieces after 4 layers from the moulds but put them back on for continiung the production. During drying the workpiece will lose 2 thirds of its weight and gain stability.. |
 |
|||
 |
|||
|
Above left: for the first time I hold a real “linothorax”- component in my hands. So this is supposed to become a cool chaos helmet, yes? |
 |
 |
||||||||||||
|
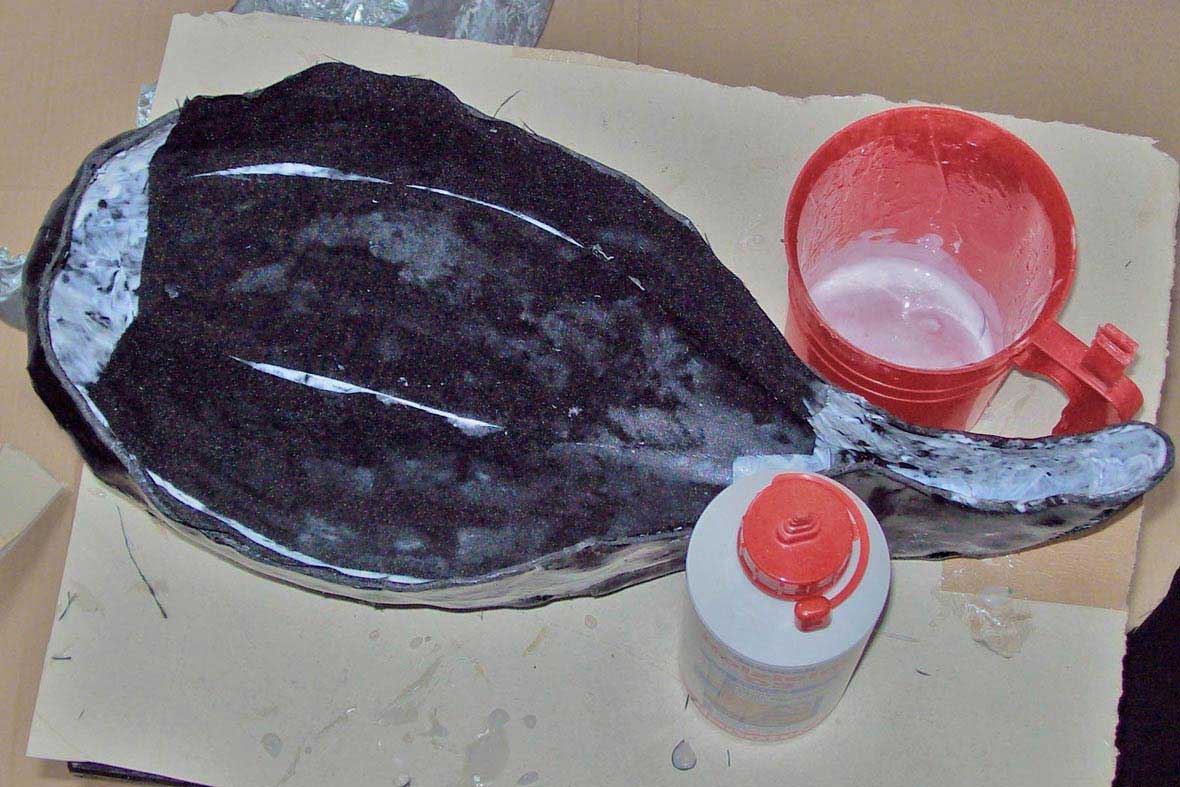
Above left: the inside. There the padding will be glued in with Pattex- but Pattex will not adhere to glued composite. Thatīs why I glue pieces of cloth onto the helmetīs inside which donīt get a final layer of glue on top but stay “cloth”. They have already been cut to size and are ready beside the helmet. |
|||||||||||||
 |
|||||||||||||
 |
|||||||||||||
|
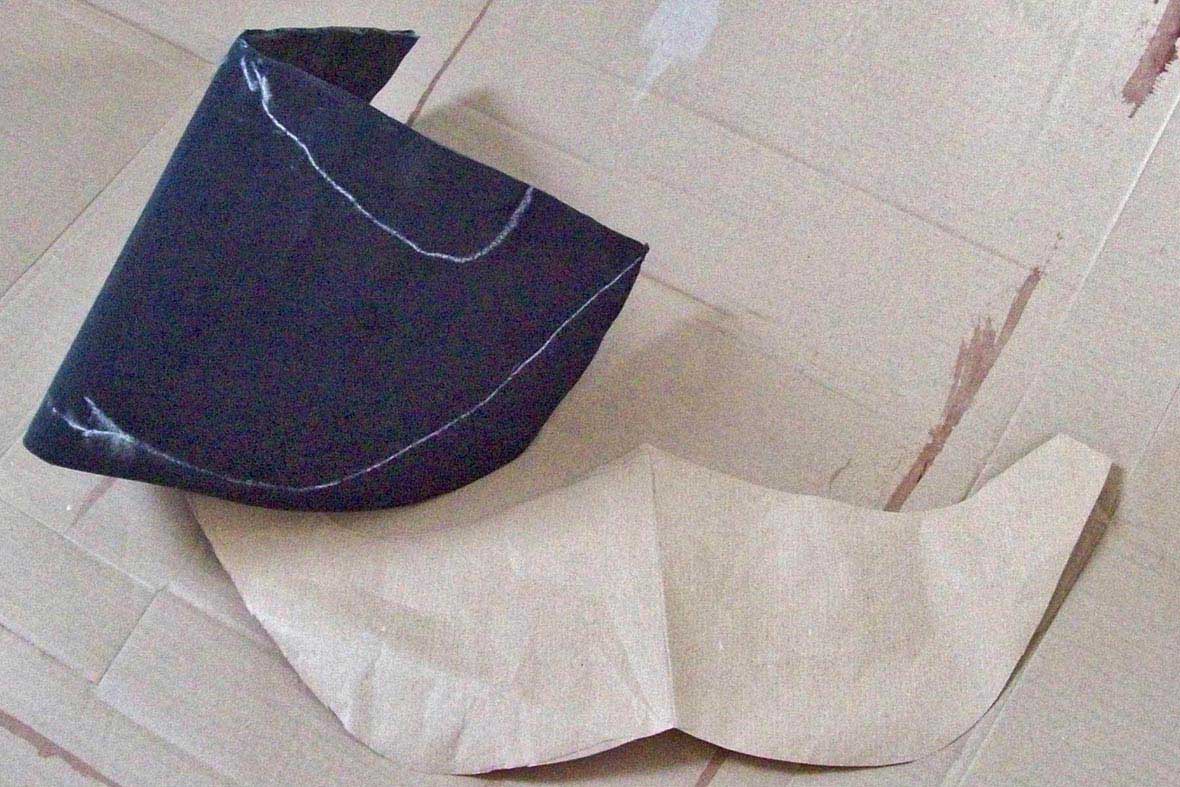
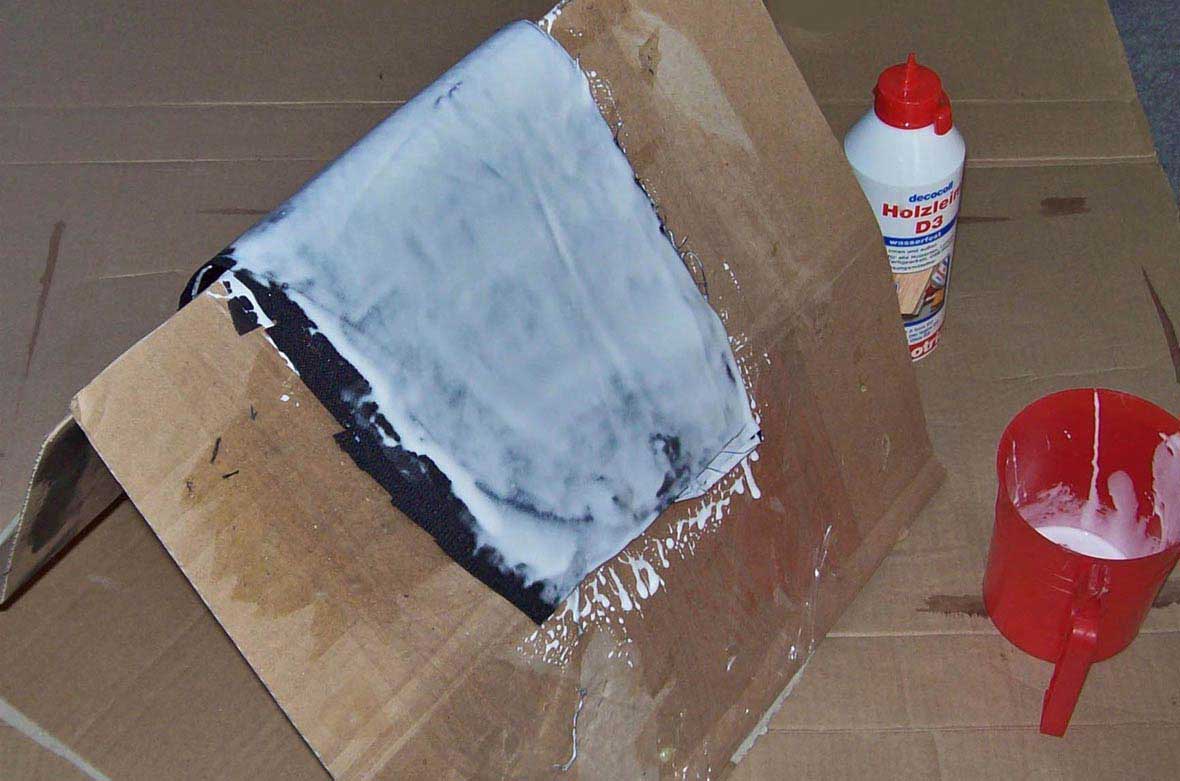
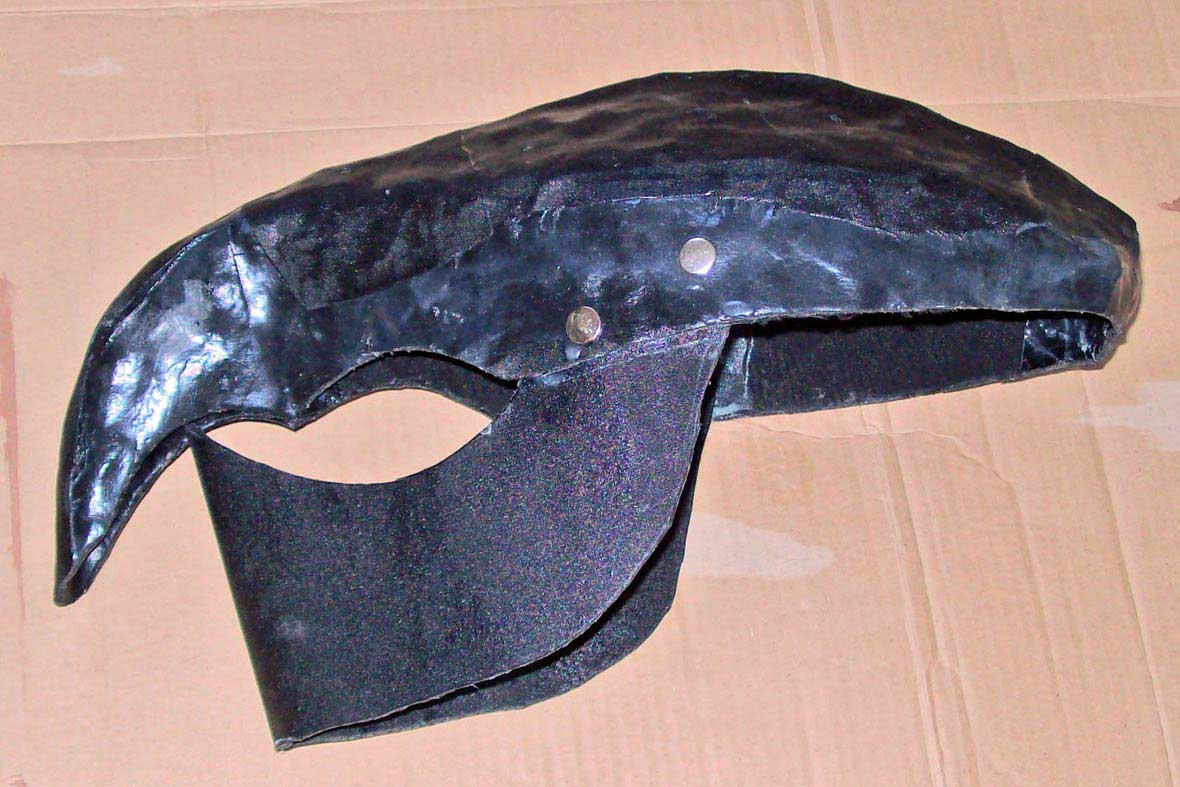
Above left: building the visor. It is produced on a right- angled form because it shall feature a stabilizing “ridge” on the front. It gets less layers than the helmet so it doesnīt become too thick to be riveted. 6 layers are enough to keep away larp- arrows but can be riveted with my longest hollow rivets. And with this the lino- work is done. But a few things are missing still until the helmet is finished... Step 3: assembly |
|||||||||||||
 |
|||||||||||||
 |
|||||||||||||
|
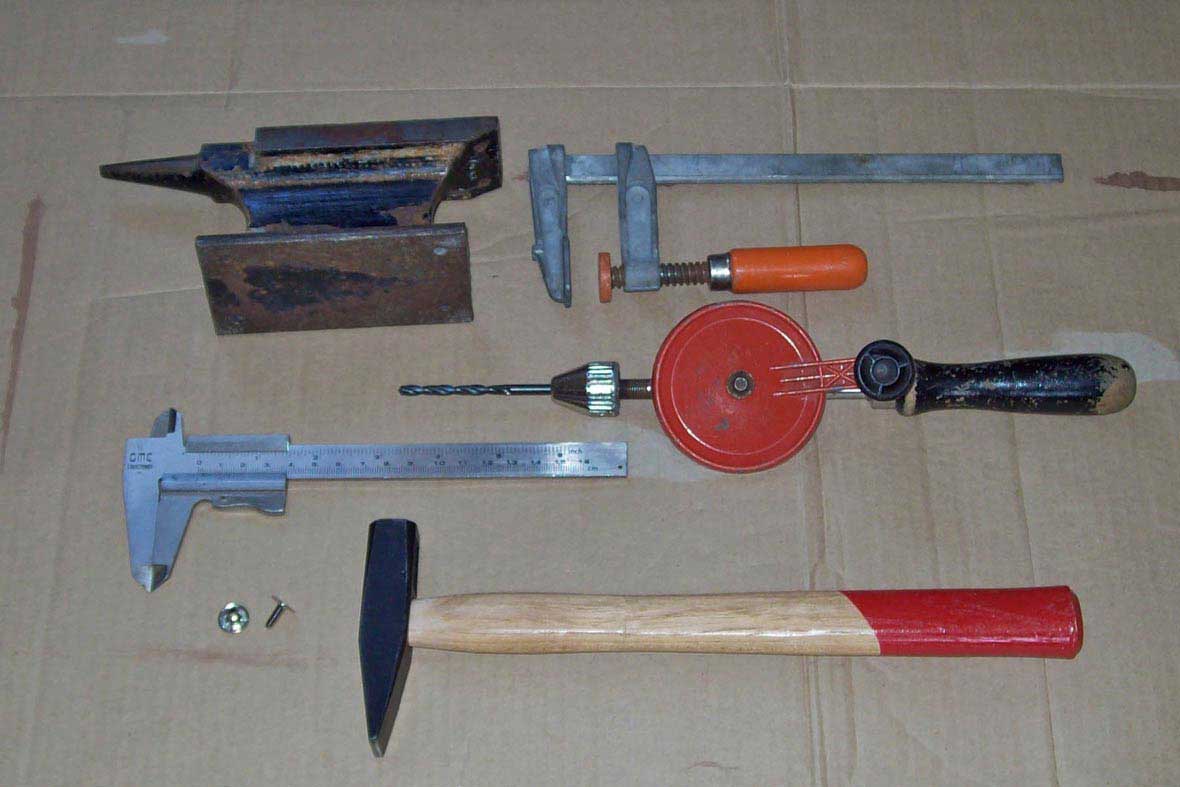
Above left: the tools: anvil, vices, gimlet, calliper, hammer, hollow rivets. Step 4: build inlay and fit it into helmet |
|||||||||||||
 |
|||||||||||||
 |
|||||||||||||
|
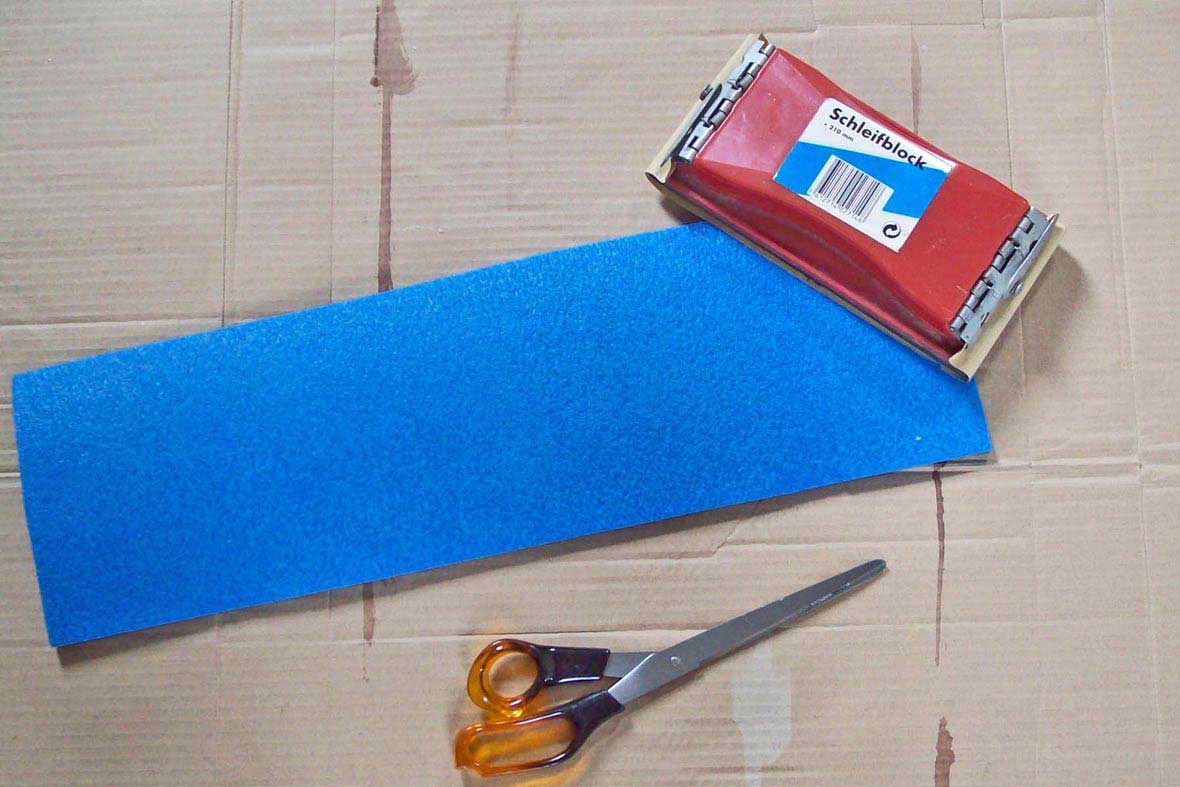
Above left: the inlayīs padding consists of strips of cheap foam camping sleeping mat. The foam is not tearproof so we glue cloth onto it (glue is Pattex this time). To make it stick to the foam one first has to sand the surface. Sanding is easier with big parts, so we donīt cut the strips at once but first glue cloth onto the foam, then cut it to strips. |
|||||||||||||
 |
 |
||||||||||||
|
Above left: mark the area where the glue will be put on. Please note that the front part of the inlay has no contact to the helmet because there is no “forehead”. |
 |
 |
|
Above left: fitting of the helmetīs webbing chin strap using two hollow rivets. The strap has no clasp because it is tailormade for me. It can be rotated to the front, but it turned out That I always wear the helmet using the strap. The plates that protect the strap from the rivets are made of lino too (only two layers). |
 |
|||
 |
|||
|
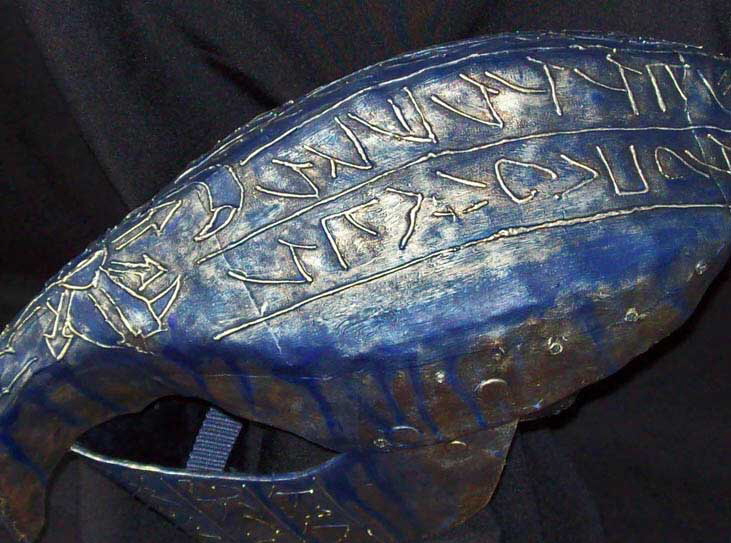
Above left: what is still missing are embellishments, colour and side- hanginghs made of cloth. The area that will be covered by cloth is marked. Schritt 5: decorating, sealing and painting Above right: the runes and the symbol are done with black window- color- contour normally used for removable window- pictures. The black “colour- area- separator” is flexible but doesnīt bond well to the composite. Thatīs why after drying the whole surface is sealed with a mixture of about 4 parts glue and one part black acrylic paint. |
 |
|||
 |
|||
|
Above: painting with acrylics. The “dissolving” blue paint doesnīt correspond with the colour scheme of the rest of the armour (where it proved impractical) but I like it. |
 |
 |
||||
 |
|||||
|
|
||||||||||||||||||||||||||||
|
|
||||||||||||||||||||||||||||||||||||
|
|
 |
 |
|
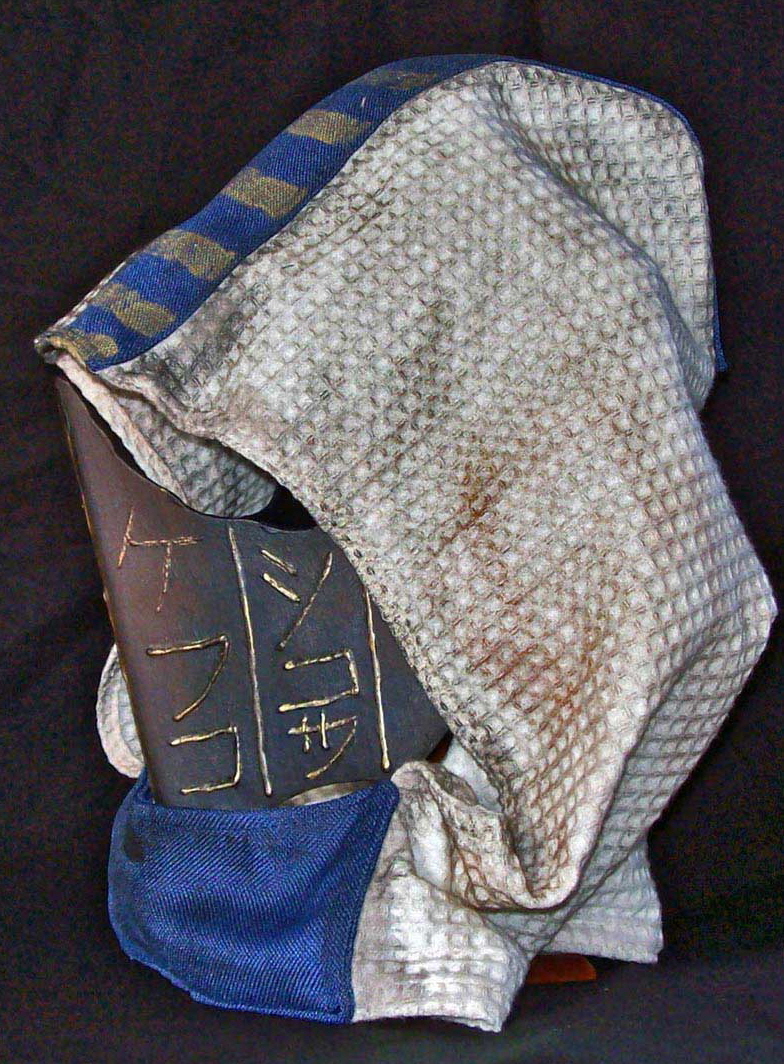
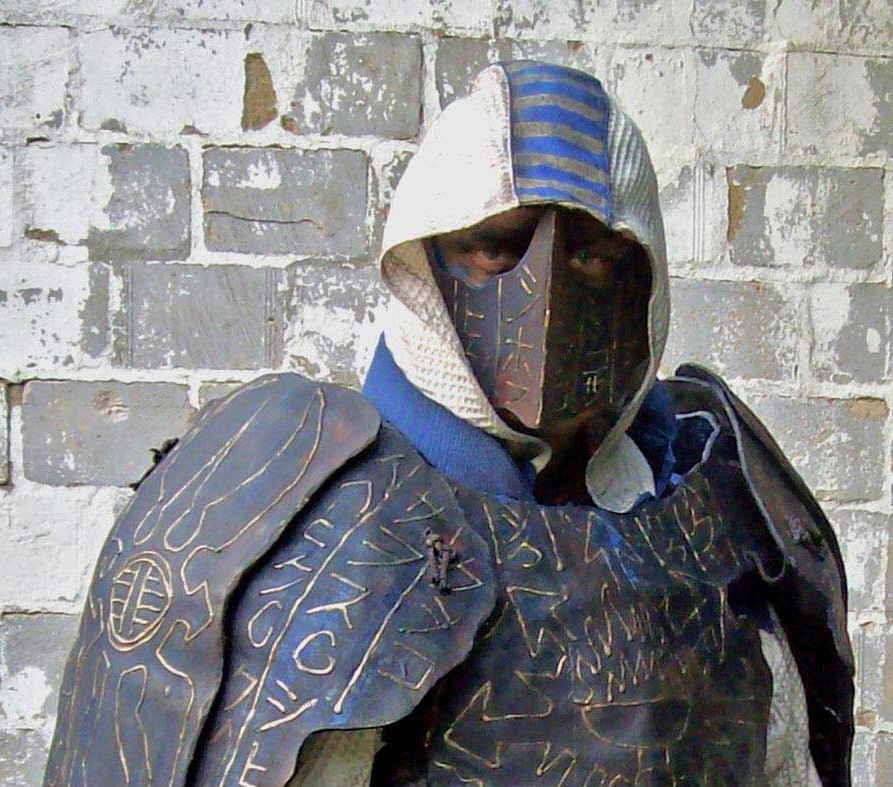
The blue parts of the hood are non- dyeing cloth so it can be washed. The “dirt” and the stripes are acrylic colour. And believe it or not: the look is not inspired by a certain assassin who for years now in a series of video games pursues his business but comes from the Games- Workshop- universe where the emperorīs super- warriors now and then wear their space suits together with hood and respirator: This is the second page of the linothorax- documentation. Oct 2014, oct 2016, july 18 (after a request from australia; thanks man, I needed the nudge) |
| [Home] [Deutsch] [English] [about me] [whatīs new] [Contents] [about monsters] [faqs] [other sites] |
