|
|
|
Multiple- walled harness made of layers of glued cloth, Epic Empires, 2014, 2017 This page is part of the documentation of my armour (namely the construction of the upper body plating); the beginning would be here: linothorax armour |
 |
 |
|
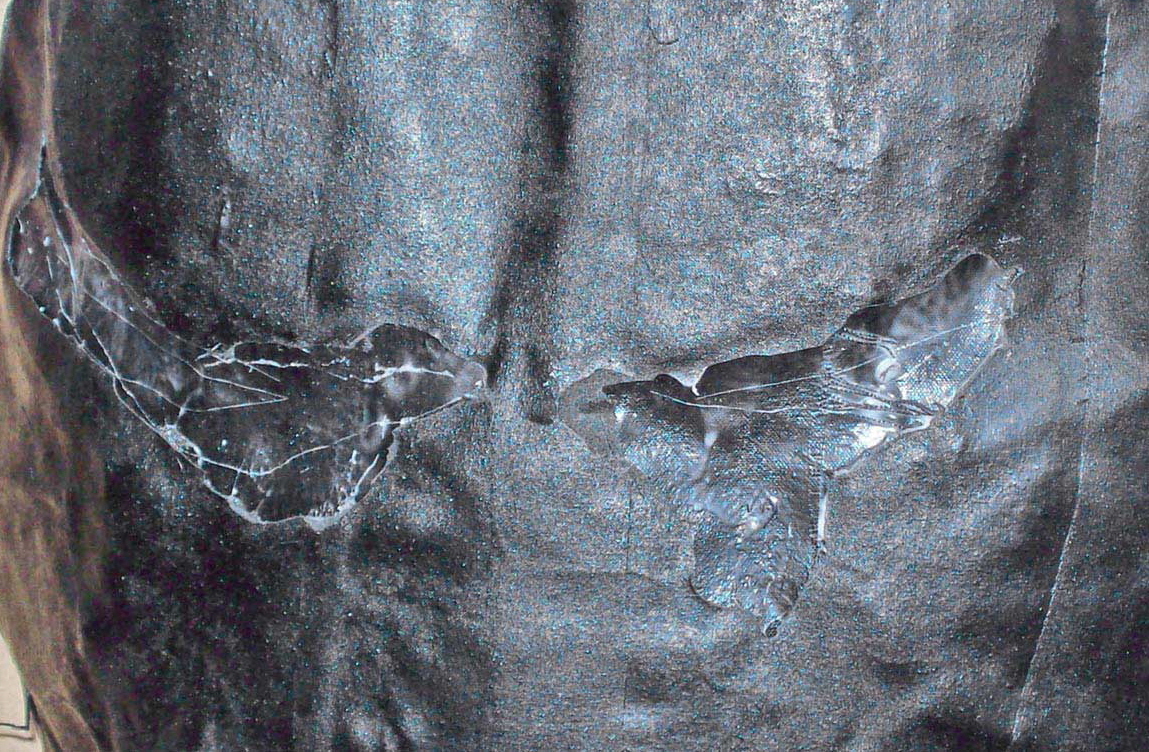
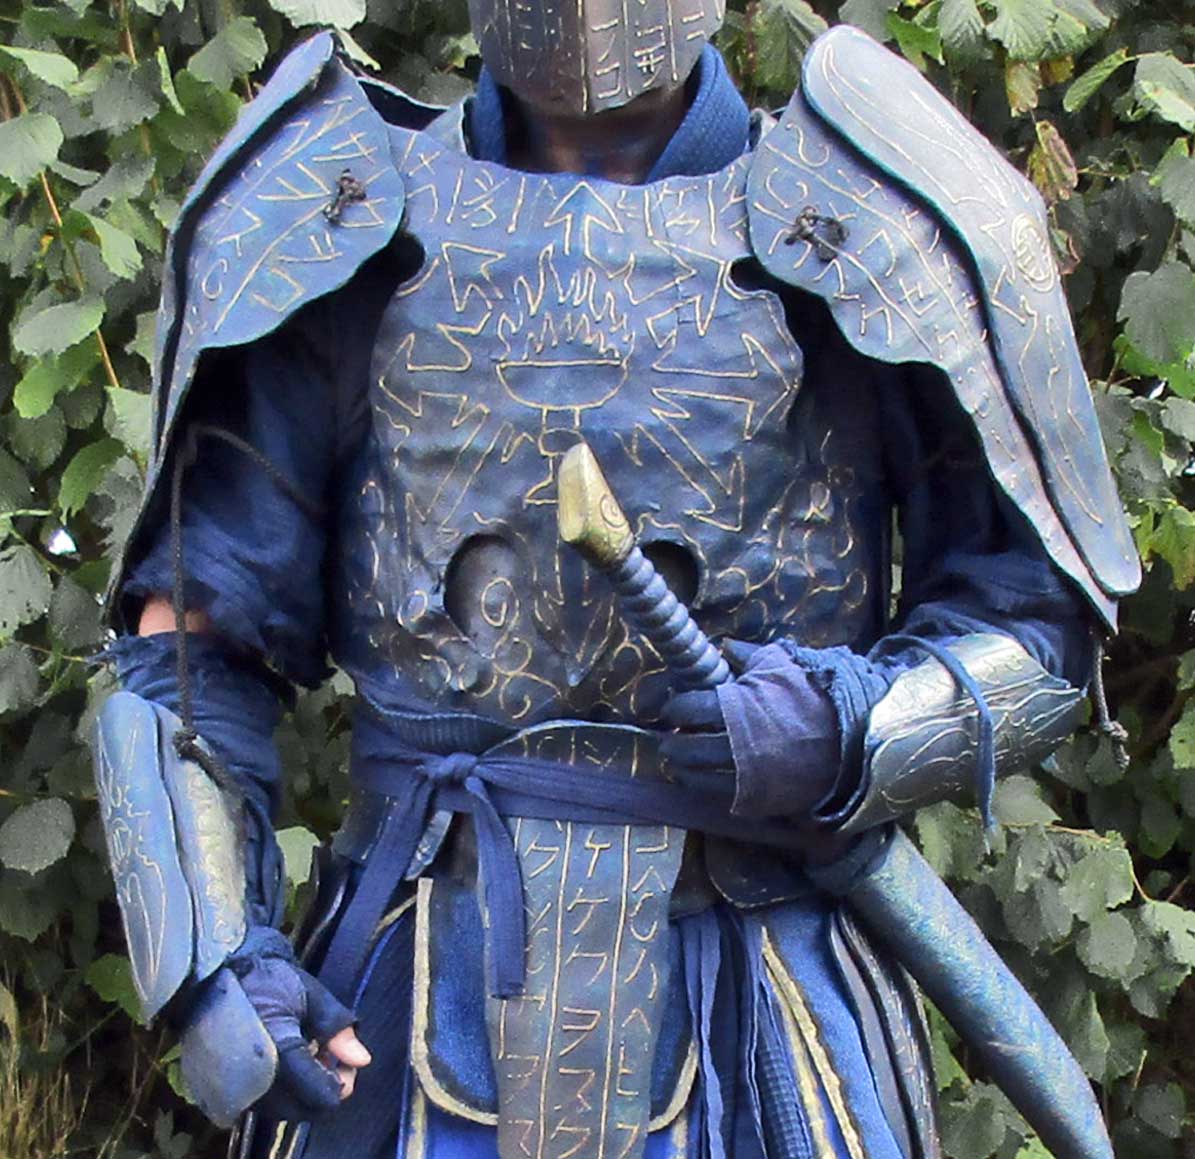
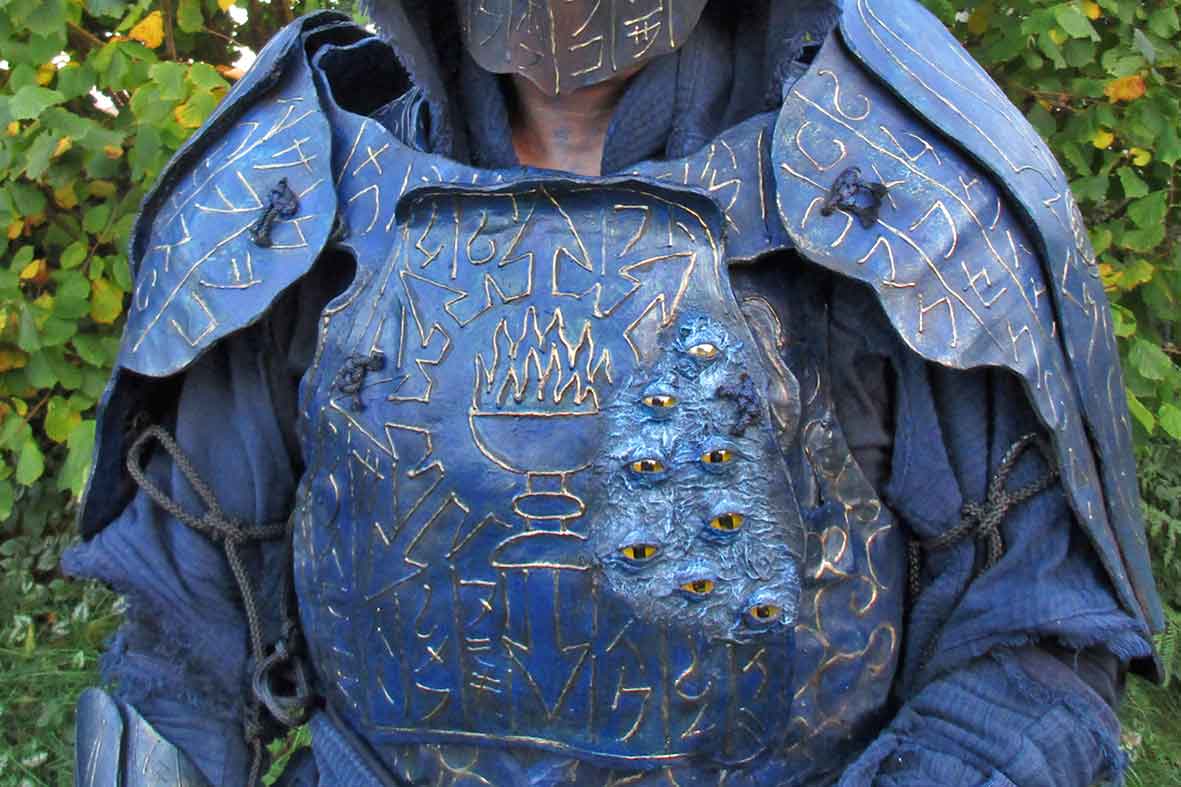
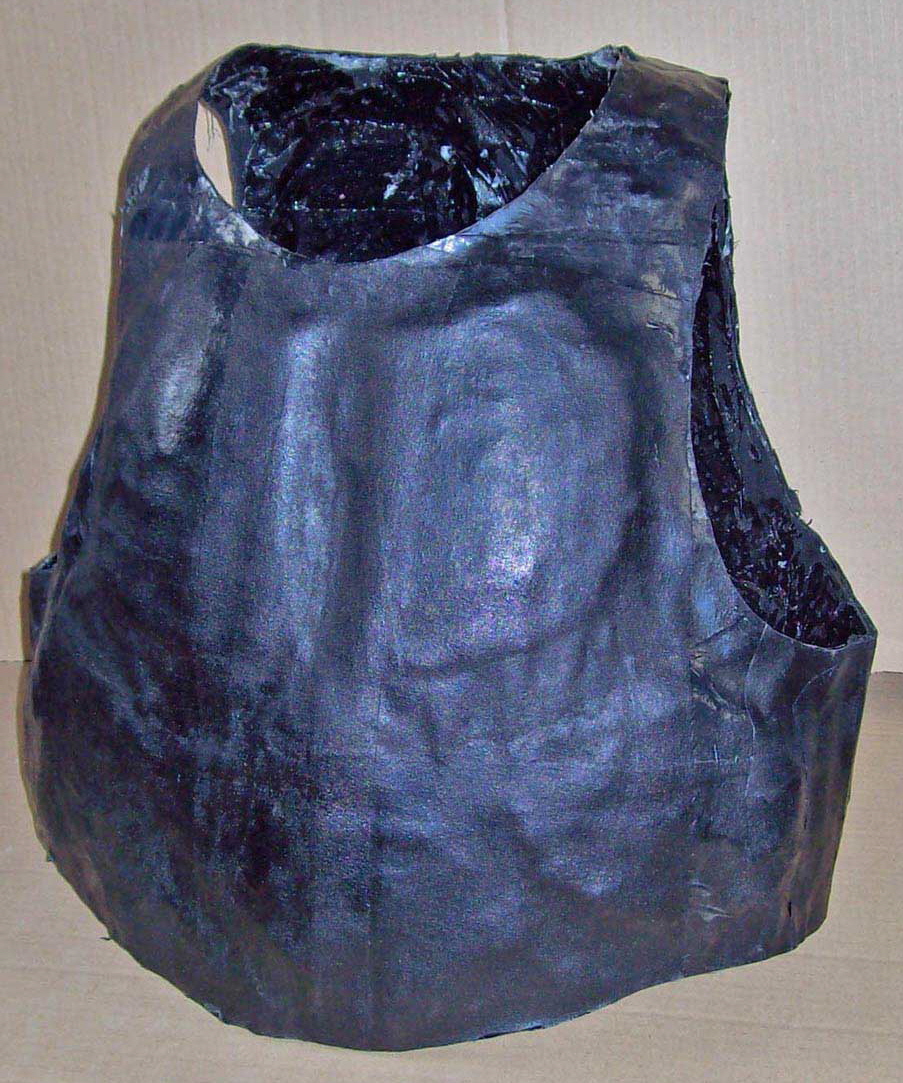
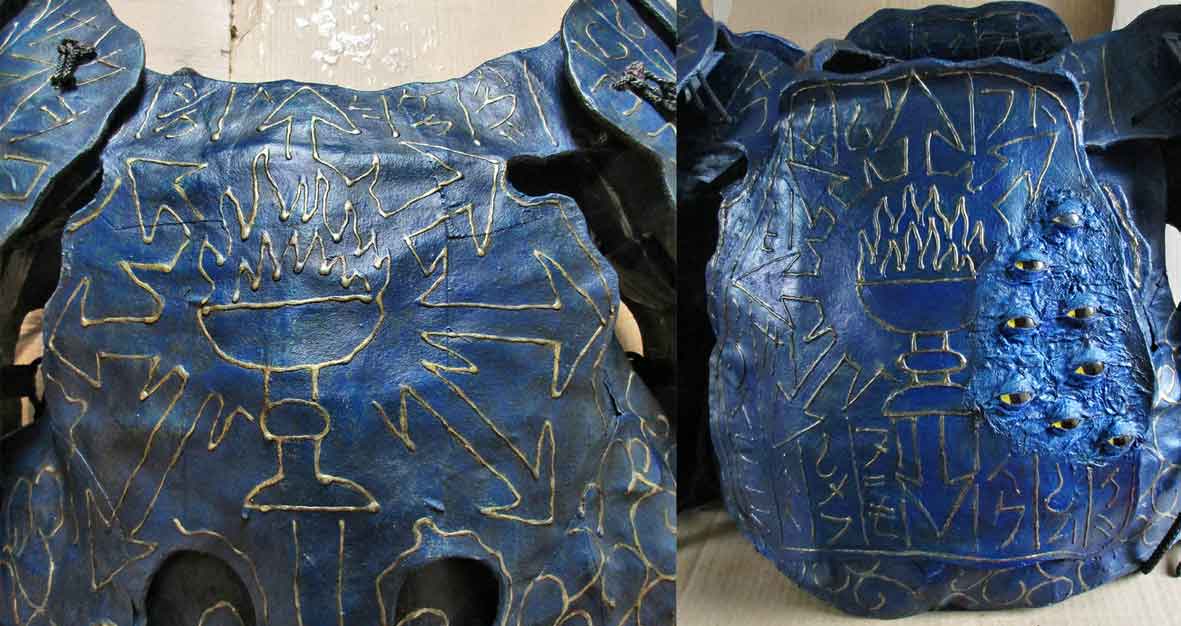
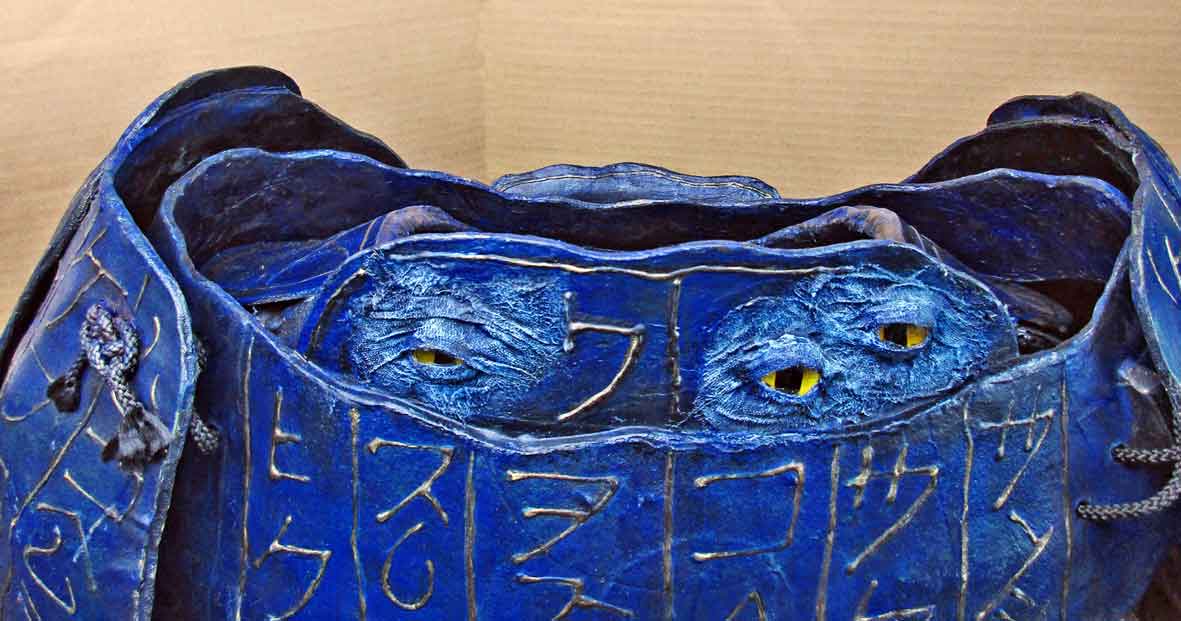
Above left: 2014, above right: 2017. The irregular surface of the original frontplate didnīt meet my requirements; a new one had to be built (with lots of eyes: follow-me-eyes). This armour basically consists of layers of cotton linen and undiluted, waterproof, transparent-drying D3 wood glue. It withstands real blades and arrows, thus offering genuine protection. Paddings are made from cheap camping sleeping mats, lacings are polyester- cord, glue is Pattex classic, side closings are self- adjusting velcro. Symbols and runes are made with window- color- contour and the surface was then sealed with a mixture of 4 parts transparent H3- glue and one part acrylic paint. All colours: acrylics. The only metal components that were used are hollow rivets that fix the lower visor to the helmet and function as initial linking of the two walls of the harness. Elsewhere Iīve already compared the substance with modern armoured vests because it functions more like todayīs ballistic protection than medieval plate armour: The glue turns the layers of cloth into an inseparable composite whose surface from a certain thickness on will become invulnerable to blades. Adequate material thickness provided, the point of an arrow can neither displace nor cut the material and thus is stopped. Lemme mention here again that this kind of composite will not protect you against modern firearms (plate armour wonīt too, btw). Layers of glued cloth are extremely tough but always stay flexible. This is a positive attribute insofar as a considerate amount of impact energy will be absorbed that way but is a disadvantage as the material will dent much easier than a metal plate. In early warfare the battlefields were just crawling with blunt high- energy- impact- weapons like clubs, heavy but not very sharp swords or maces of all kinds (not to mention armour- piercing pick- like devices against which the only defence is not to get hit at all). So with lino (even more than with metal armour) the idea is not only to stop a weapon from biting pieces out of you but also to avoid “compression traumata” which occur when the armour after a blunt impact makes unhindered physical contact with the wearer and transfers energy (like a hit on chainmail worn without sufficient padding). The consequences of such a concussion would be bruises, lacerations or even bone fractures. And hereīs the receipt I came up with: arched components and two- walled crumple zones. Because I deliberately forego the use of strengthening the material with metal plates which would efficiently restrict unwanted flexibility (they could be riveted on or glued in) the harness has dentable areas which absorb enough energy to prevent such injuries and help to impede penetration. |
 |
|
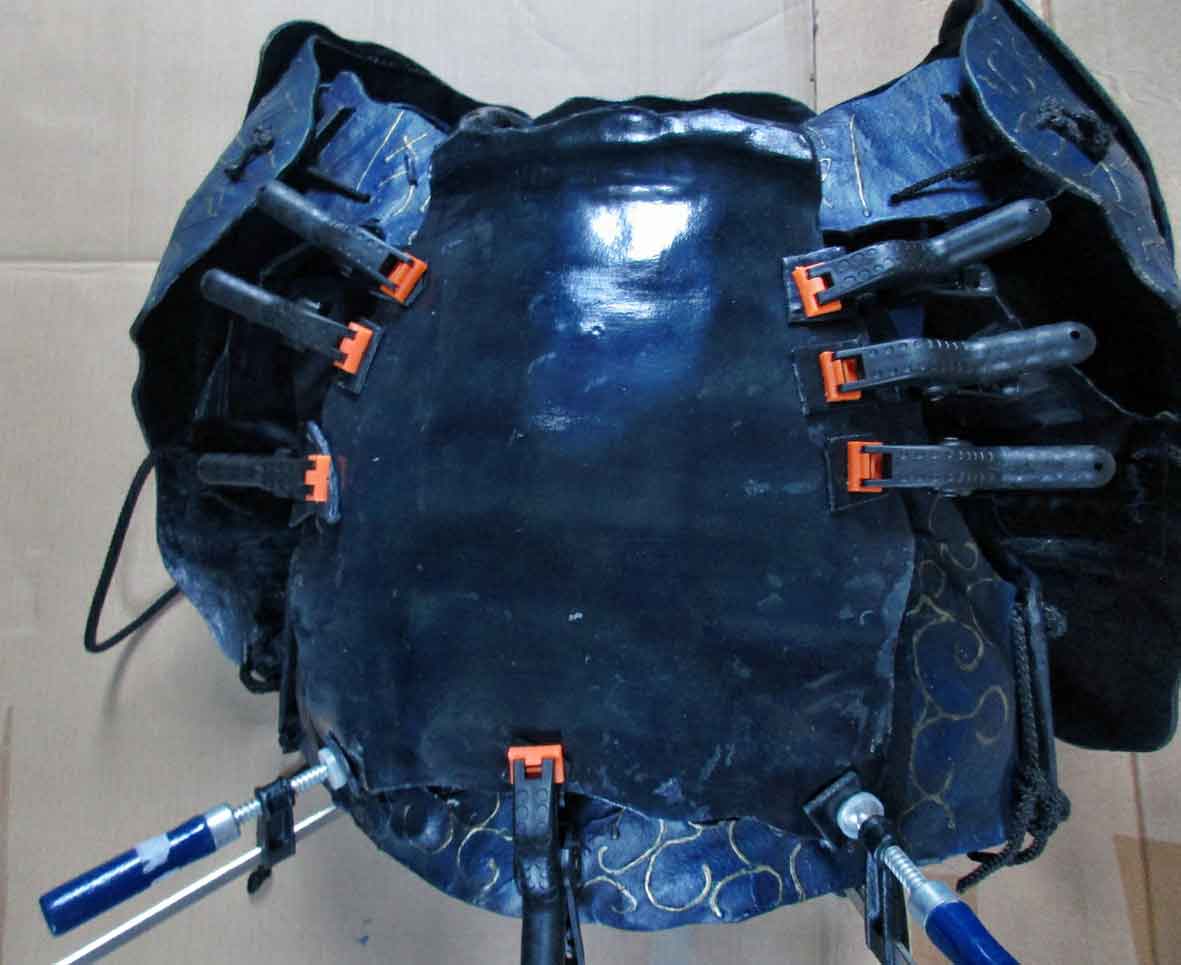
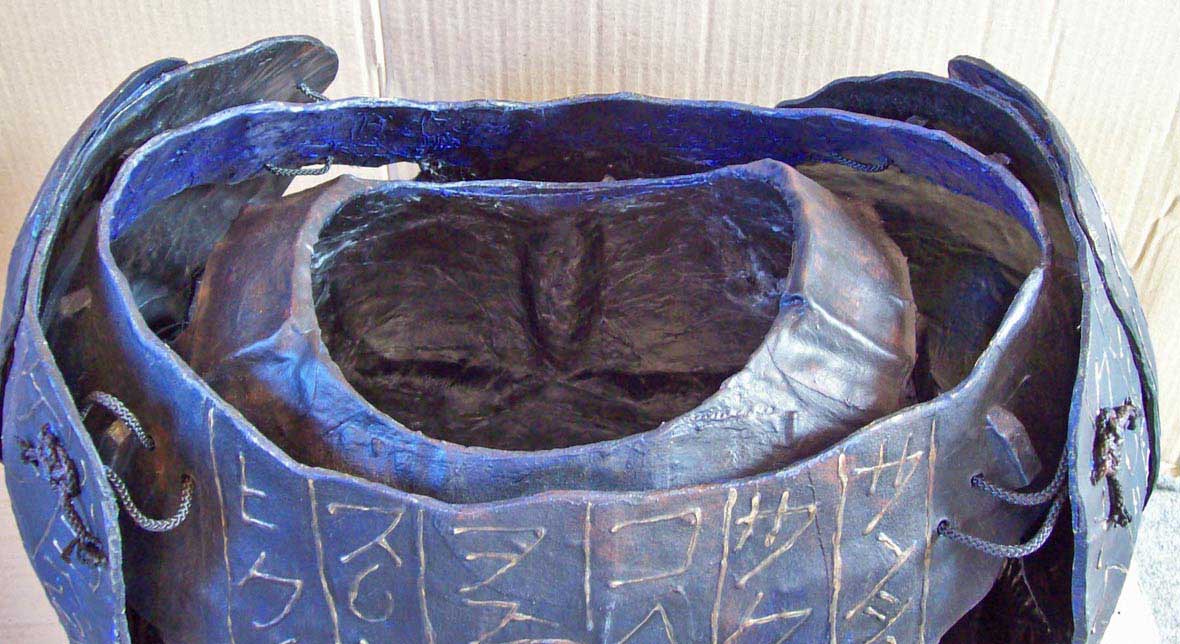
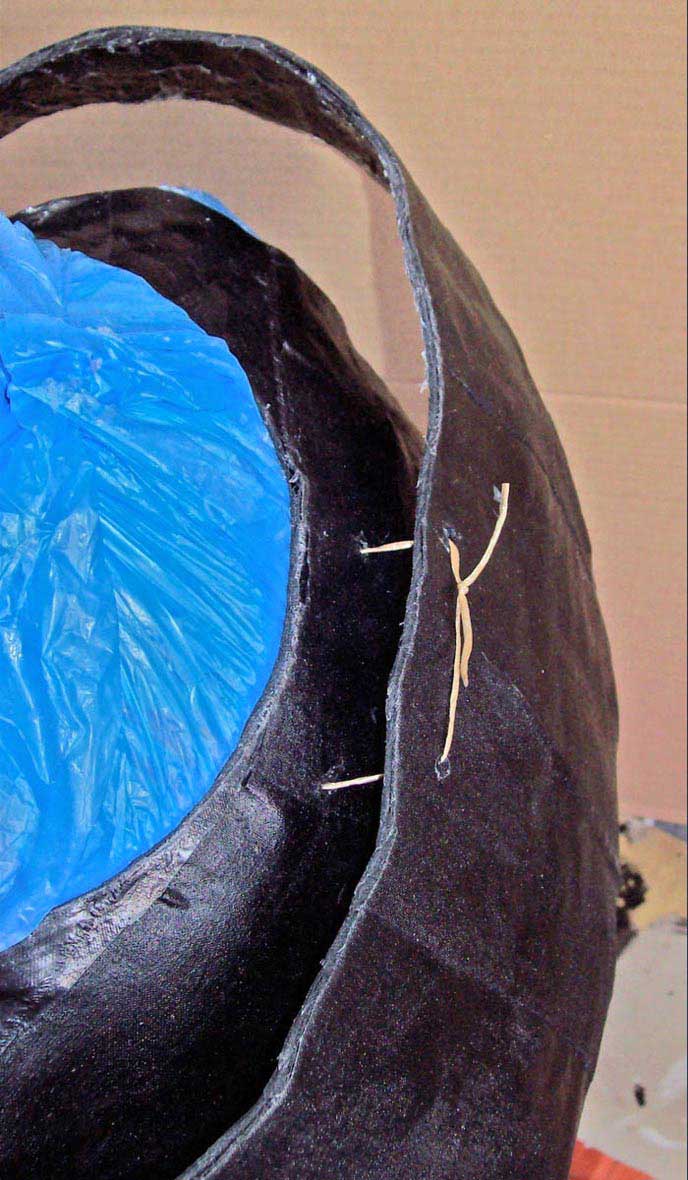
Above (2014), seen from behind: Breast and back are double- walled with about 3 cm airspace in between. Each tier in itself is impenetrable but flexible, thus eating up lots of impact energy but nevertheless forbidding penetration or cutting. A compression is possible but difficult because all plates are arched for more stability and better energy dissipation. The contact surfaces to the wearerīs body are minimized by the under layer consisting of many strongly arched separate areas; only the recesses rest flat. Padding here is not necessary: should enough energy manage to get through, these areas will “work” too, coming up and dissipate whatever force would hurt me otherwise. |
 |
|
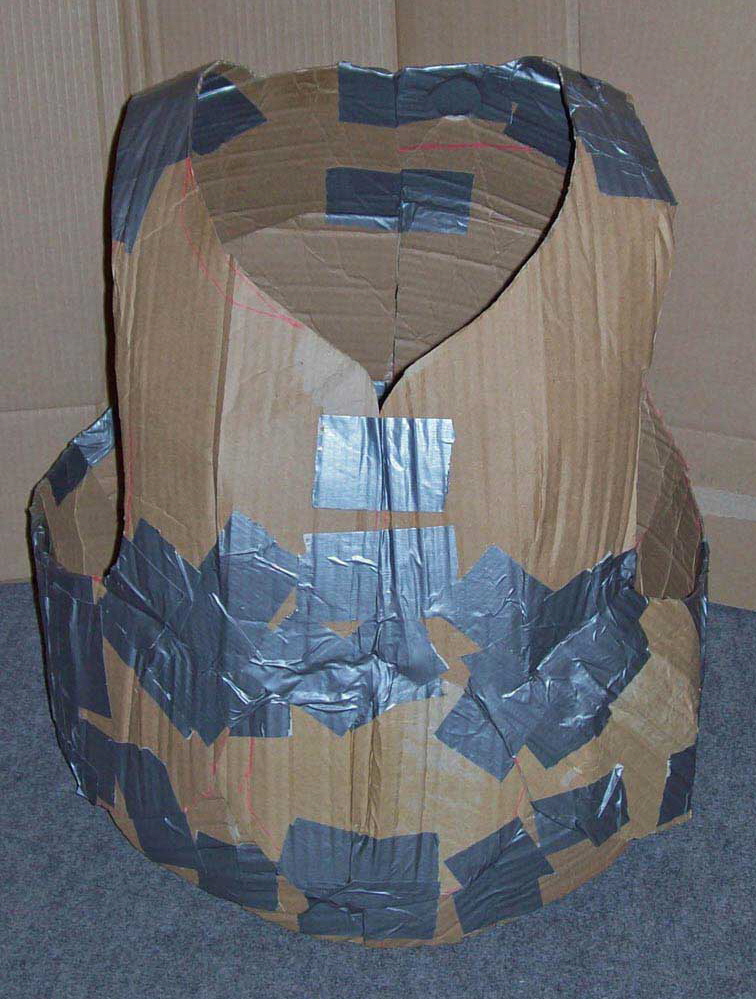
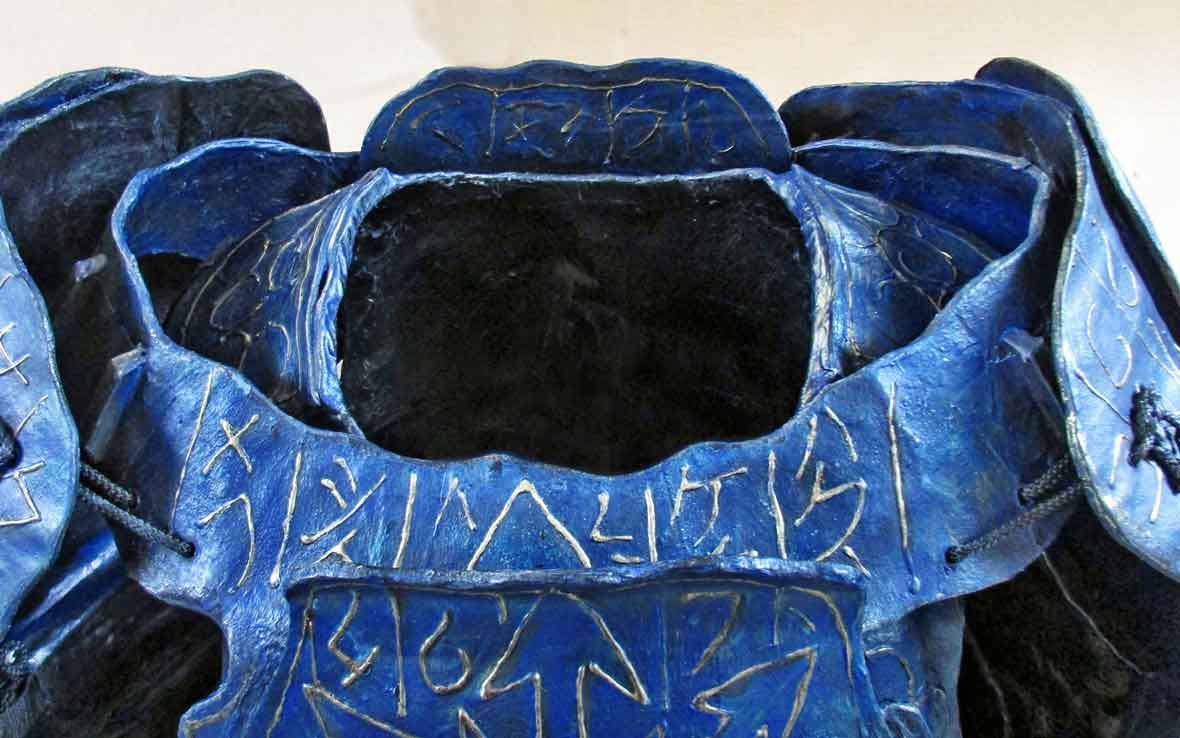
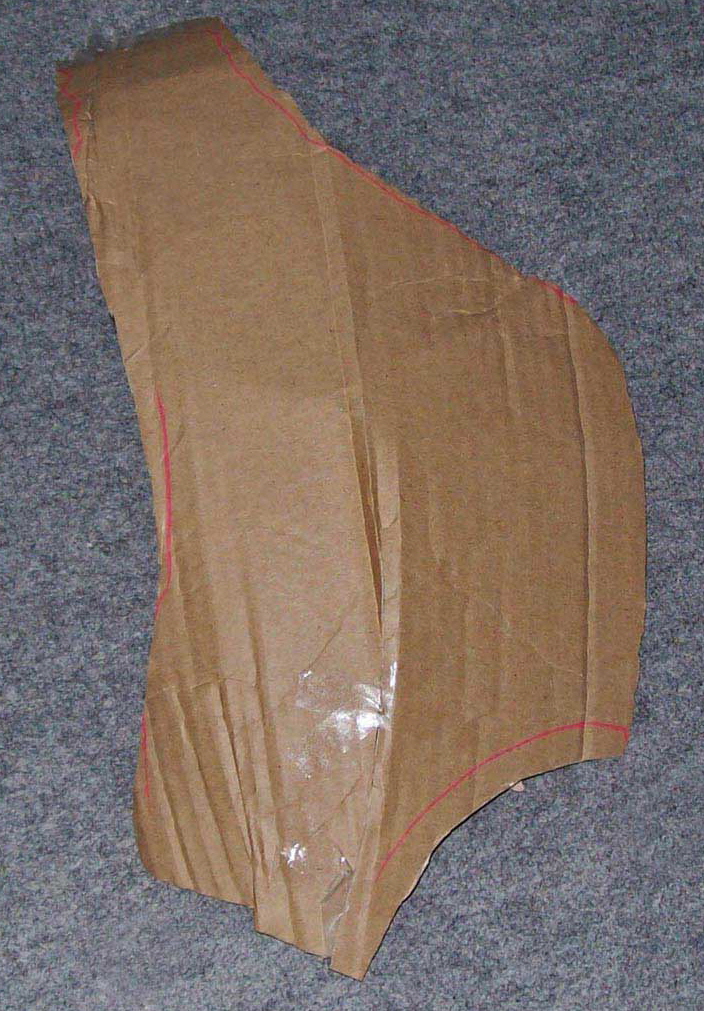
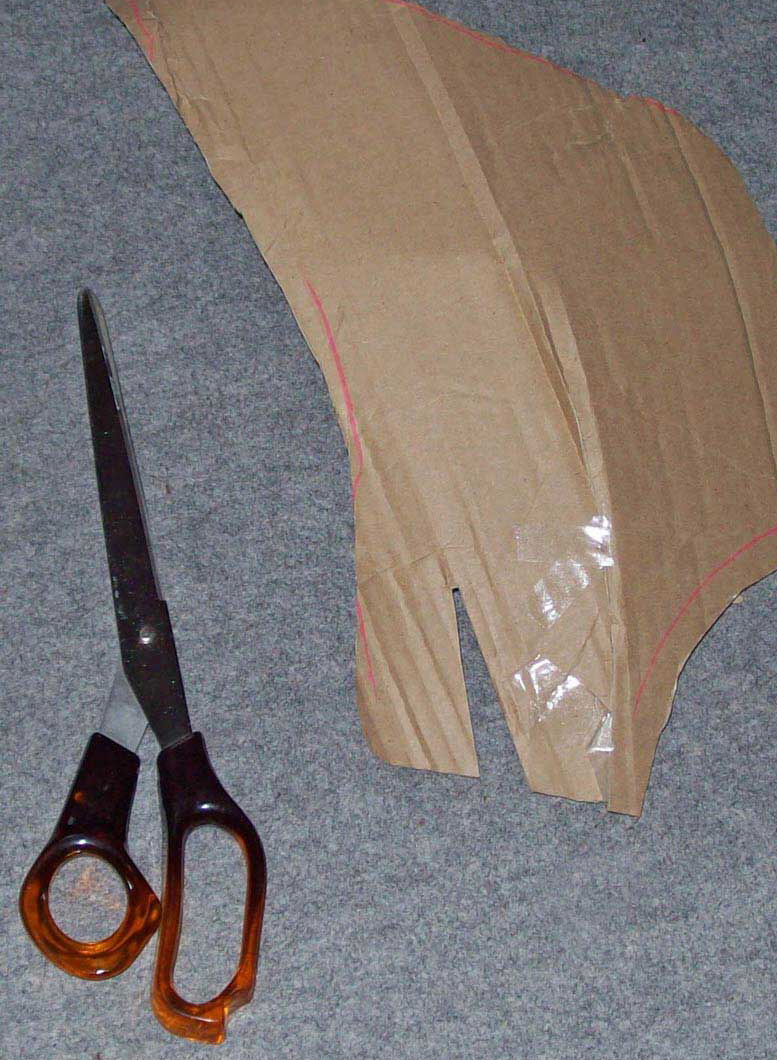
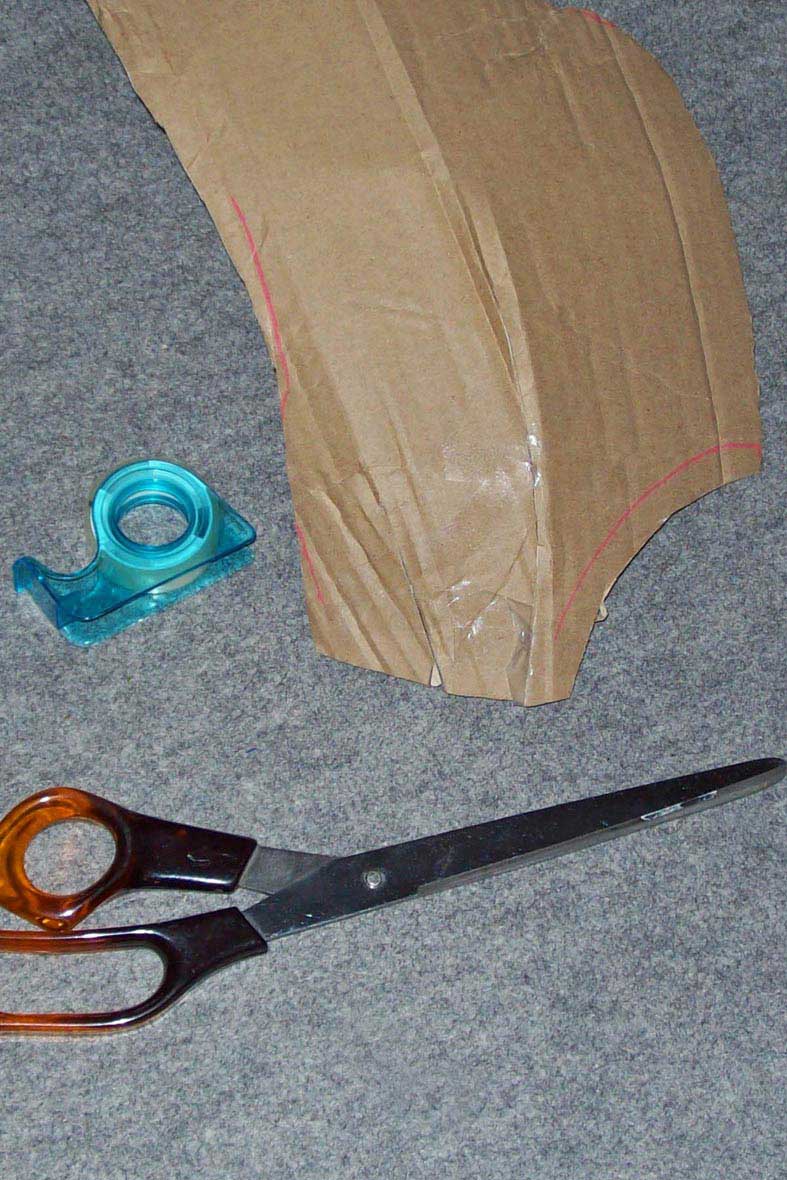
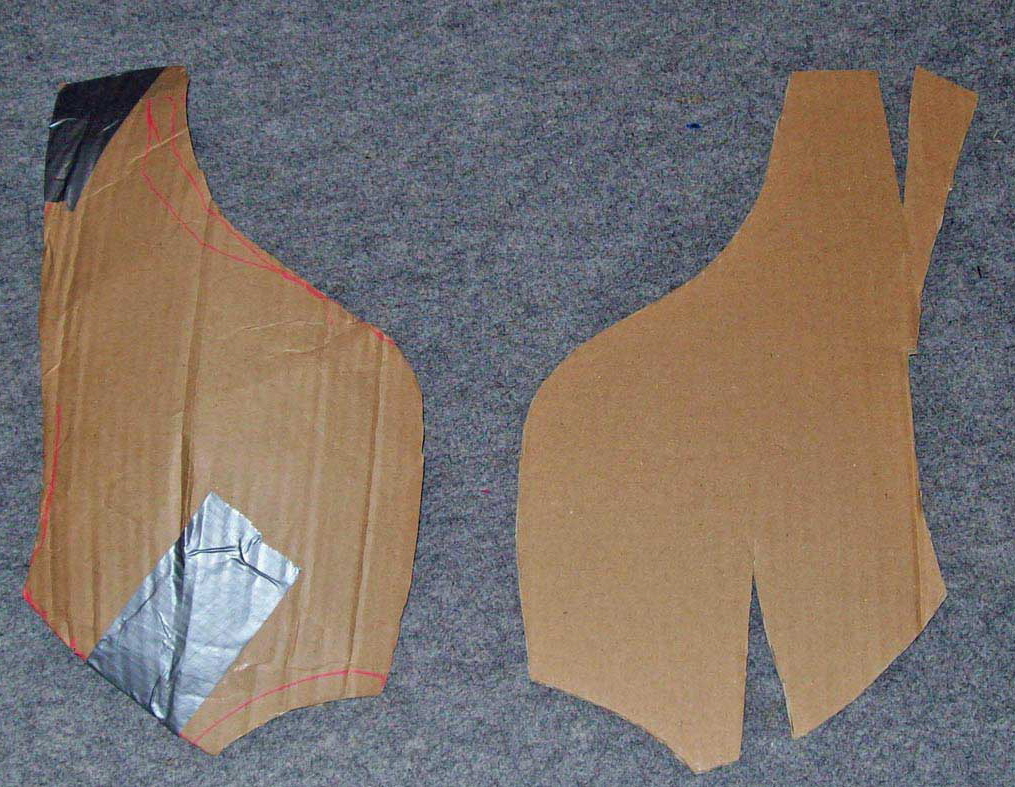
Above (2017), seen from the front: an additional frontplate with protruting arrow- repulsing upper edge was attached. Rear neckguard and shoulder plates left & right on the inner collar close gaps, reinforce and embellish. Each wall consists of 10 - 12 layers of cloth (cotton linen), overlappings adding layers in preplanned areas, making the armour substantially stronger there. It is not necessary to vary the alignment of the clothīs warp during manufacture of the layers, you only do that with armour made of quilted fabric. I used black cloth; this is least noticeable in case of colour abrasion. The minimized contact surface together with the arched areas of the armourīs under layer permits to largely dispense with isolating padding, thus allowing air circulation under the armour. Whoever enjoyed this luxury on a hot battlefield never again wants to go without it! This and the armourīs weight of under 7 kg make it very well suited for use in hot climate. The side plates covering the upper arms are non- removable and arched like the other components. To save weight and volume they look like a silhouette of Africa instead of being rectangular or crest- shaped. In their main- impact- area a second arched plate rests on a layer of padding; that way implementing the two- tier- principle. The undergarment again is padded on the upper armīs outer sides. Of course this construction is way more complicated than a classical greek/ roman linothorax. The reasons for taking the long route were: Iīm talking so much about the function of the armourīs individual components because otherwise one would reasonably have to ask why I didnīt just copy an approved and reliable construction like a “Lorica Segmentata” (the roman legionaireīs metal- armour) or build a “tube- and- yoke- armour” like a greek Linothorax; both would have been way less time- consuming and complex. Whatever. Back to topic. The helmet was ready which is necessary for trying it on together with the harness over and over again to make sure the equipment doesnīt lock or becomes entagled. Step one 1: Mould making; encore une fois... Below: the harnessī bottom wall made of cardboard and tape. |
|
|
 |
 |
 |
|||||
 |
|||||||
|
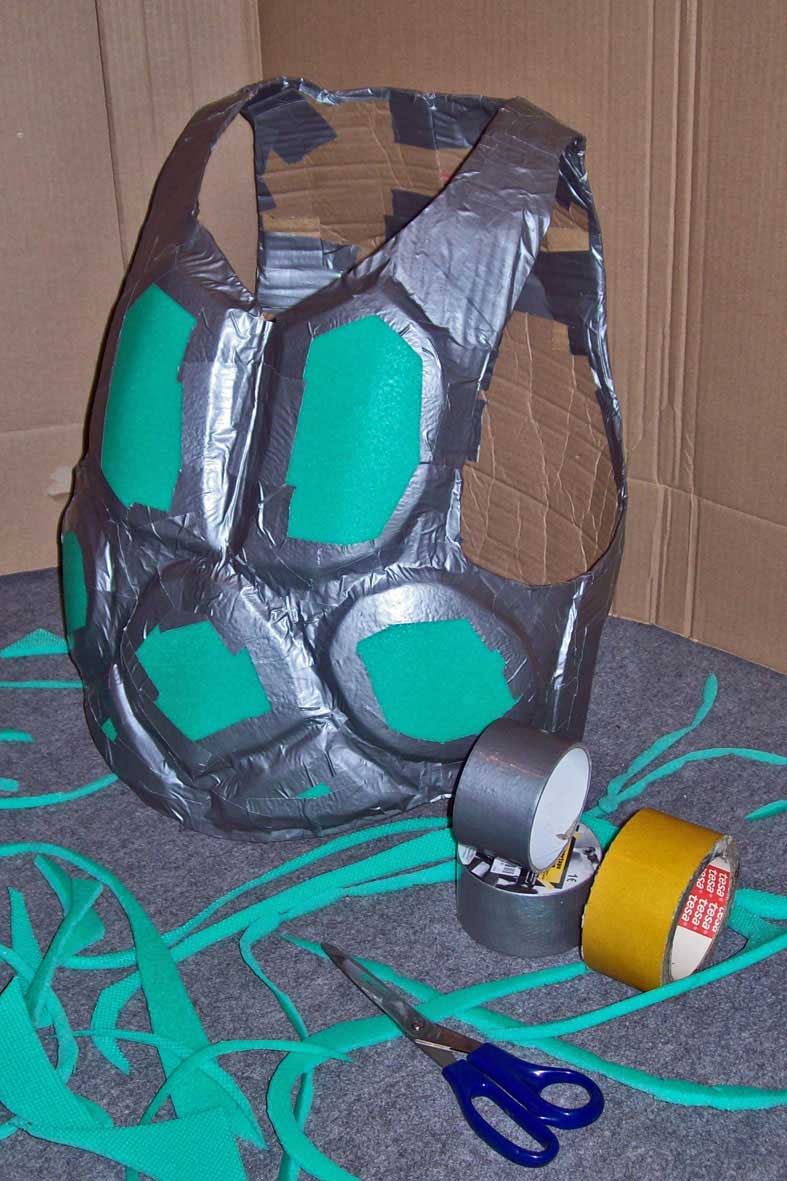
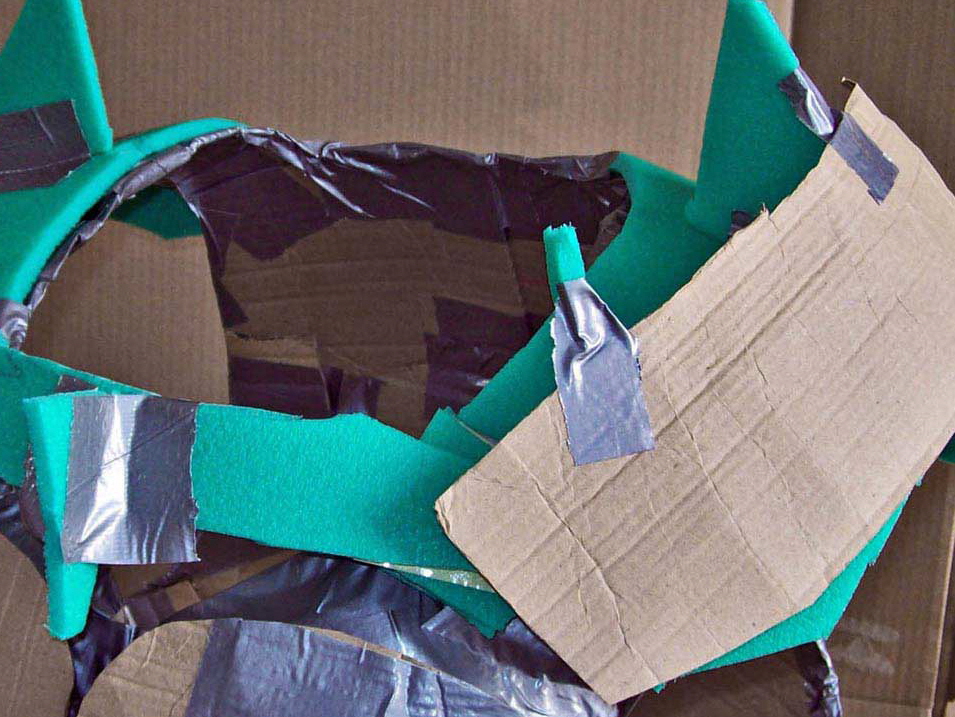
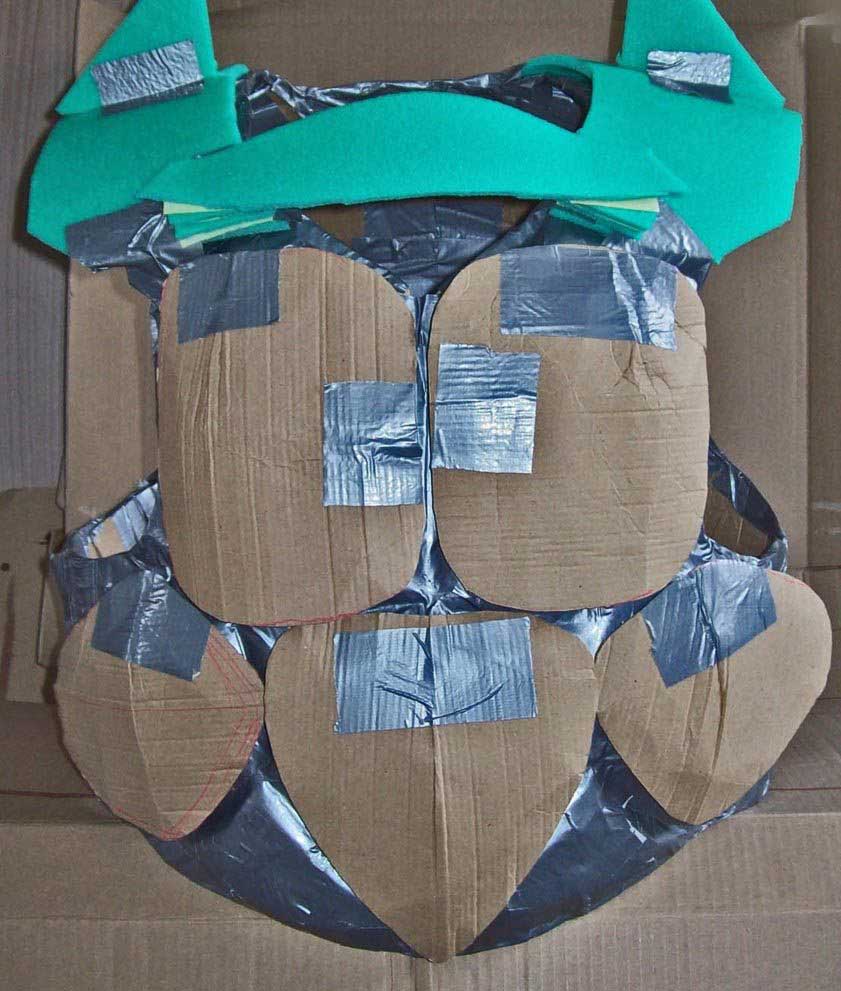
Above: arching cardboard plates, from left to right: |
|
|
|
|
|
Deadlines donīt wait. They never do. I hate that. |
 |
 |
|||||||||||||
|
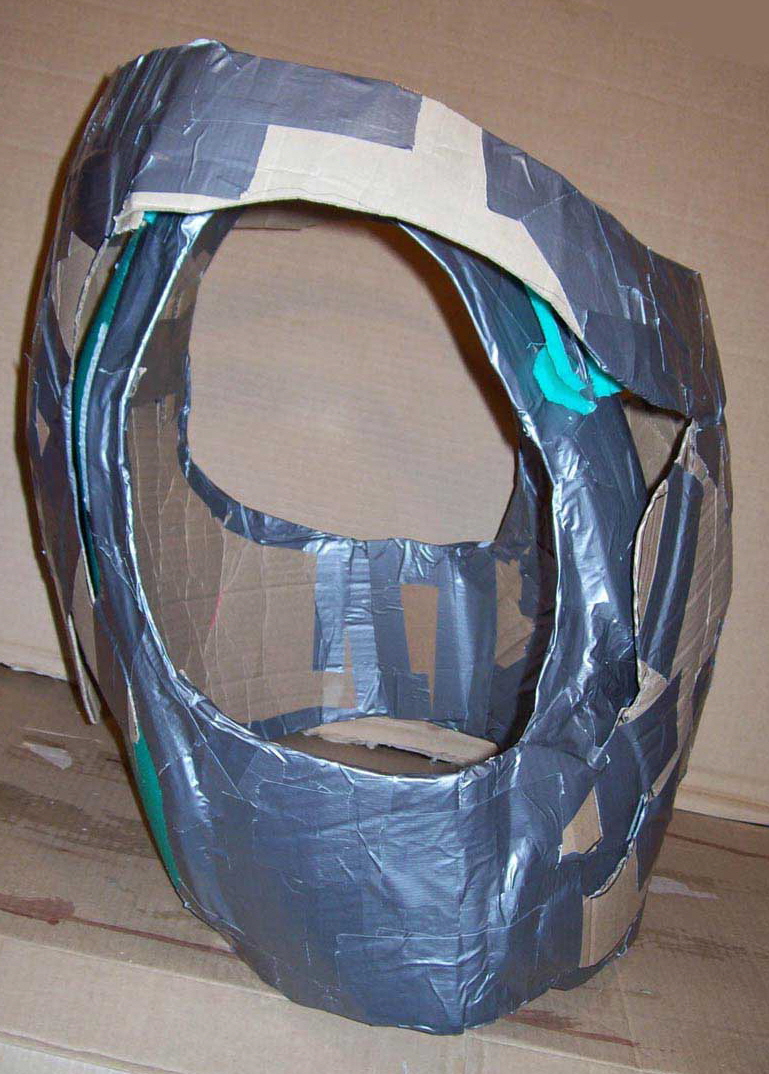
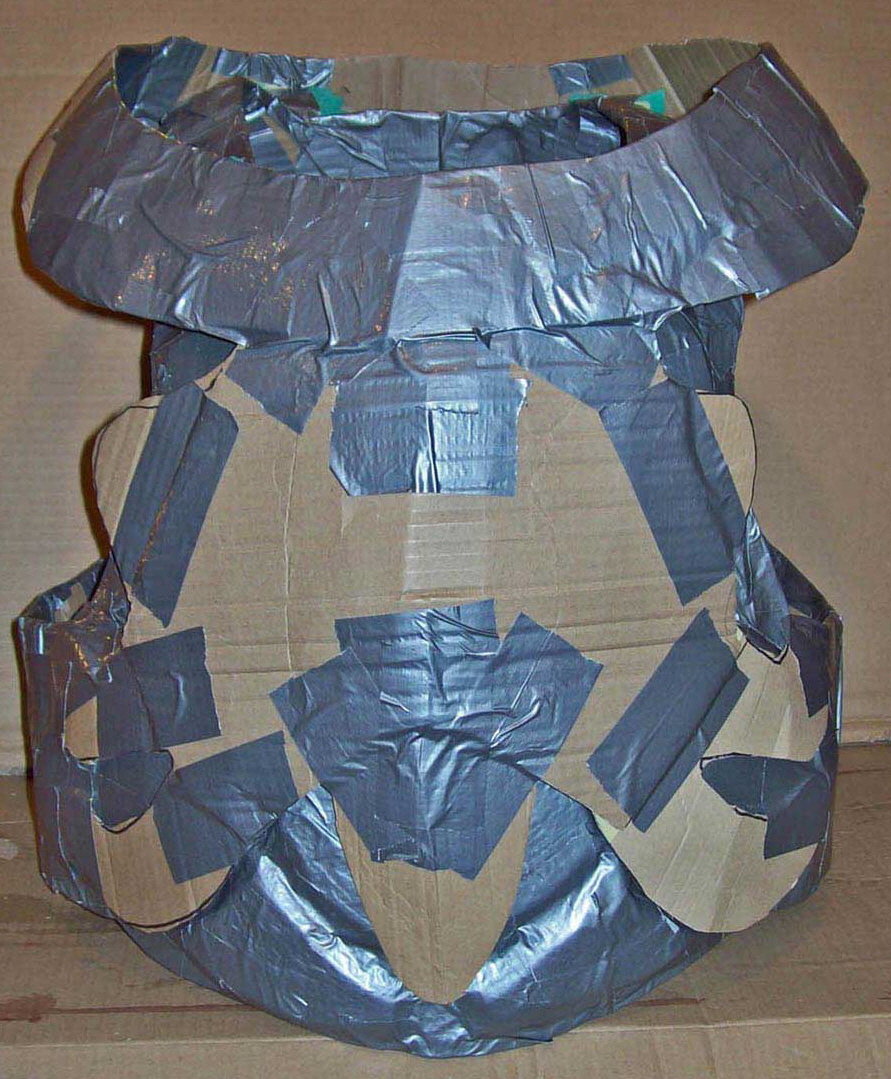
Above: The harness consists of only two components: the bottom layer with the arches and the top layer consisting of breast, collar and back. Built- in paddings arenīt necessary; the stacks of green foam under the collar on the left picture are only sustainers that were omitted in the finished workpiece. Step 2: Cloth and glue. At least 12 layers per tier but not many more... |
||||||||||||||
 |
||||||||||||||
 |
||||||||||||||
|
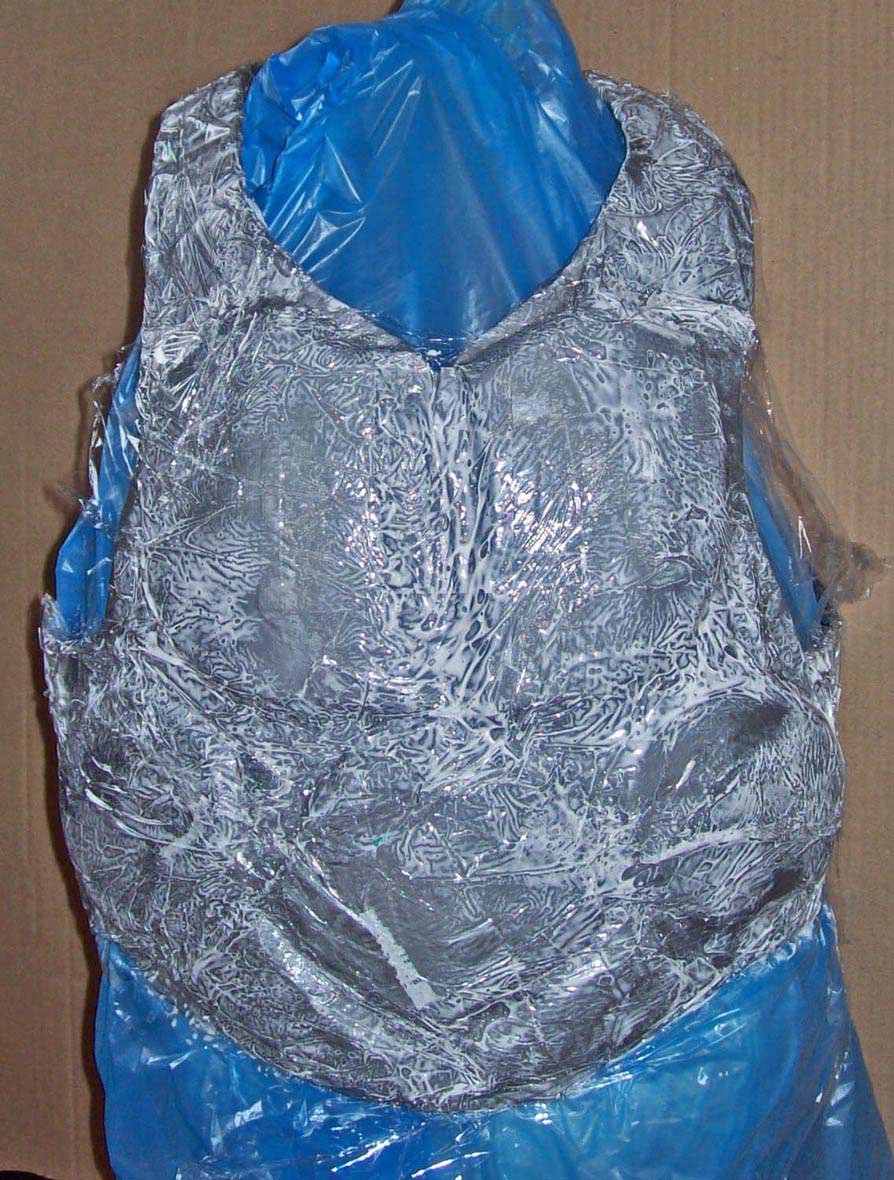
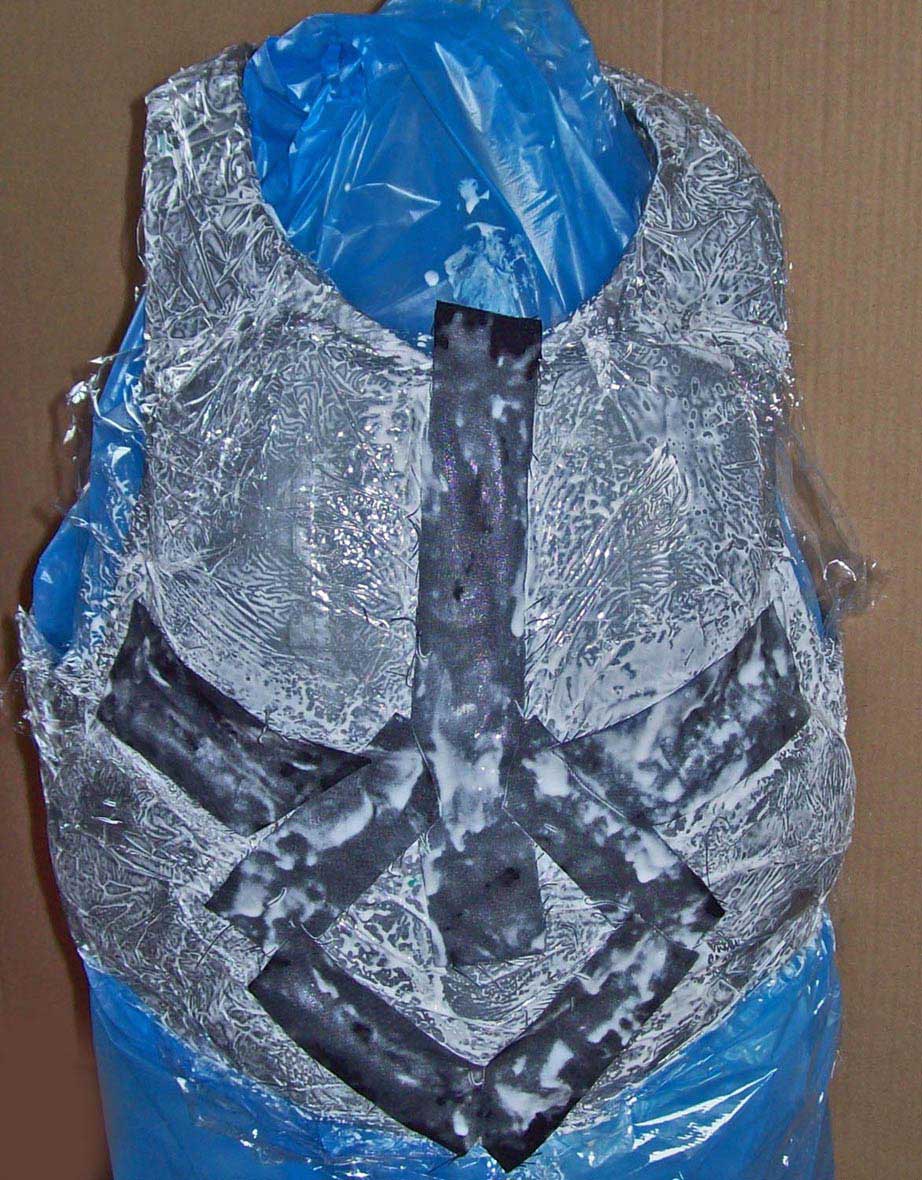
Above left: The form has been completely taped to protect the cardboard and facilitate easy detaching of the workpiece once it has dried. Above right: And after weeklong preparations for building the helmet and the form finally the building starts, first in the recesses: glue // cloth // glue, patch by patch. Spirit of optimism! And better not think about the deadline:the convention is in 4 weeks and I donīt have something to dress! The pictures were taken july 1st, and the convention is at the beginning of august... |
||||||||||||||
 |
 |
|||||||||||||
|
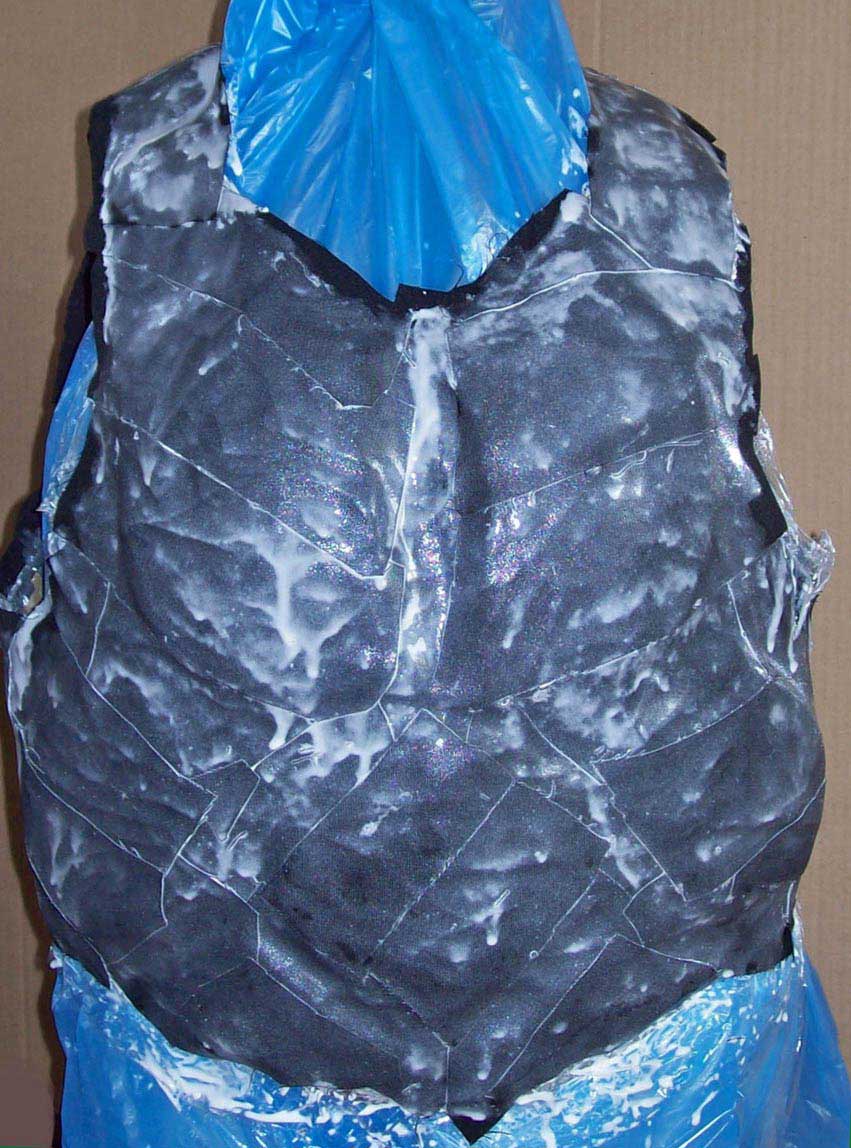
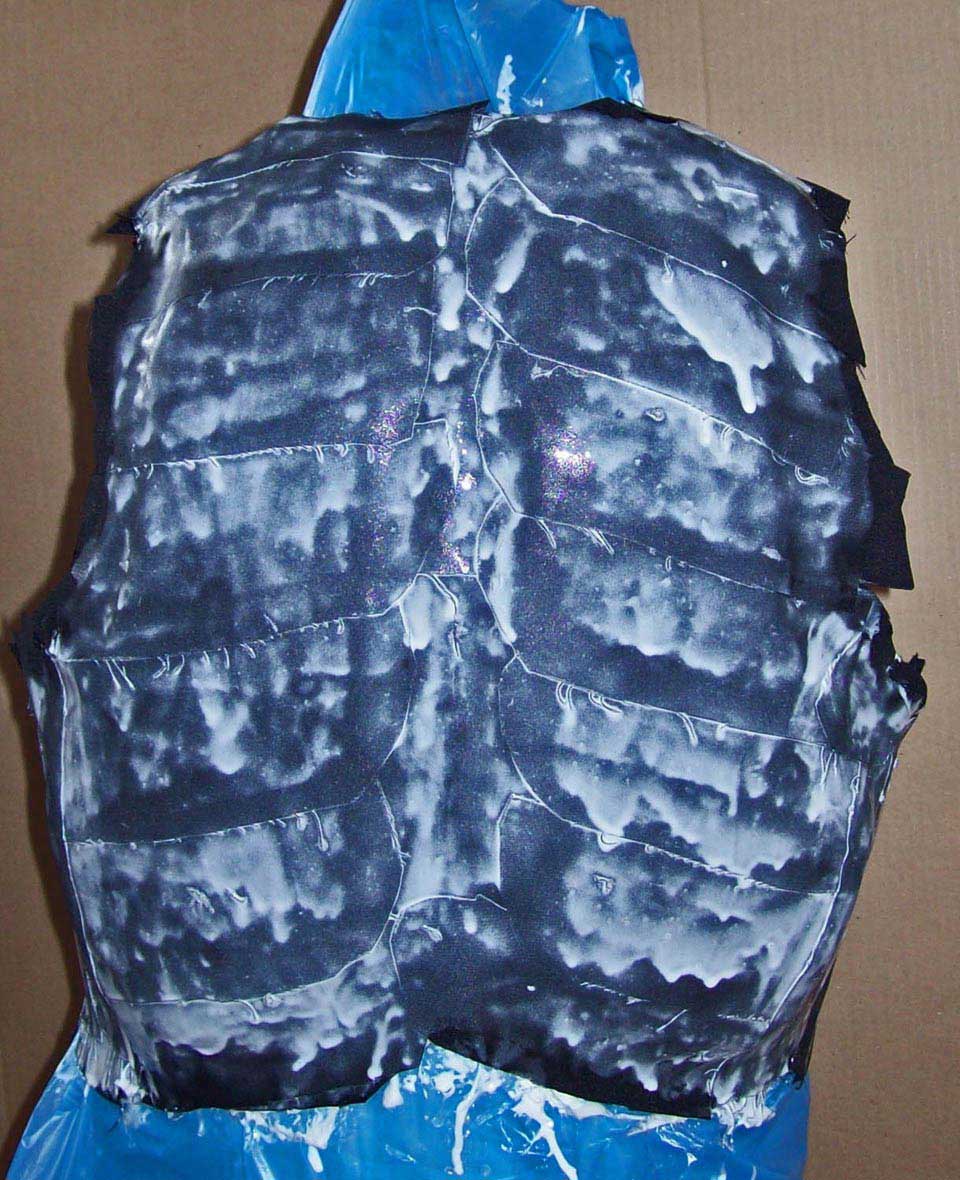
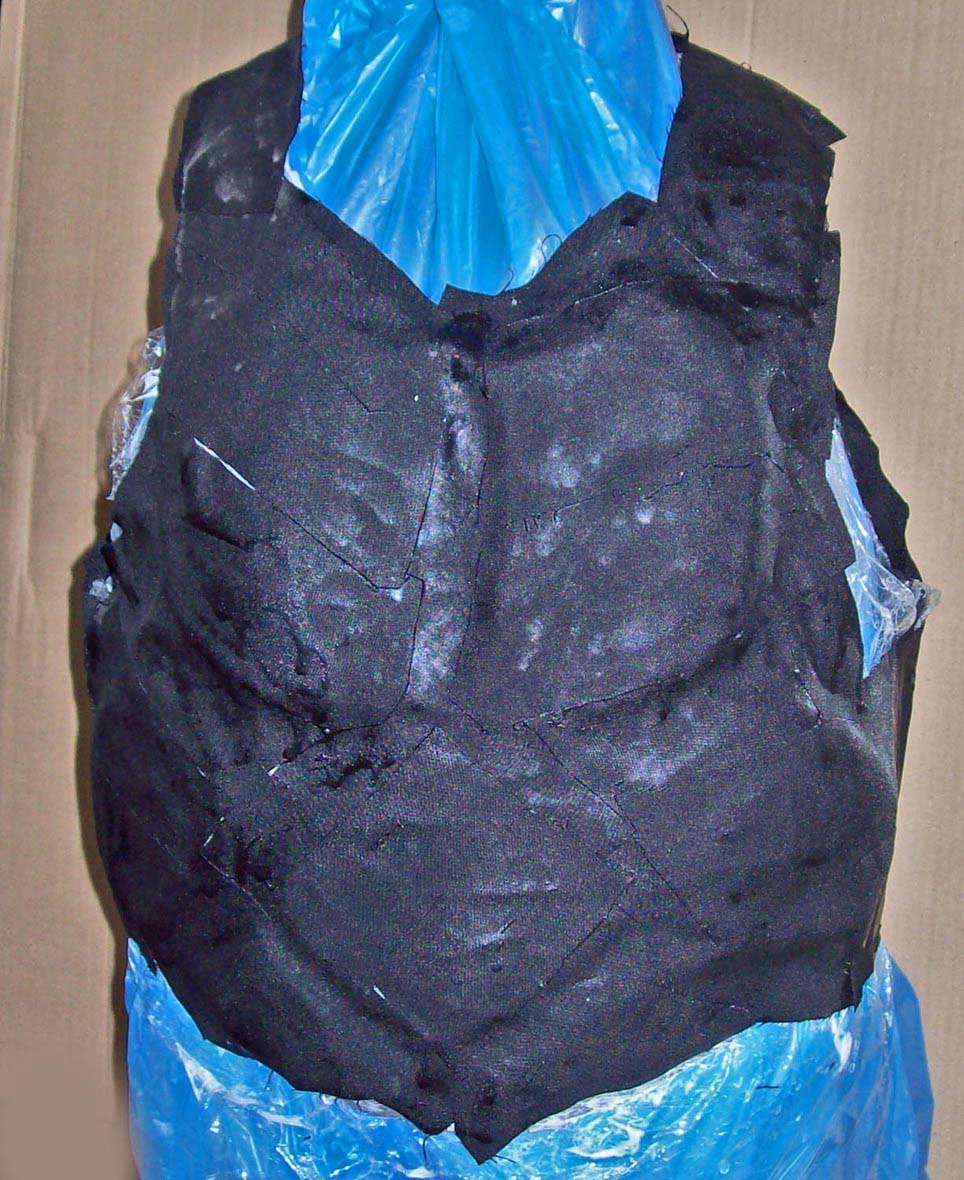
Above left: The first layer; on the left the front side, on the right the back. For the first coating I donīt spare glue because the idea is to soak the cloth as much as possible. For the upper painting I use as little glue as possible to minimize the development of “tears”. I use undiluted glue (D3 wood glue, waterproof, transparently drying) and black cotton linen. The problem with overlappings is: each one is a layer more. Put many of them one onto another and you get bulges. We donīt need that. So it makes sense to put the next layerīs overlappings somewhere else. They alternately can be deliberately concentrated in areas you want to strenghten especially. |
 |
|||
 |
|||
|
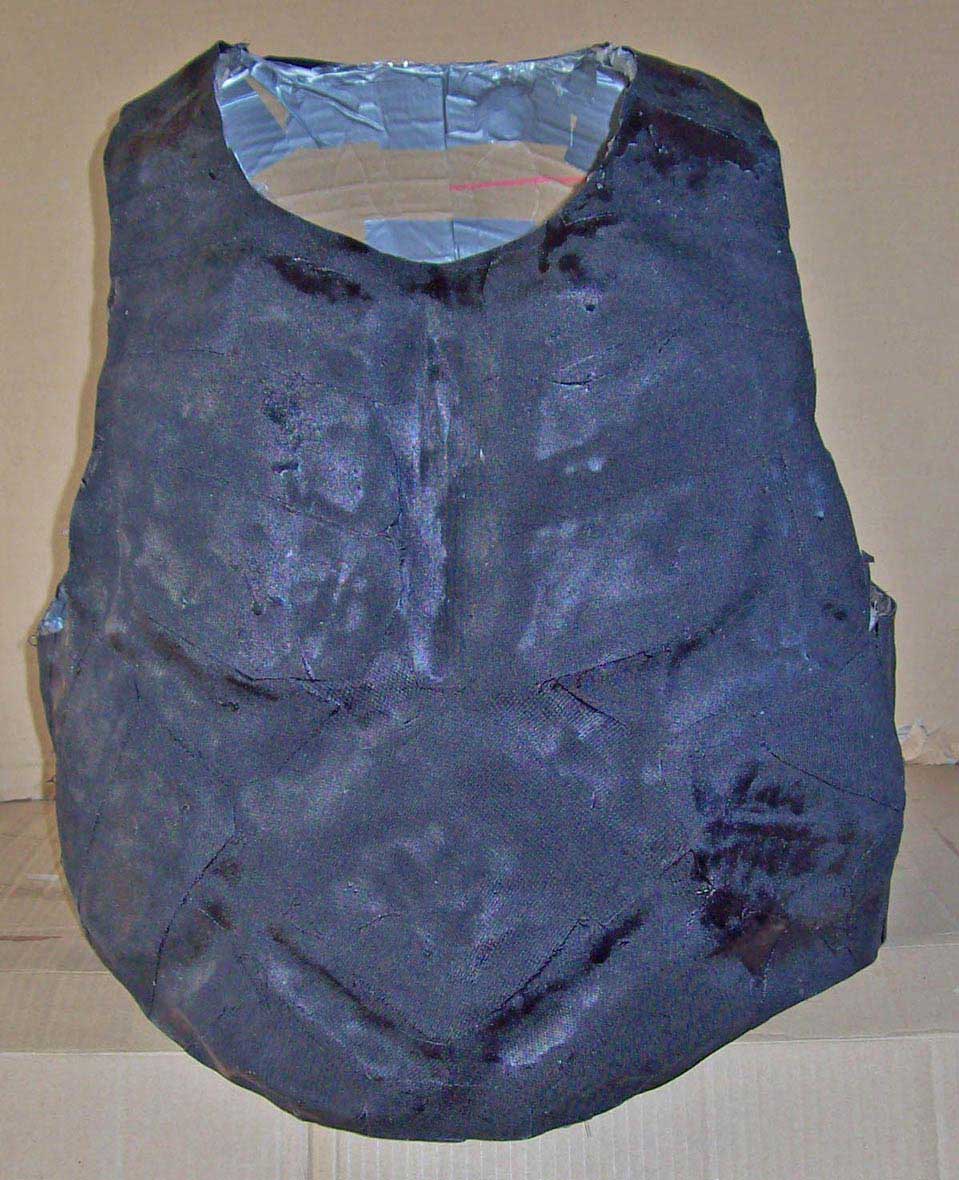
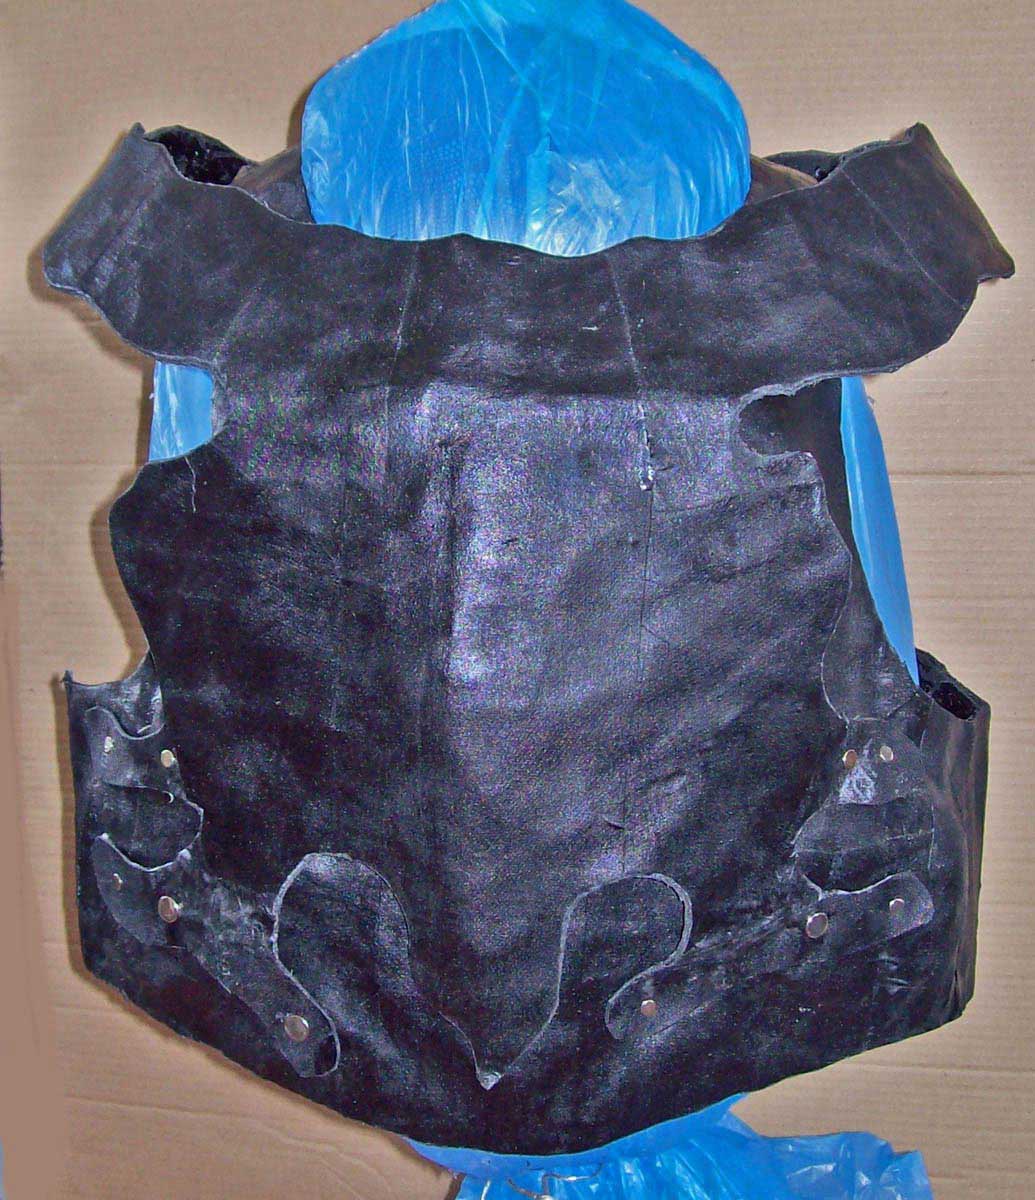
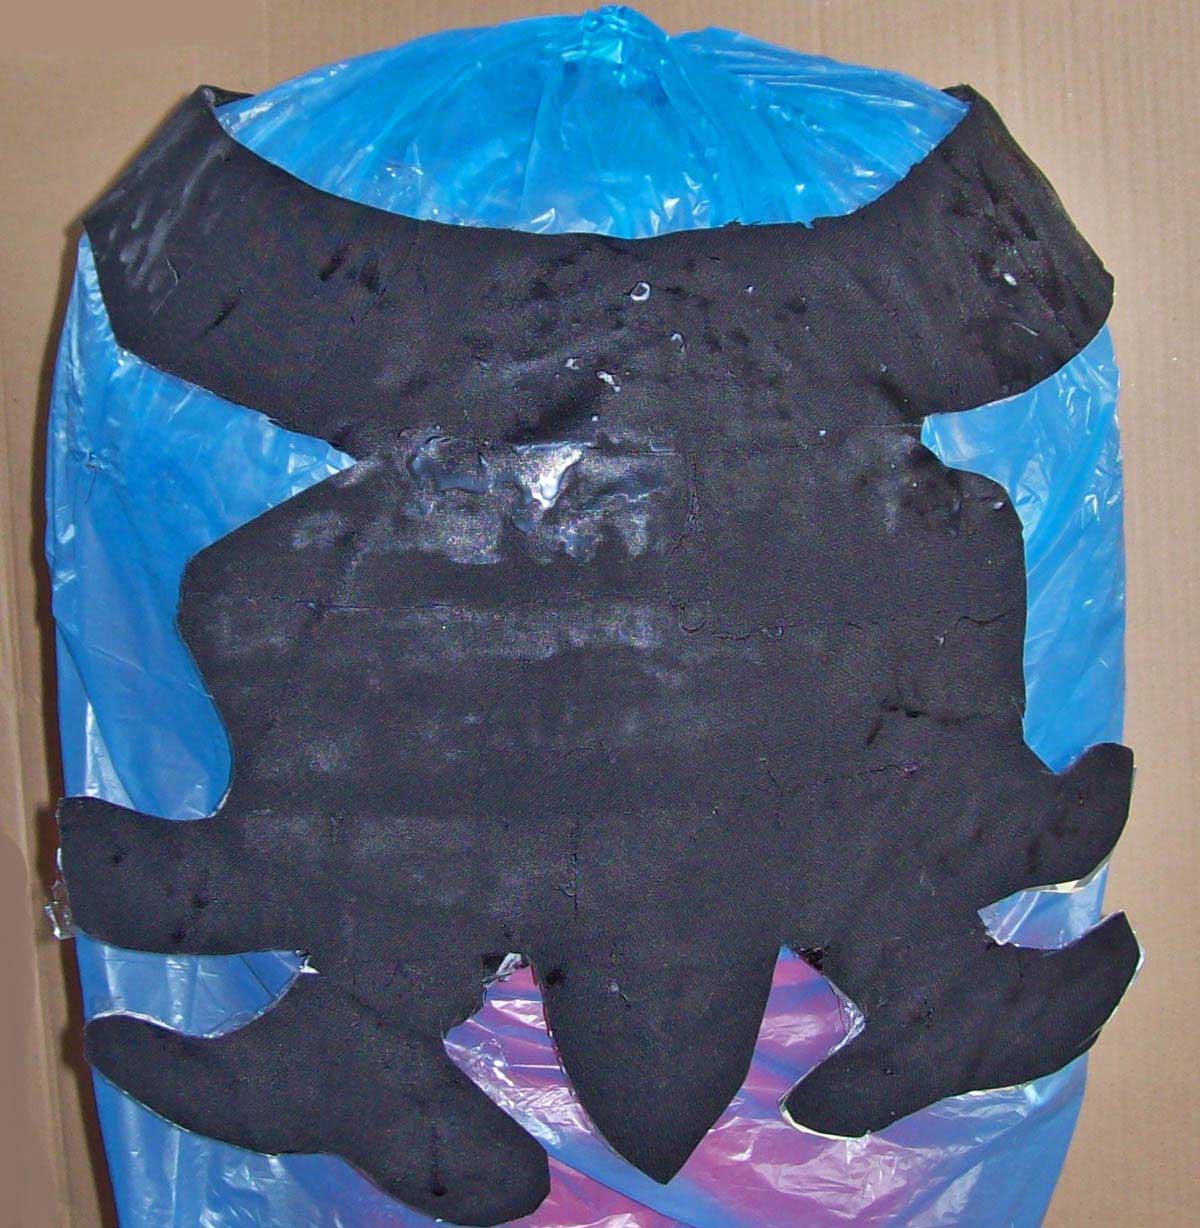
Above left: The transparent drying glue produces a black work piece. That way paint abrasions will only show black, which I consider least annoying. Above right: Therefore every 2 or 3 layers I trim the edges with shears, later plate shears. The final trim is only done when all layers are applied. I build only as thick as plate shears will barely bite. After 4 layers I detache the harness from the form for the first time so it can dry from the underside too. Nevertheless itīs put back on andīll stay on the form until completey finished. So: more layers. The answers to most linothorax- questions are: “build more layers”. |
|
|
|
2 layers per day are possible: one in the morning before going to work and one in the evening when off- duty. Best have only so many components ready as can be processed in about one hour. Hands cleaning: just wash with water. Not a patch on Pattex- clogged fingers (for that I use nail varnish remover- my own cheap one, not my girl- friendīs of course). |
 |
|||||
 |
|||||
 |
|||||
|
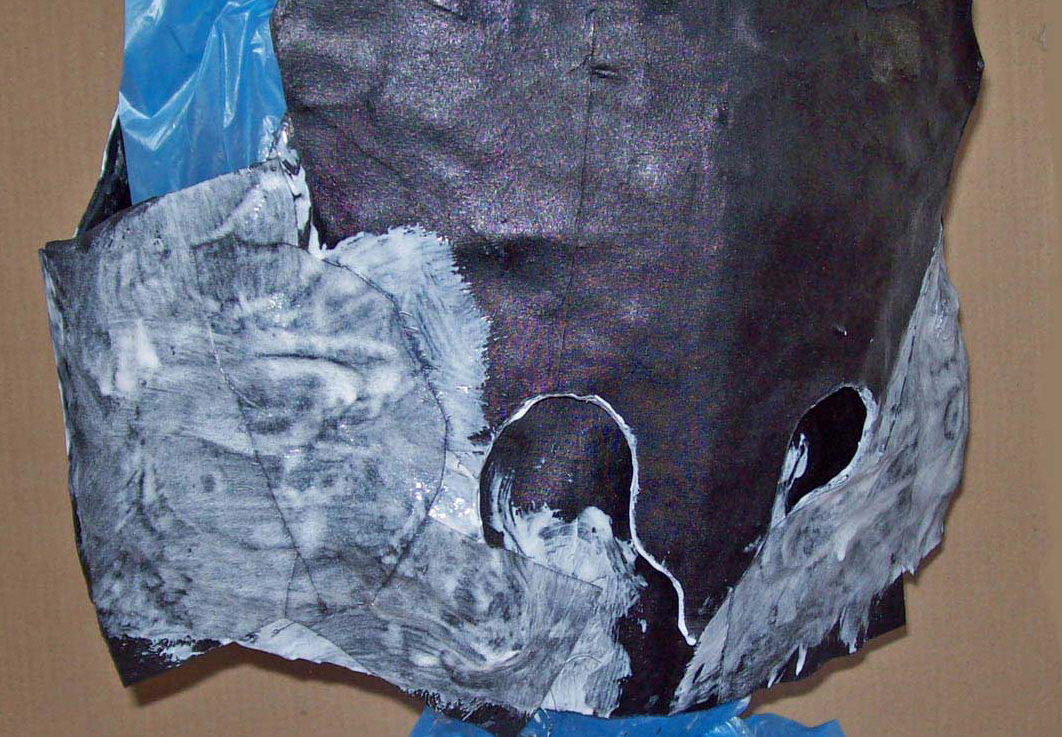
Step 3: Assembly of the harness Above right: Both layers are riveted together. The upper tier is slightly under tension which itīll never loose, thus lifting off a few fingers breadth from the lower tier. The irregular-cut outer collar on the right picture is a bright idea to cope with a symmetry problem that began to arise quite early with the building of the armourīs bottom layer. So I came up with the plan not to give the armour any straight edges but cut all rims asymmetrically. This even contributes to its exotic character: not bad, considering that the warriorīs deity is the “changer of the ways”- and en passant slight symmetry erros are concealed. |
 |
||||||||||
 |
||||||||||
|
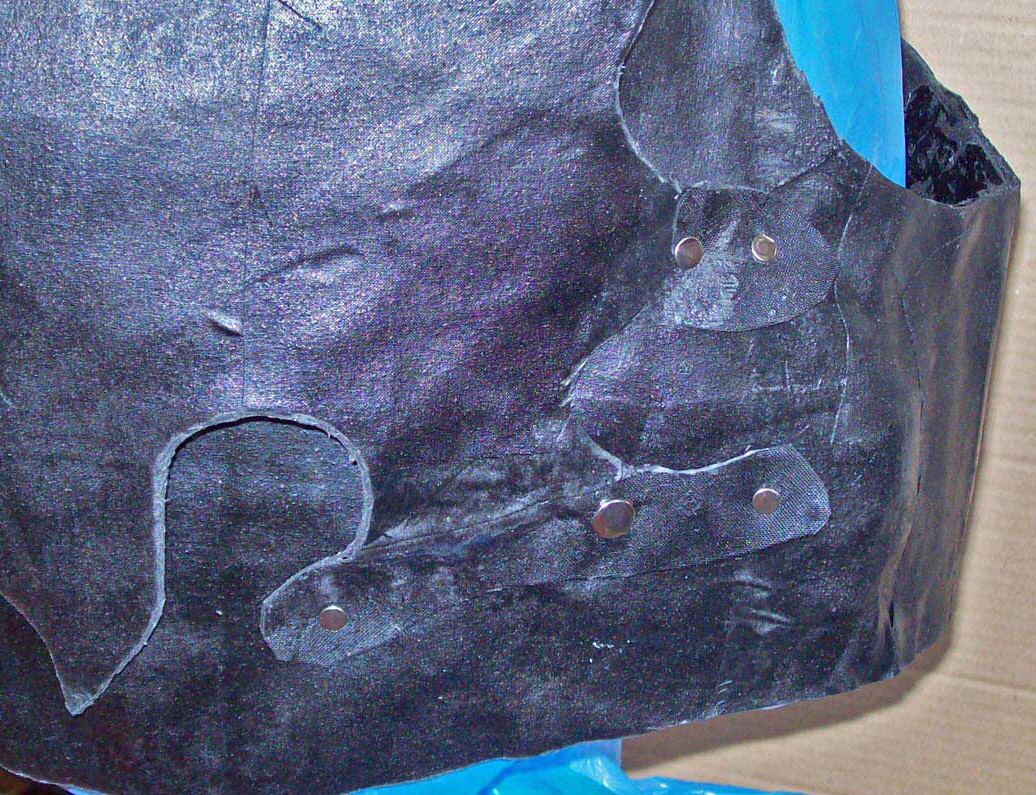
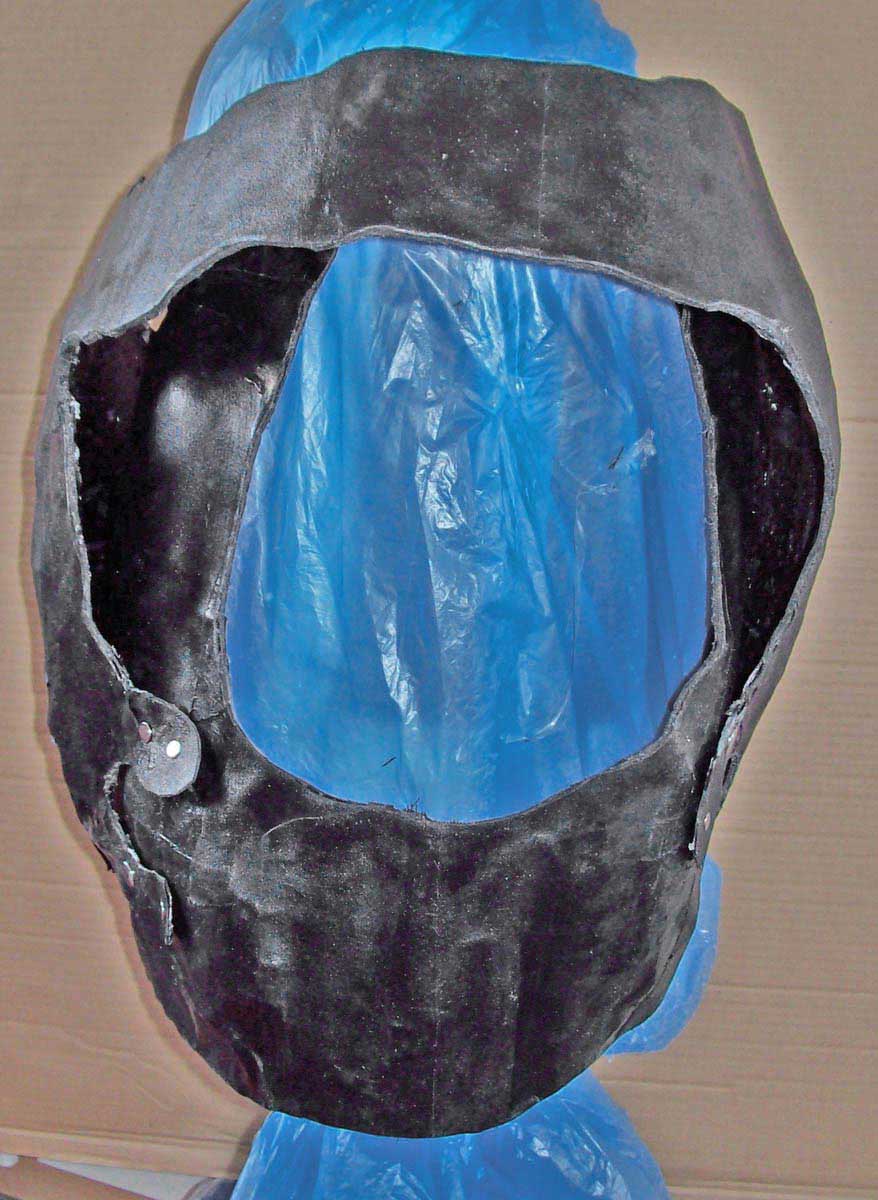
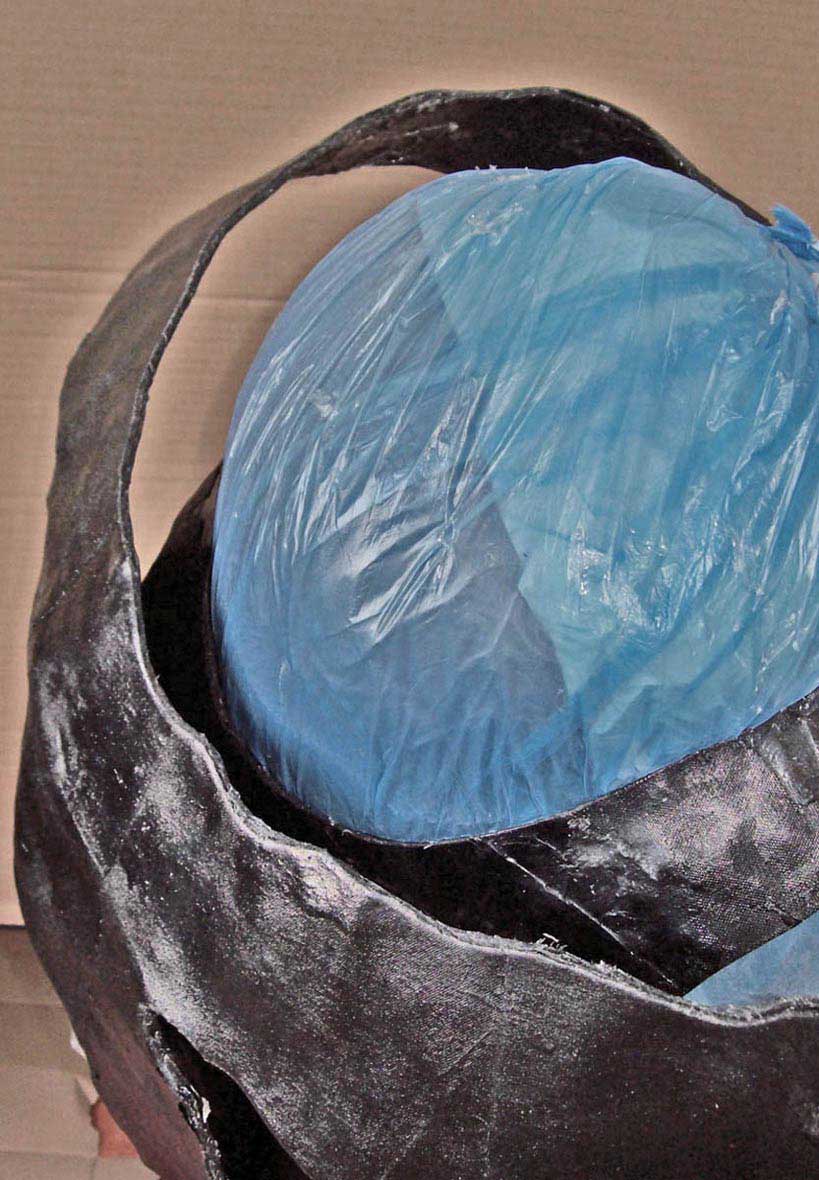
Above left: The hollow rivets on the ramifications of the upper tier. Above right: Covering of the gaps with cloth/ glue, thus producing an coherent surface. “Smooth” it didnīt get, though... The asymmetrical point downward is not glued onto the bottom layer. It belongs to the “crumple zone” and gives in with an impact. The openings left and right from it also serve as water outlets in case it rains into the armour over a longer time period. |
||||||||||
 |
||||||||||
 |
||||||||||
 |
||||||||||
|
Above: the two- layer- concepts of crumple zones An impact-event therefore will not flatten the upper plate against the lower one at once but ellipitcally deform the outer collar first. Later the side shields will make that even harder. The back crumple zones works slightly different: the outer plate will relatively easy establish contact to the inner one but the strong arching of both plates offers no possibillity for conducting energy onto the body and thus they withstand the impact.. |
 |
|||||||||||||||||||||||||
 |
|||||||||||||||||||||||||
 |
|||||||||||||||||||||||||
|
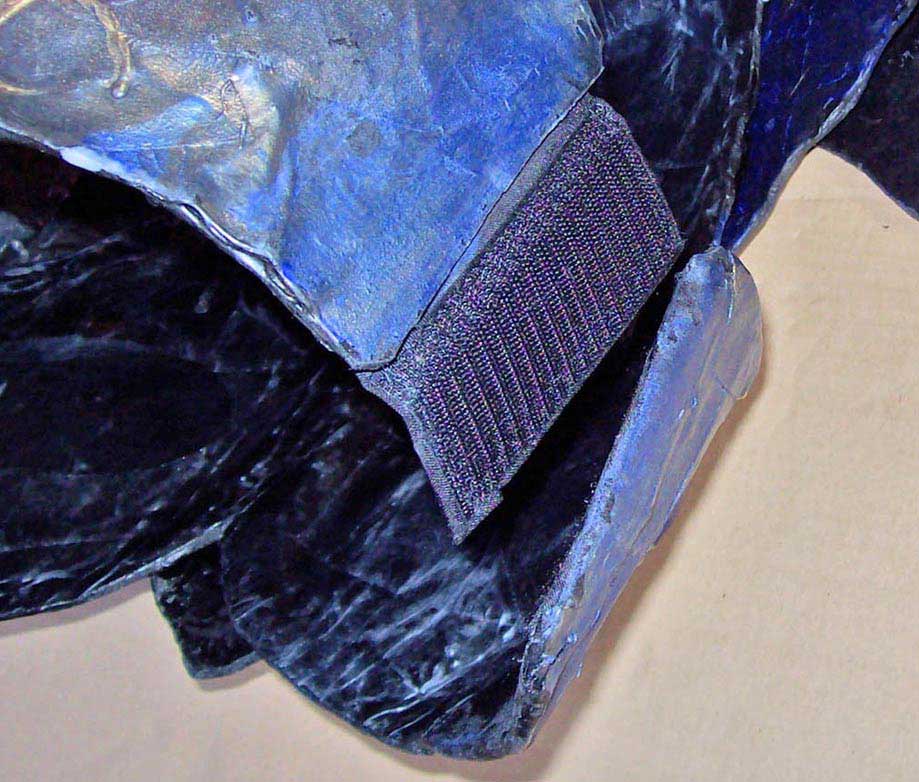
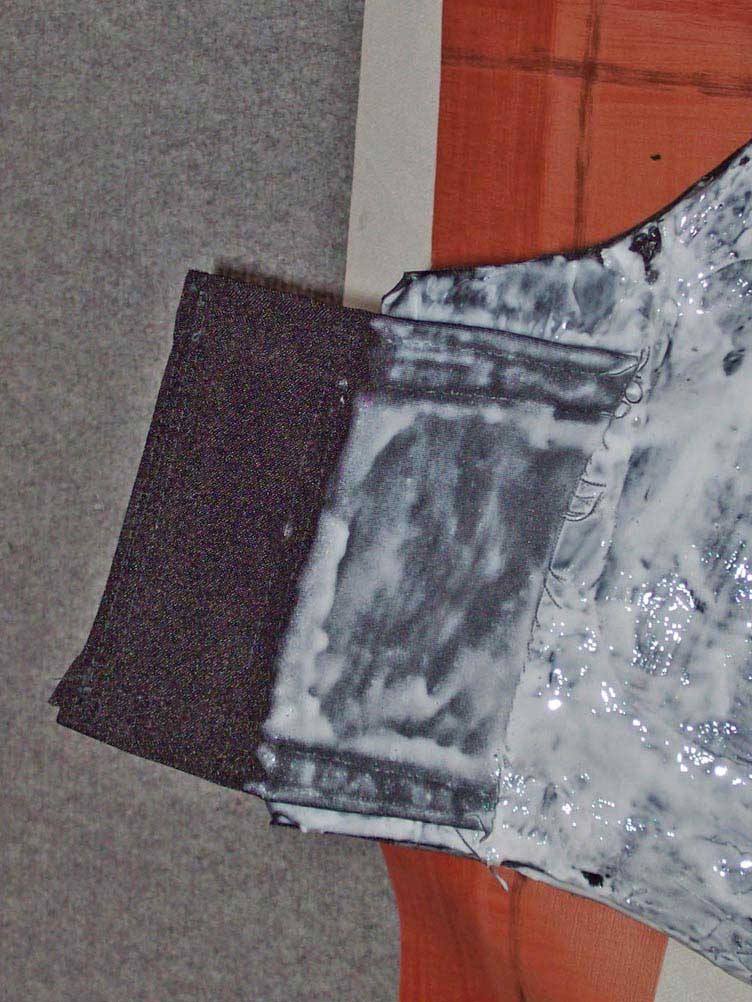
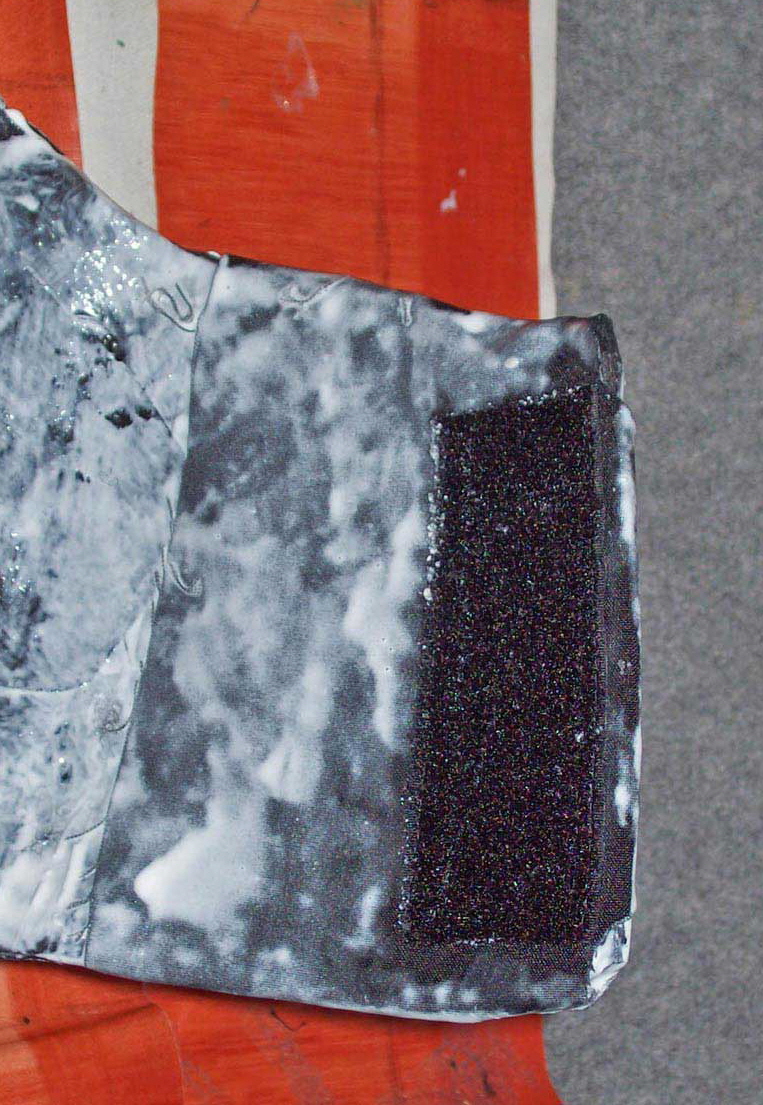
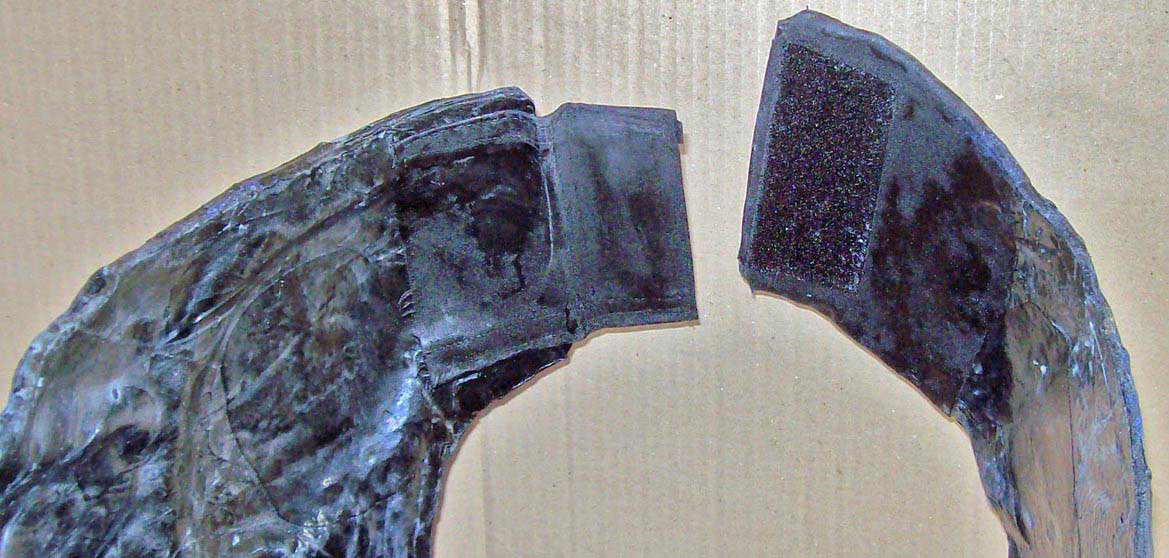
Above: The harnessīside- closings with self- adjusting velcro After both layers of the harness are assembled it is cut under the armholes. It will be closed with broad straps of velcro. Both sides can be opened but in practice I open only one. Velcro is sewed on sufficiently big pieces of cloth and securely glued on. The hook side on the harnessī front plate points outside (so as not to bite the undergarment) and is attached flexibly beside the armourīs edge. The velcroīs fluff side points inward and is glued directly onto the armourīs back plateīs inside (see picture above right). |
|||||||||||||||||||||||||
 |
|||||||||||||||||||||||||
|
Above: on the left the front part of the harness with protruding flexible velcro (hook side outward) on the right the harnessī back with the velcroīs fluff side clued onto the armourīs inside. The harness can be dressed without help and the flexible- mounted velcro strap automatically positions itself in the optimal angle for max efficiency. |
|||||||||||||||||||||||||
 |
|||||||||||||||||||||||||
|
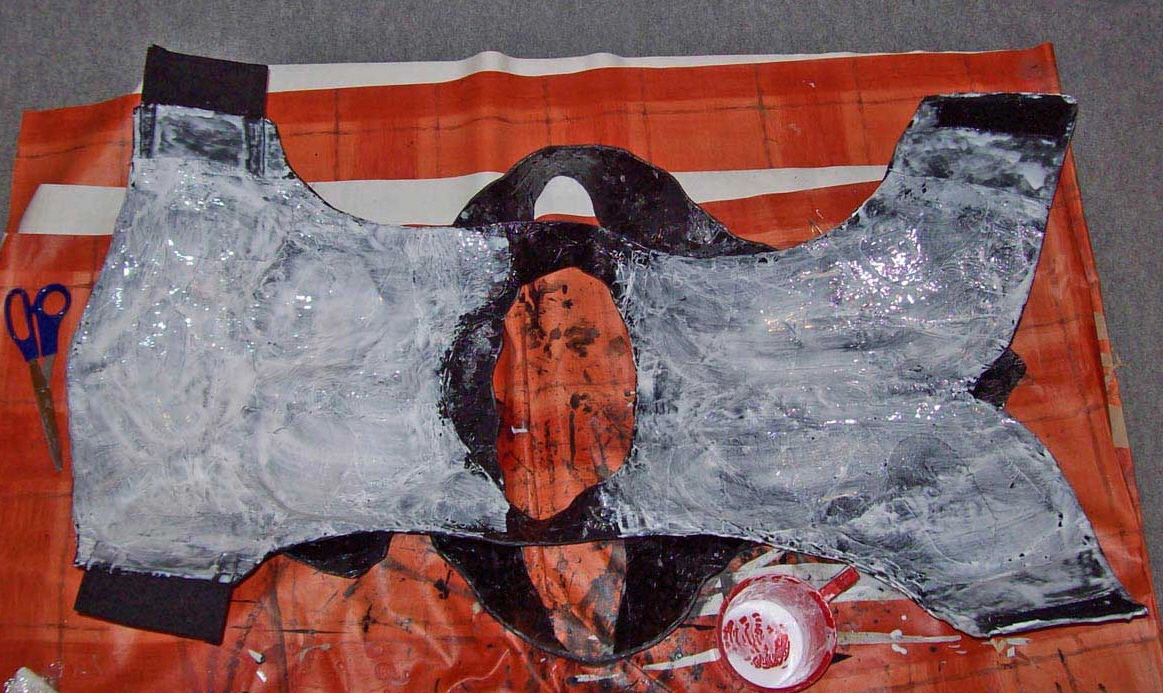
Above: a last layer of glue for the inside. Notice how far the two- walled harness with outer collar can be bend apart. The glue will dry transparent, rendering the inside black again. After wearing it for a few days in wet weather the insideīs colour turned whitish. The effect was revised when all was dry again. The armourīs consistency didnīt change, though. The harnessīvelcro fastenings are already attached. |
|||||||||||||||||||||||||
 |
|||||||||||||||||||||||||
 |
|||||||||||||||||||||||||
|
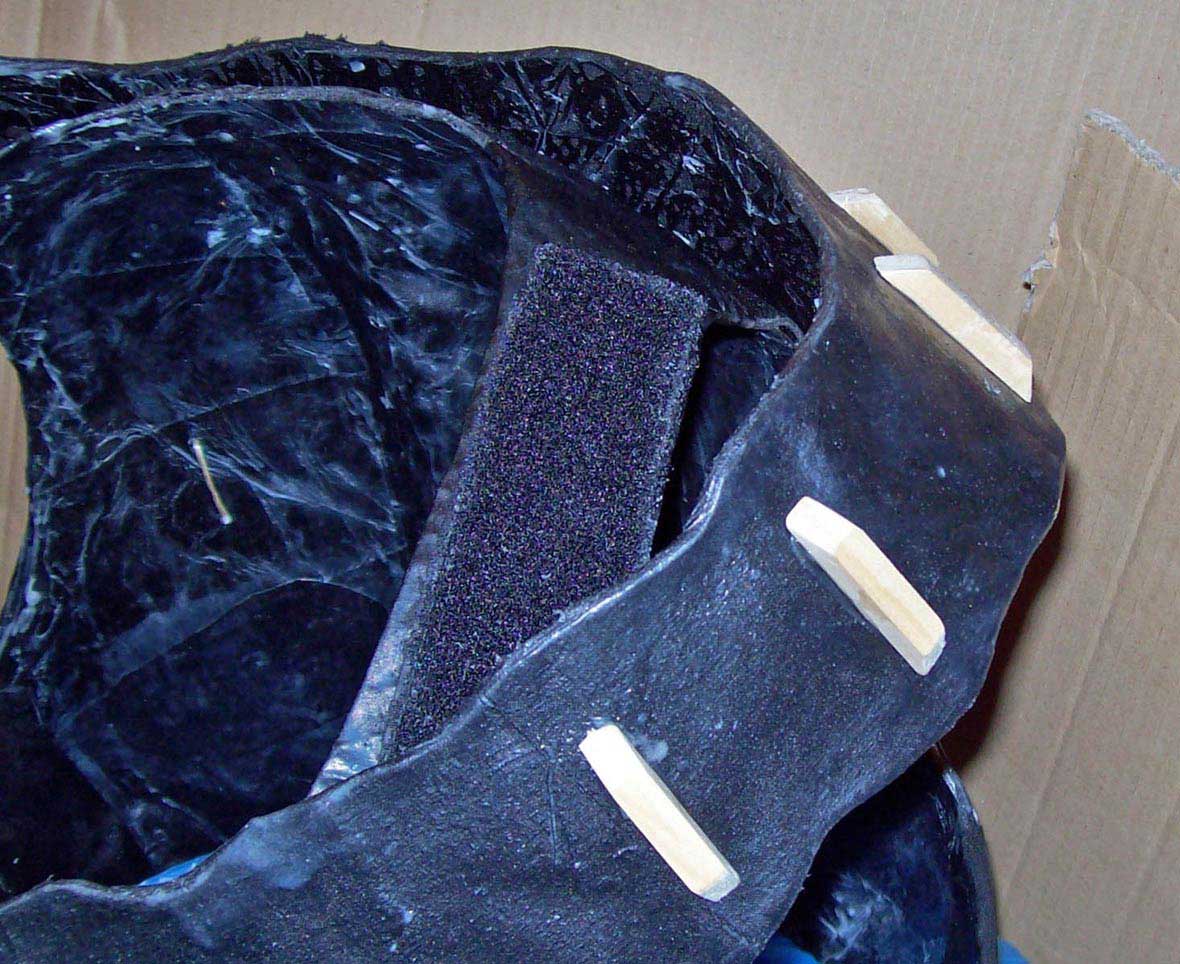
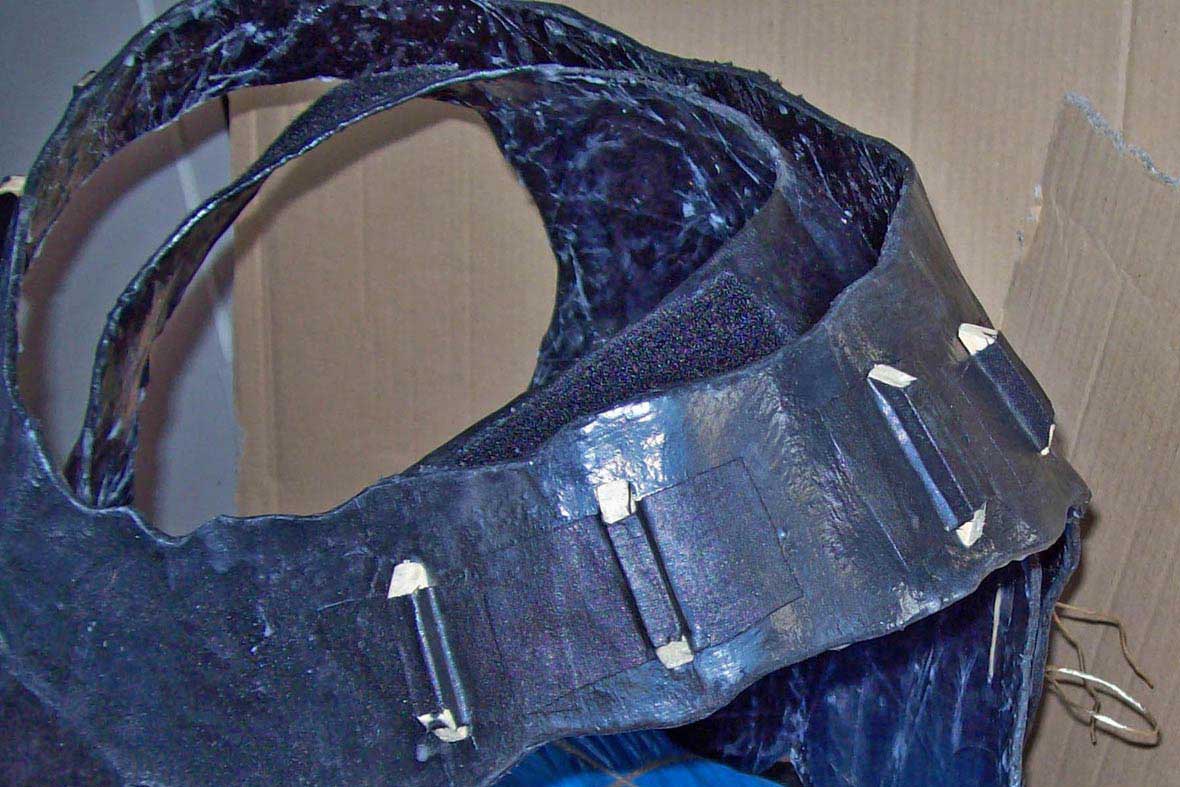
Step 4: shoulder shields and final assembly The velcro tape on the shoulders of the inner layer will be used to establish the correct position of the side shields. When attachment points and required length of the shield straps are determined, everything will be glued together and covered with a few layers of composite.. |
|||||||||||||||||||||||||
 |
|||||||||||||||||||||||||
 |
|||||||||||||||||||||||||
|
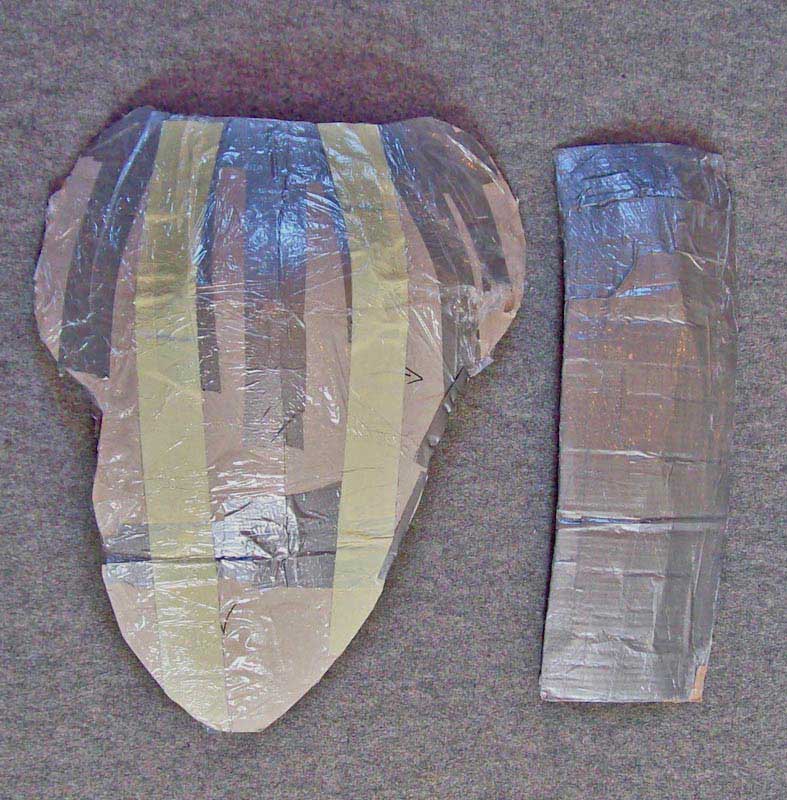
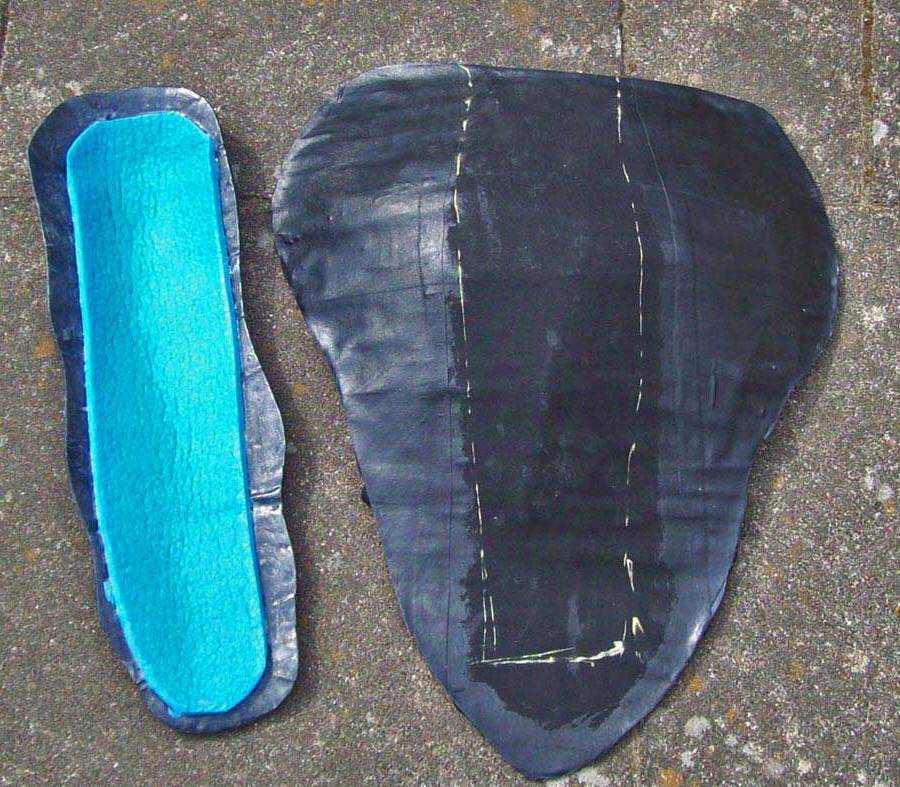
Above left: The shieldīs forms are made of arched cardboard, tape and clingfilm (Iīd use only tape meanwhile). Each shield has its own form; thus they can be manufactured simultaneously. Above right: 12 layers of cloth later: the lower plate hasnīt been glued in the contact zone of the foam because Iīll use Pattex for it which wonīt bond with glued surfaces. The lower side of the upper plate also isnīt glued but left “textile”. When the shields are assembled Iīll glue any leftover areas. |
|||||||||||||||||||||||||
 |
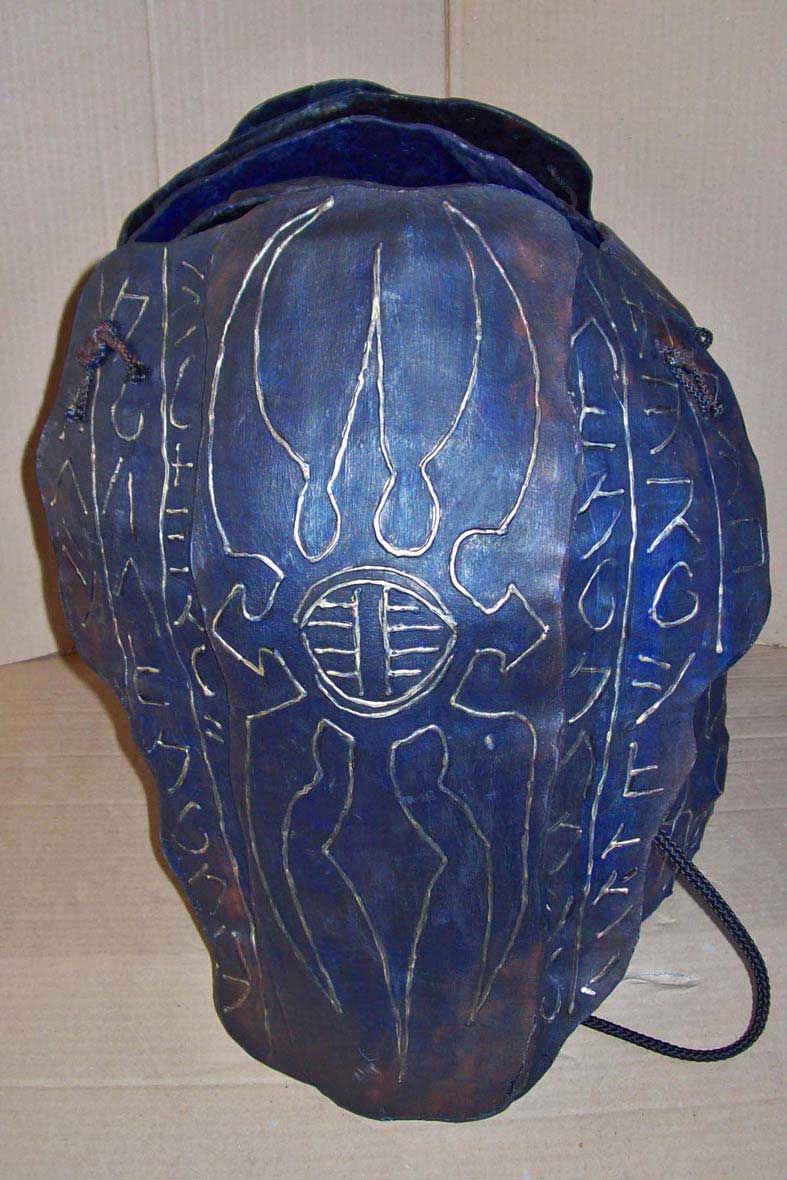 |
||||||||||||||||||||||||
|
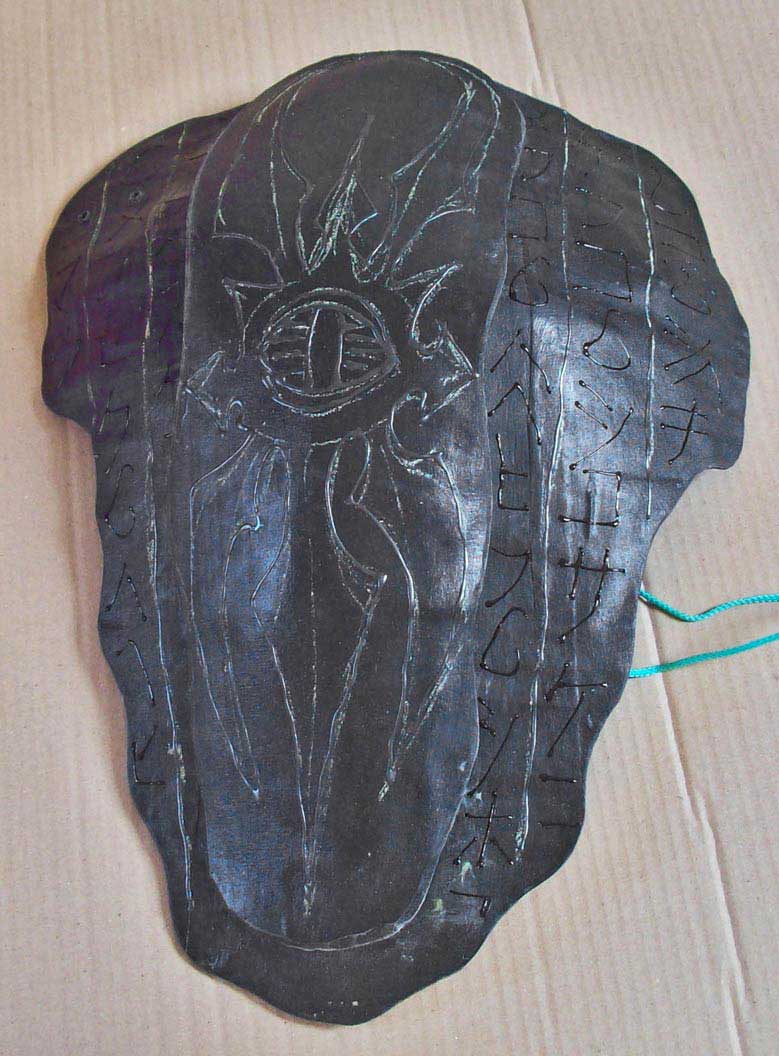
Above left: runes und symbols made with with black window- color- contour. The ornaments were then fixated with a mixture of 3-4 parts glue and one part acrylic paint. Above right: for the sake of completeness the painted shield- but thatīll come later... |
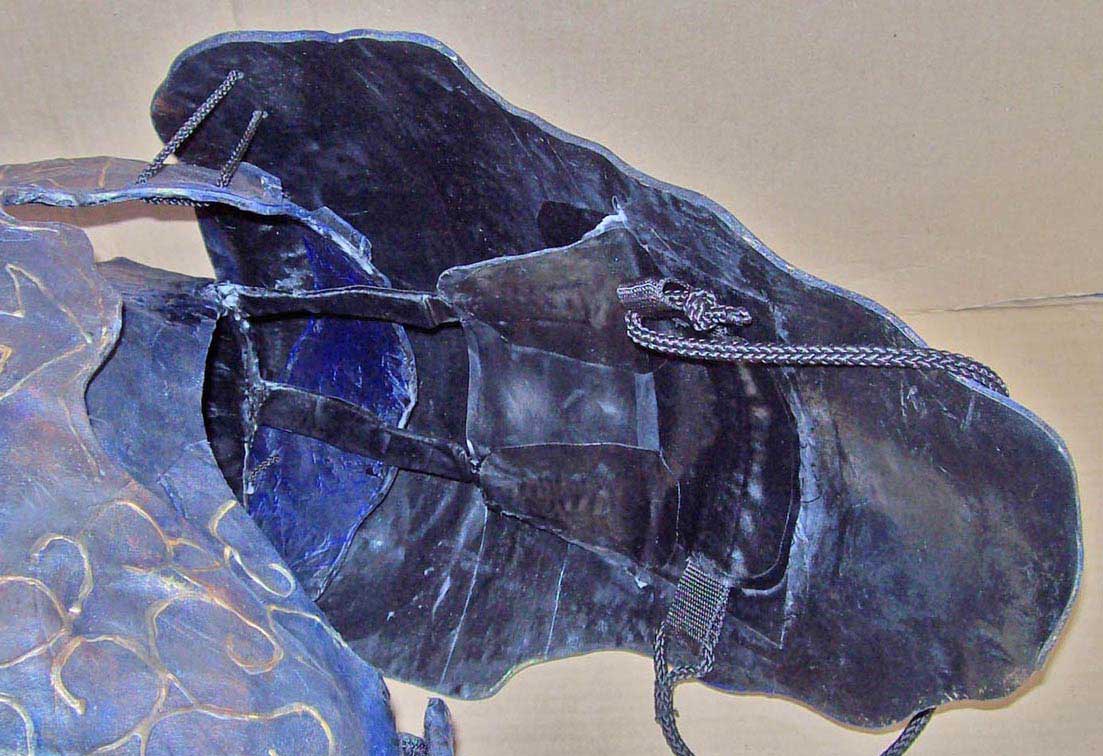 |
||||||||||||||||||||||
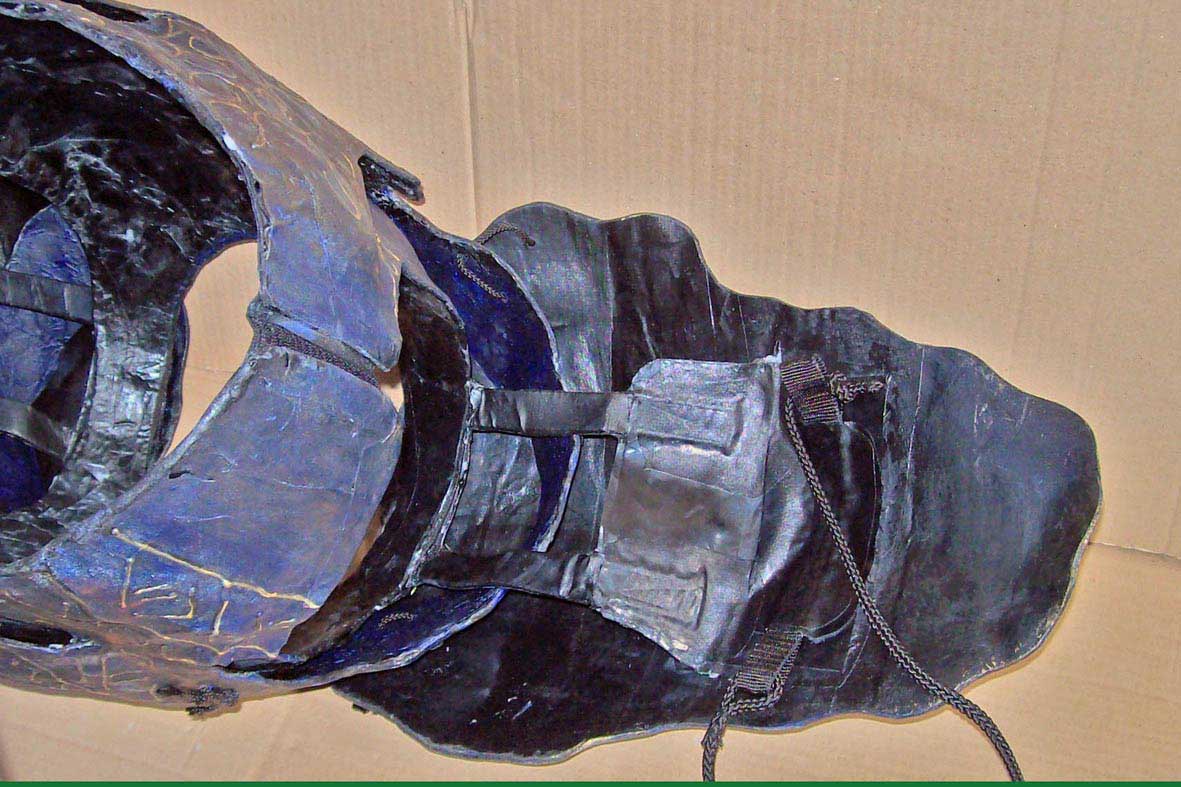 |
||||||||||||||||||||||
|
Above: a side-shieldīs attachment from below. From the middle of the shield instead of long straps a single flexible piece of composite only 3 layers strong branches below sholder-height into two tearproof straps (cloth-glued webbing). These belts connect in front of and behind the shoulders to the inner layer of the harness. Thus the side shields can not only hinge up like a classic knightīs shoulder (pauldron) but can smoothly be pushed up, thus following the armīs movements much better. A cord under the upper arm prevents the shield to move more than necessary. The use of glued webbing straps and flexible lino- parts made of only 3 layers of cloth instead of leather straps means that all attachments only move when theyīre required to rather than “dancing” with every step. Thus the big side shields are well under control. |
||||||||||||||||||||||
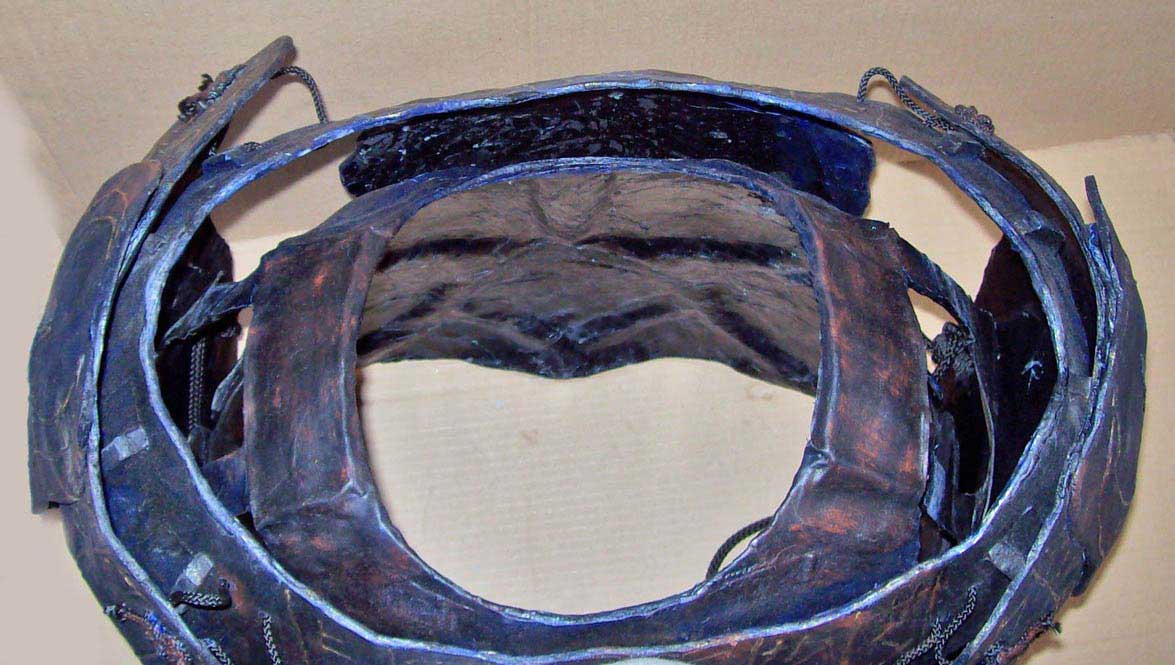 |
||||||||||||||||||||||
 |
||||||||||||||||||||||
|
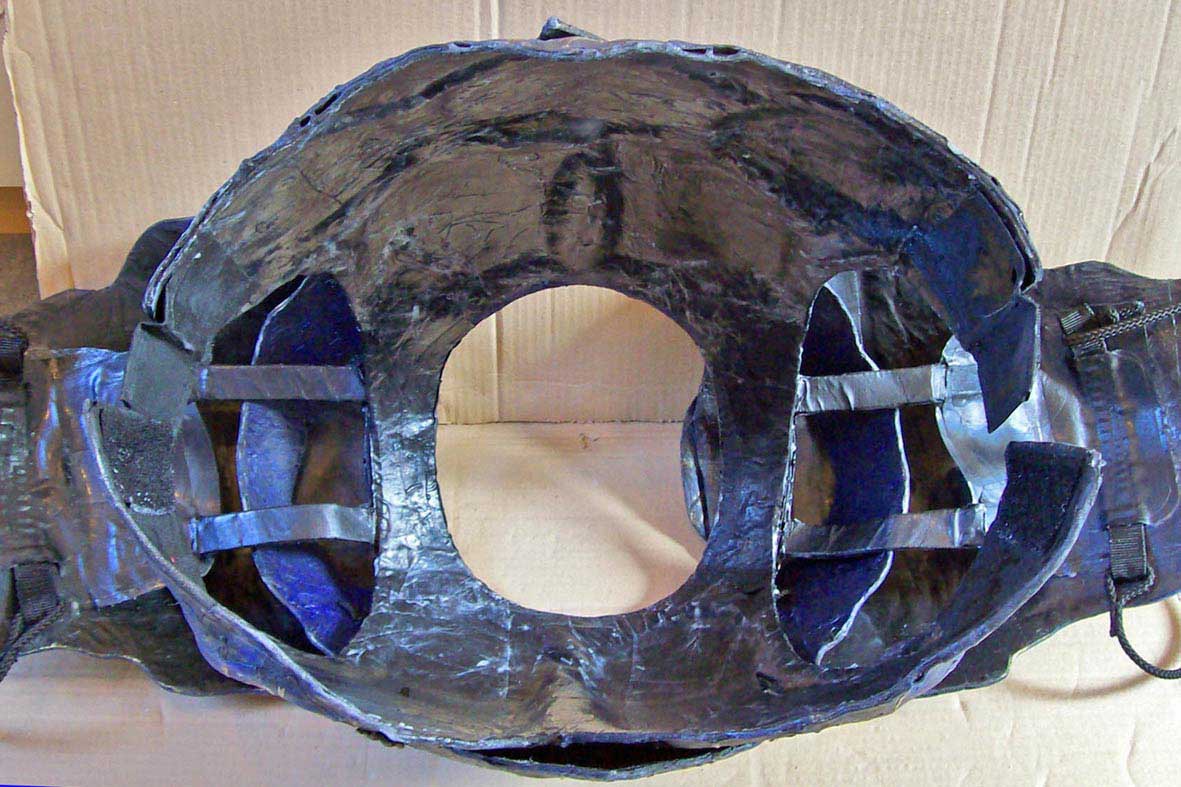
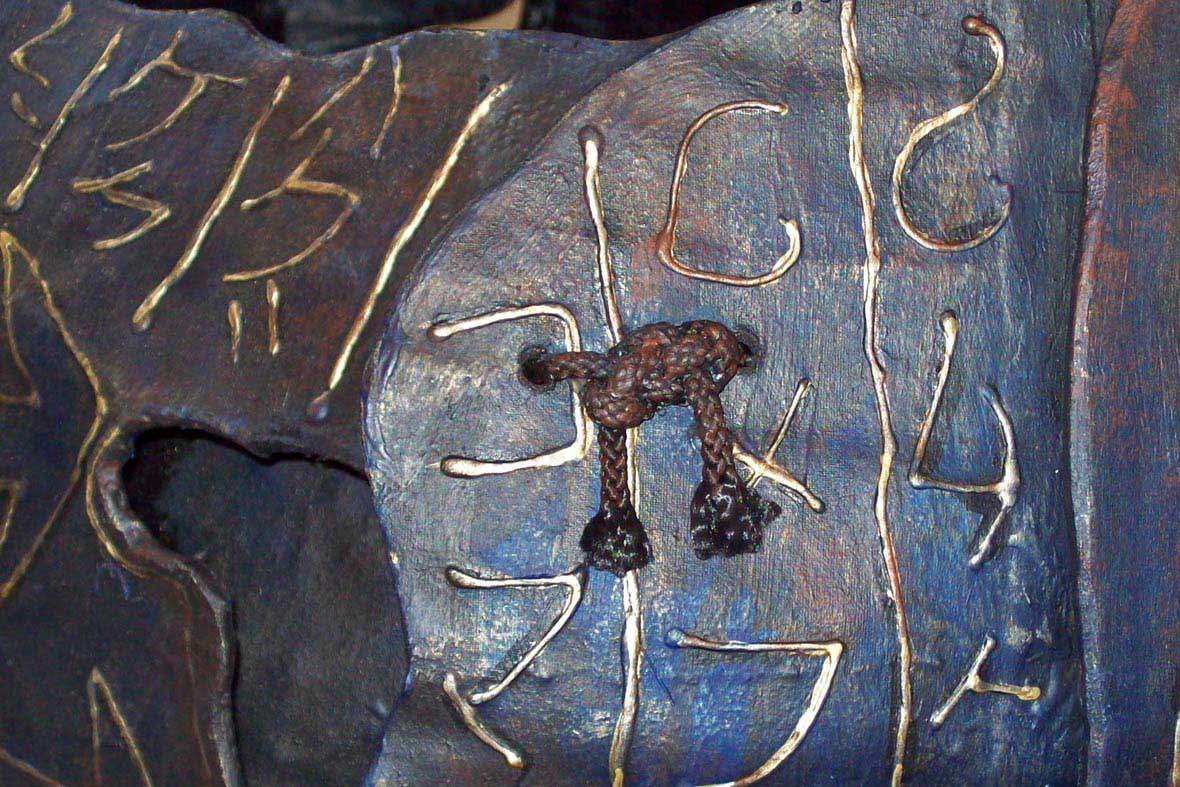
Above left: view from below into the harnessī inside Above right: from above. Each shoulder plate is stabilized at the top front and back with loose cords that restrict the plateīs movement range. From the outside the cordīs knots are visible. |
||||||||||||||||||||||
 |
 |
|||||||||||||||||||||
|
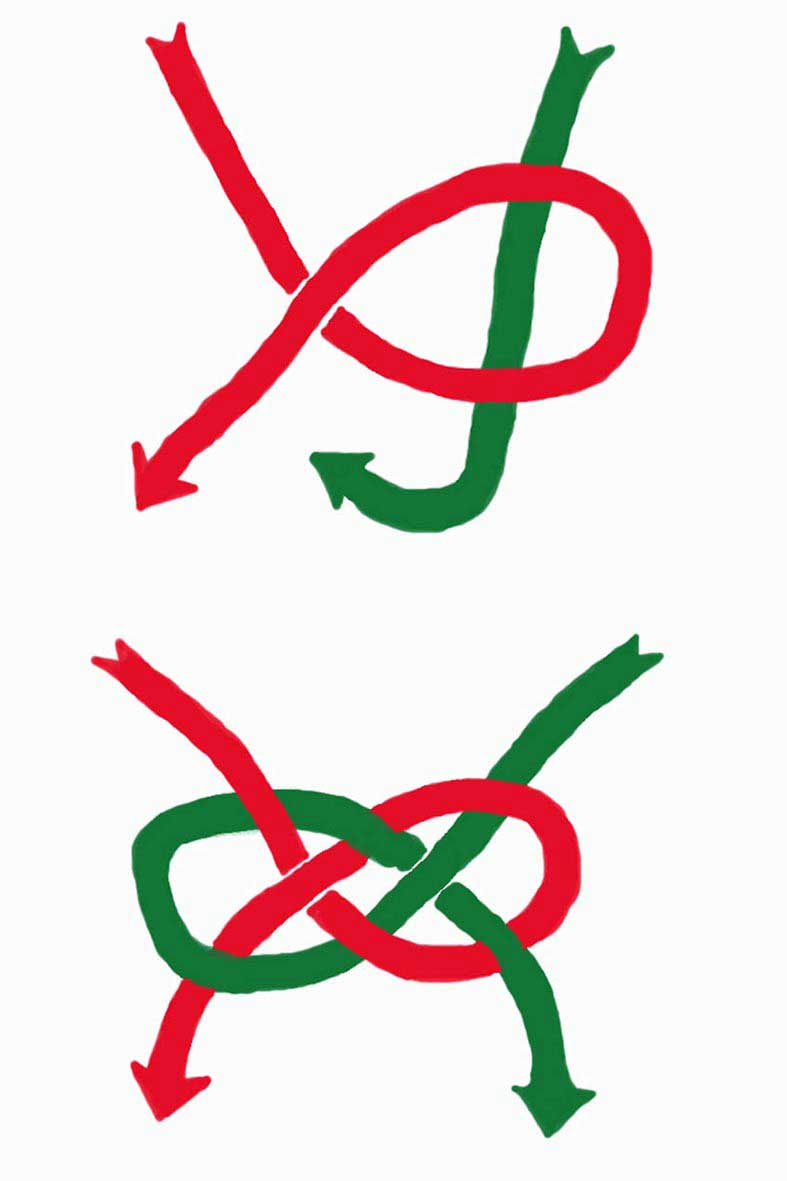
Above: One of 6 chinese oder “Josephine”- knots. Actually a large-scale decorative knot it wasnīt meant to really hold anything- but I glued it on and now it does. |
||||||||||||||||||||||
 |
||||||||||||||||||||||
 |
||||||||||||||||||||||
 |
||||||||||||||||||||||
|
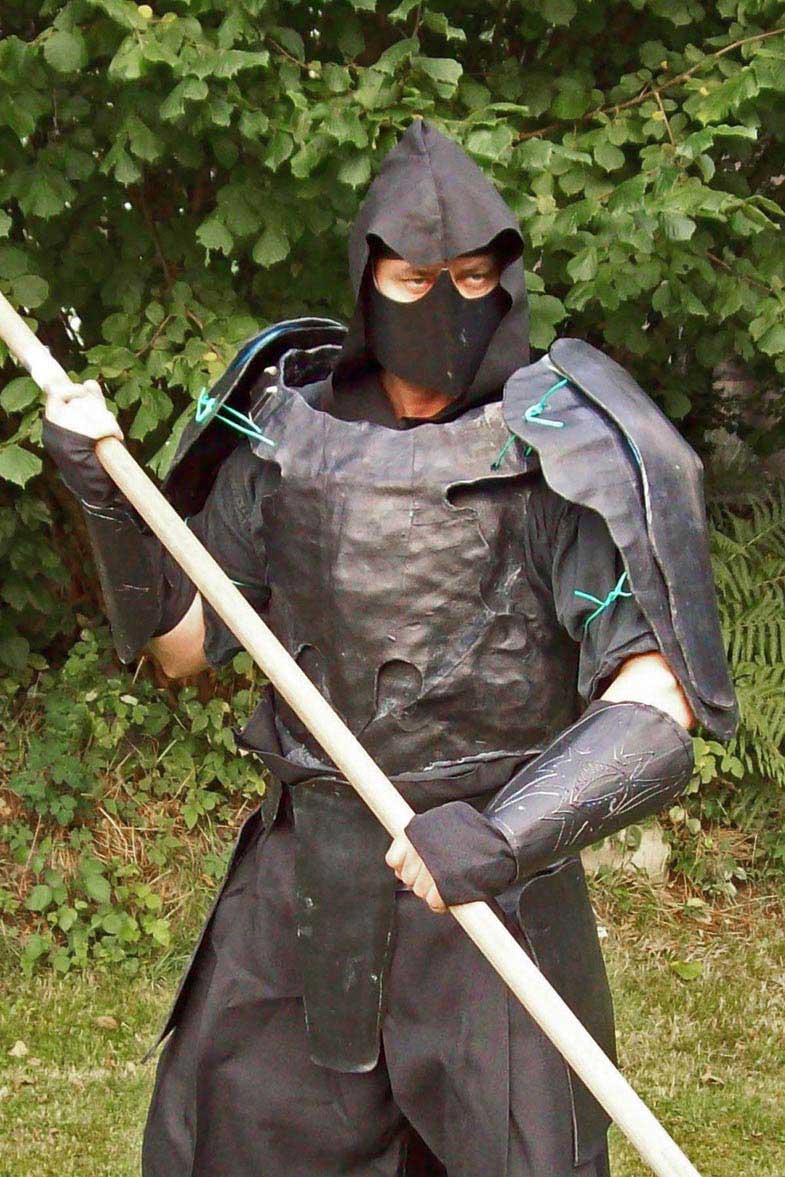
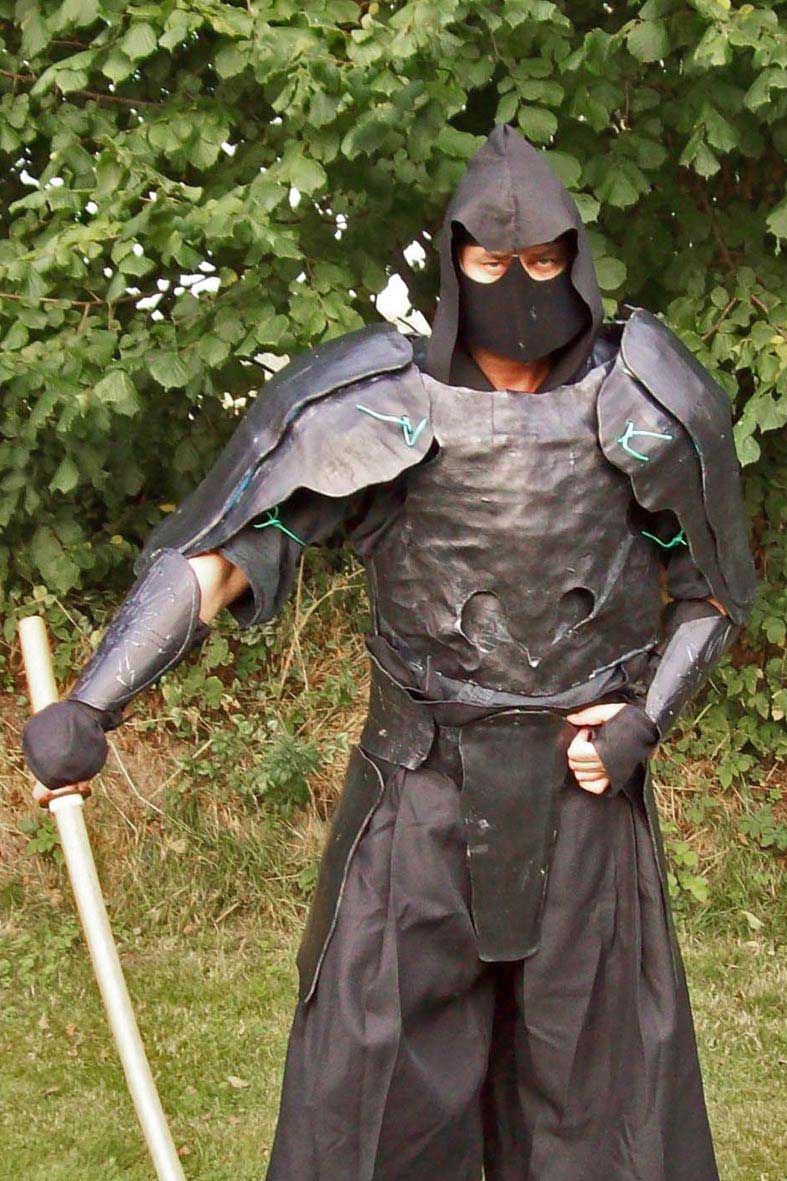
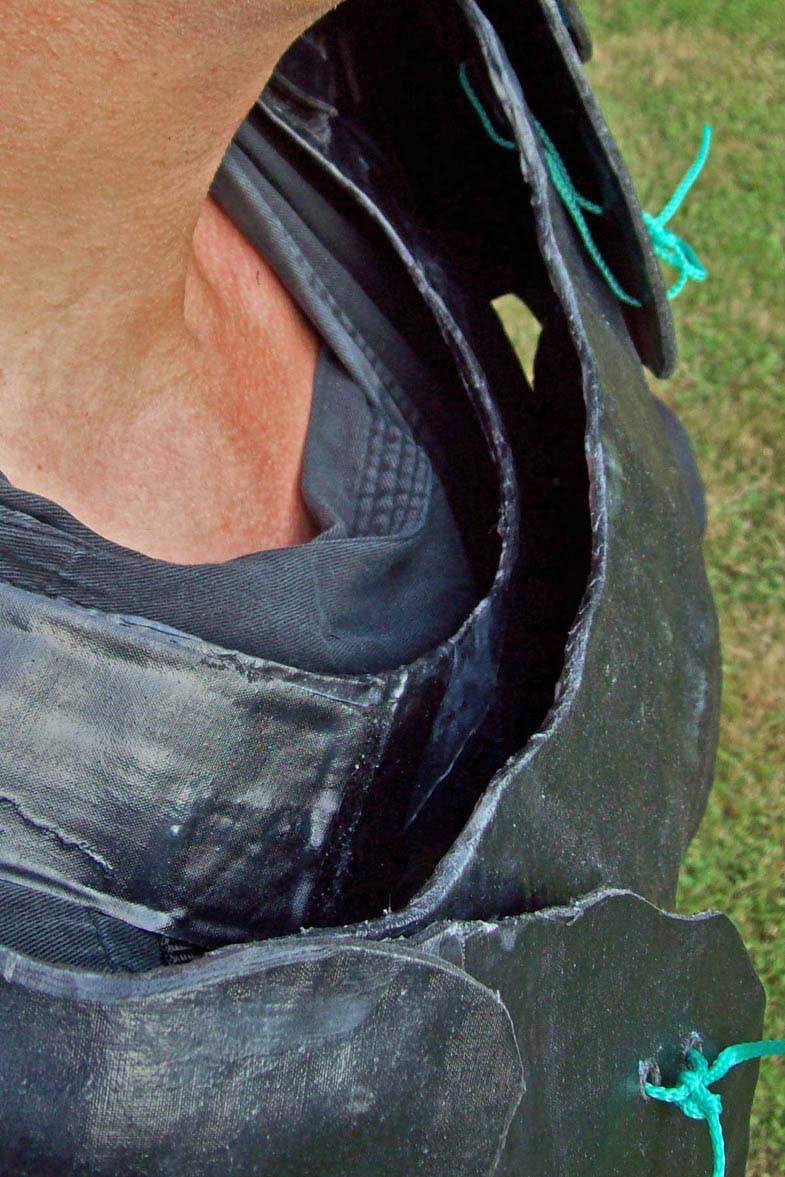
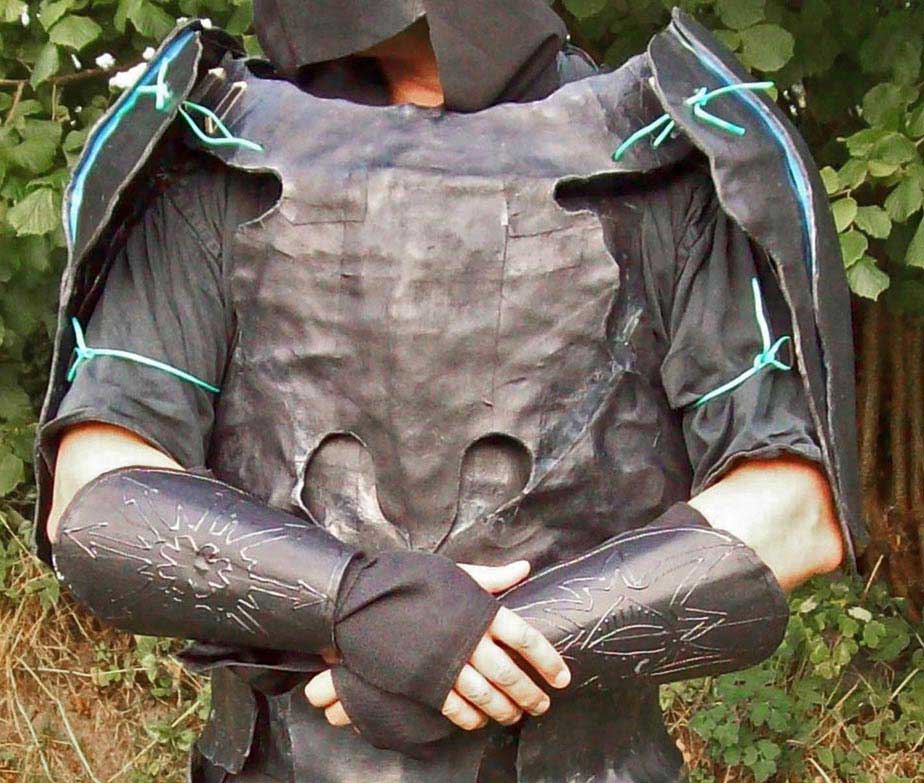
Above: pictures from the test phase. The armour is fully assembled but yet neither embellished nor painted. The tests serve to determine the correct places for the different attachments, the suitable length of the cords that limit the shoulder plateīs movements (here green and makeshift) and establishing the definite shape of the plates. Above right: View into the decollete. The undergarment with padded collar is still missing, so one can perceive how little the armourīs bottom layer touches the body and how much the upper tier stands off. |
||||||||||||||||||||||
 |
||||||||||||||||||||||
 |
||||||||||||||||||||||
|
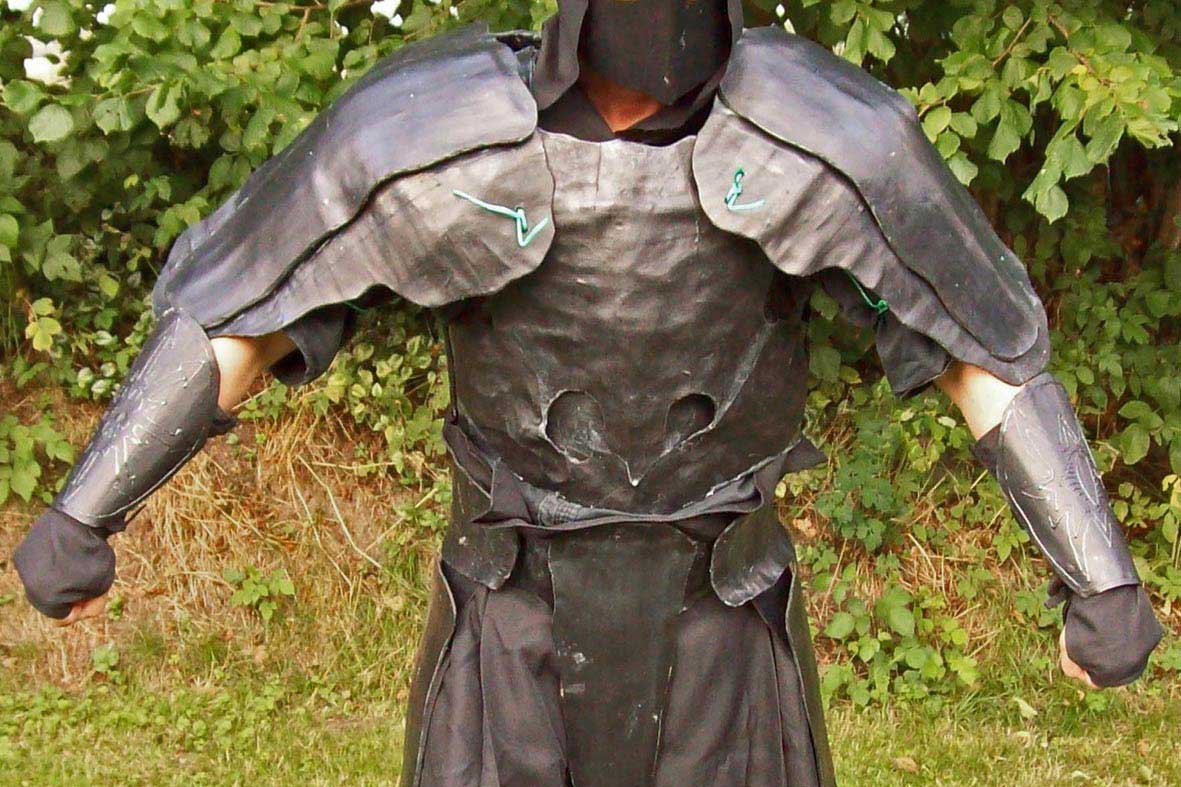
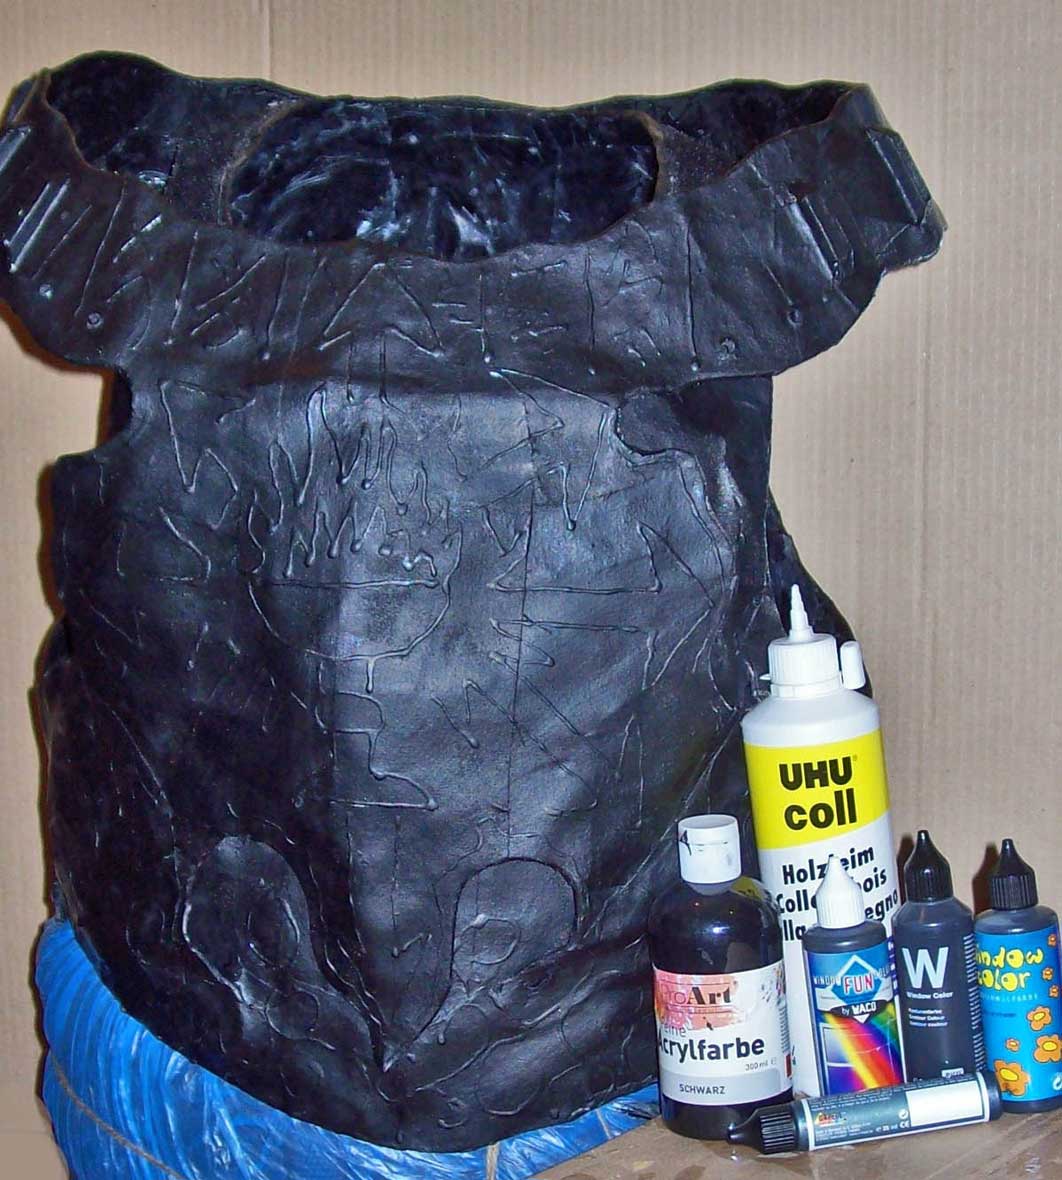
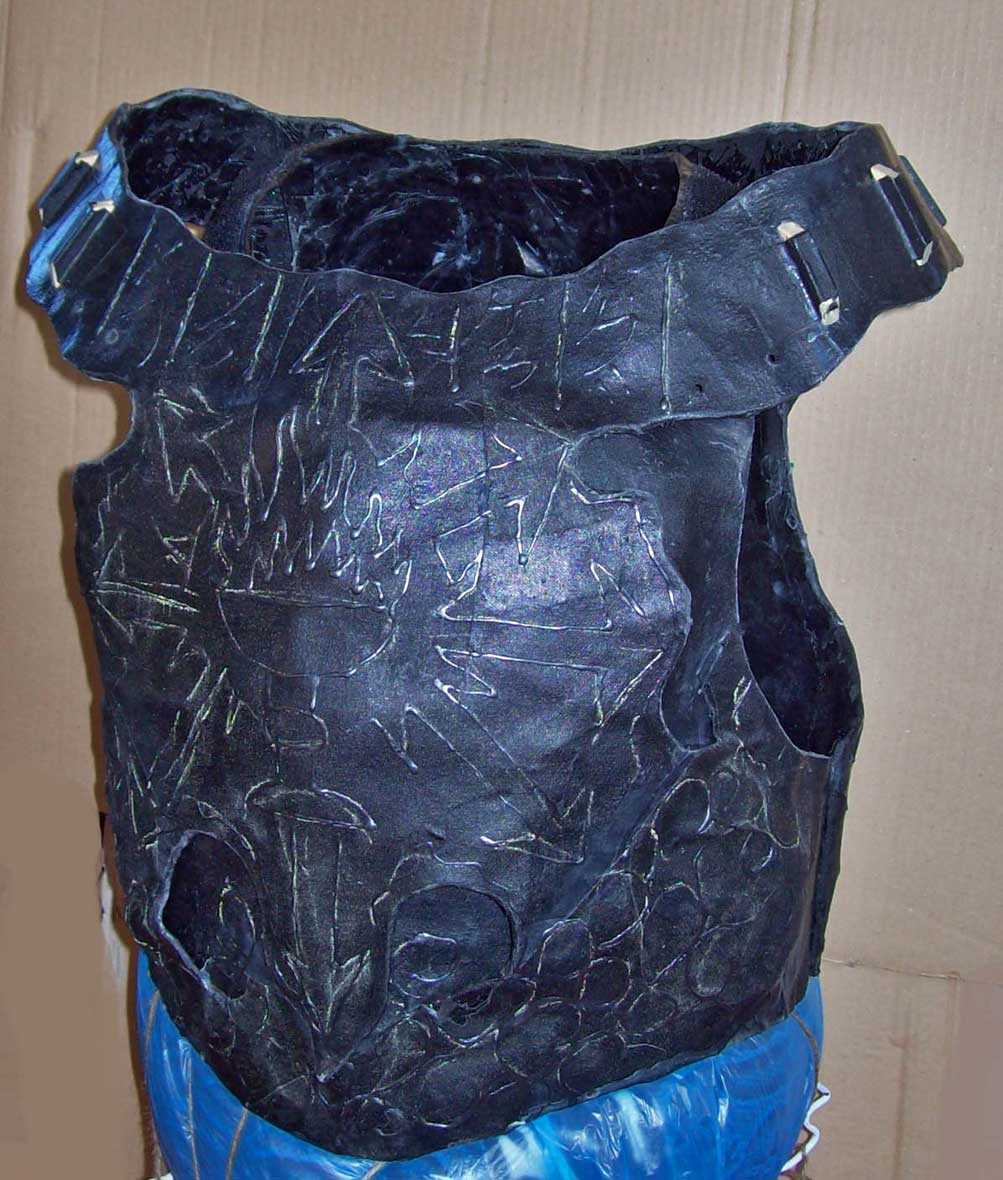
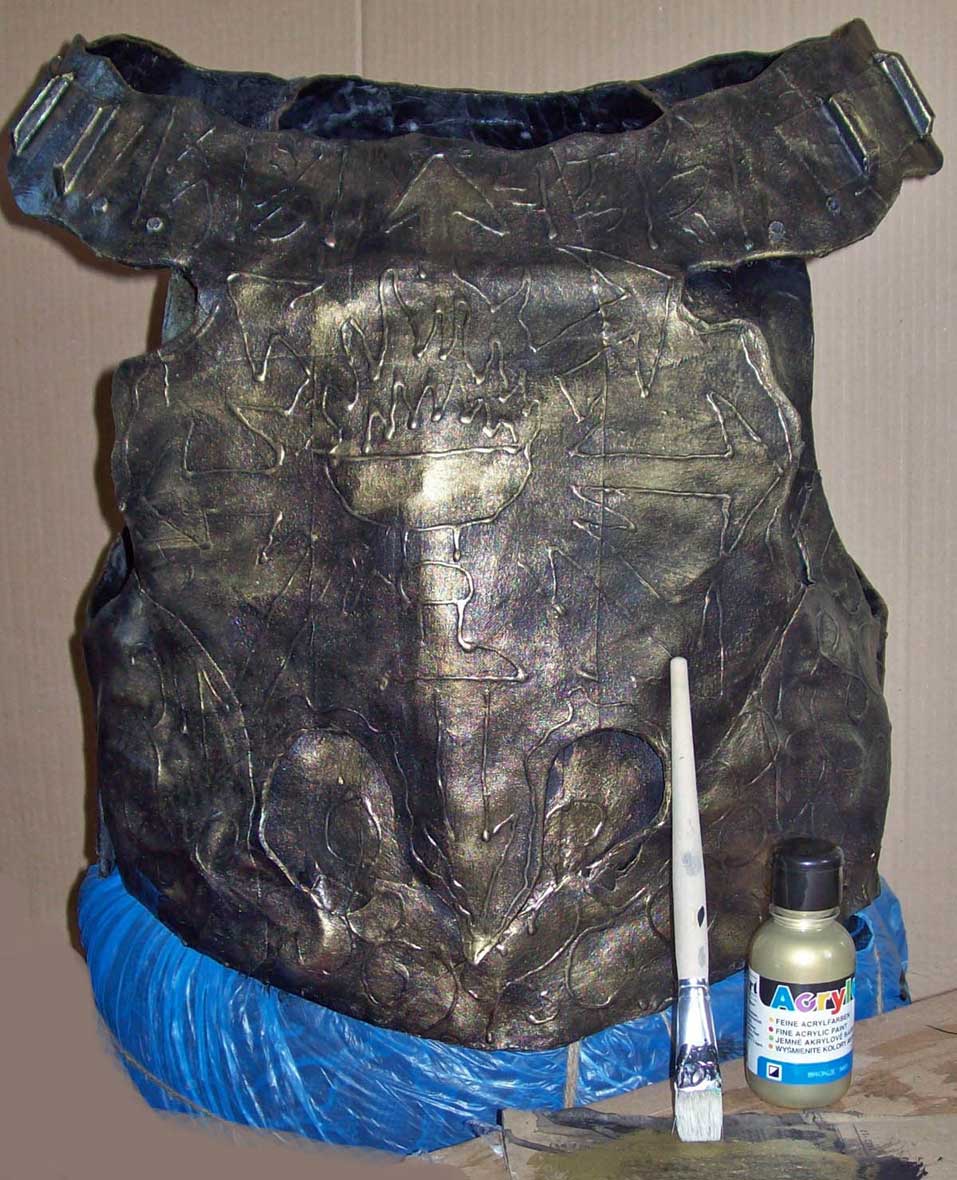
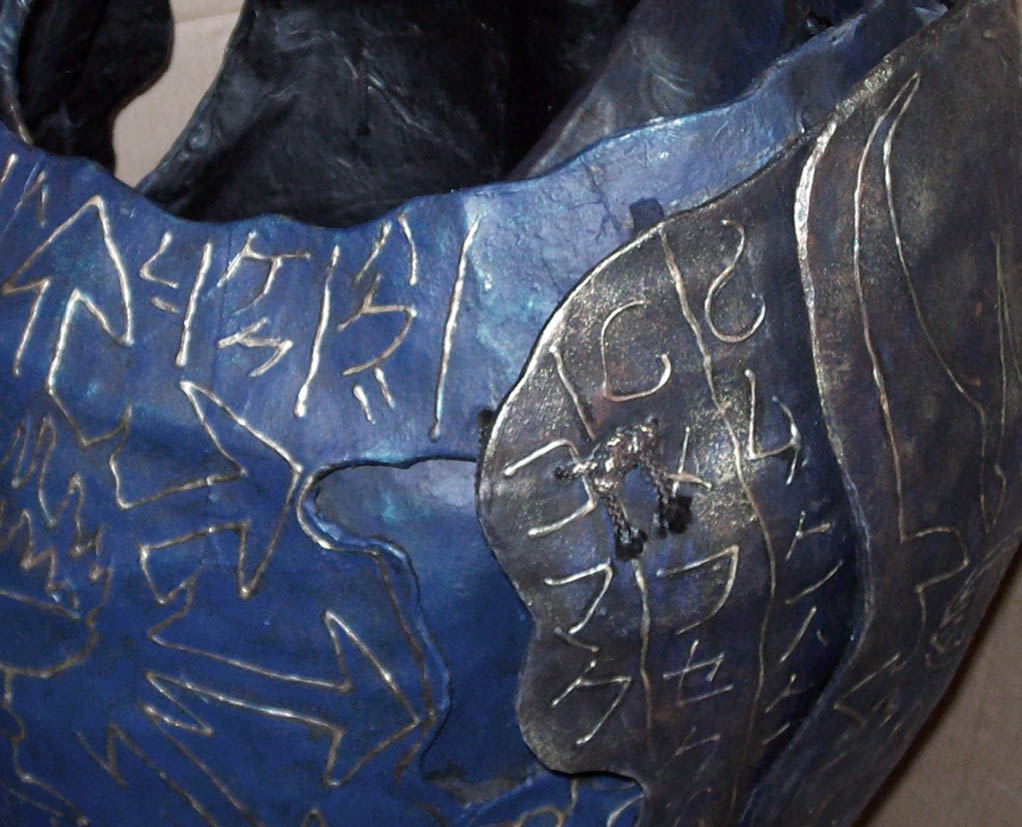
Above: the range of movement of the shoulder plates from the rear to the front. One of the insights gained with these experiments was: the upper breast plate in front of the right arm protrudes too far into the armīs movement zone and had to be cut back. step 5: painting and decoration Below left: ornaments and runes are done with window- color-contour. The substance is flexible (after all it was made for glas designs) but doesnīt bond reliably with the glued surface (again thatīs what it was build for: to be able to be lifted off glass plates if needed). Below right: Thatīs why the surface is now sealed with a mixture of 4 parts glue and one part acrylic. The paint changes the consistency of the glue to “even more viscous” and almost merges the ornaments with the ground. A suitable hard impact can of course still damage the adornments, but hits with foam weapons donīt fall into that category. |
 |
||||||
 |
||||||
 |
||||||
 |
||||||
|
Above: The actual painting of the surface is done with undiluted acrylics. Above left: drybrush gold. Thus all runes and lines are accentuated. Above right: and then blue is painted around the ornaments. A very dubious pleasure, but this procedure gives a better result than painting it all blue and then repaint the ornaments with gold. On top comes a wash off black (thinned paint that settles in all recesses) and “dirt”. There is no varnish so that colour abrasions -should they happen- can be restored even on-site in the next game-pause with quick- drying acrylics. But that wasnīt even necessary. Addendum 2018: the new frontplate |
 |
|||||||
|
Above: 2014 und 2017. As stated already, I never really liked the original surface of the front plate, resulting in me not wearing the armour. So change it or dump it. And after only two years of tinker-planning (... replace the upper layer? Grind the thingīn build more layers? Build everything new?... argh!) an elegant solution presented itself: “Just build a third, this time nice & fine plate and simply glue it on top, dimwit”. O...kay: |
|||||||
 |
|||||||
 |
|||||||
|
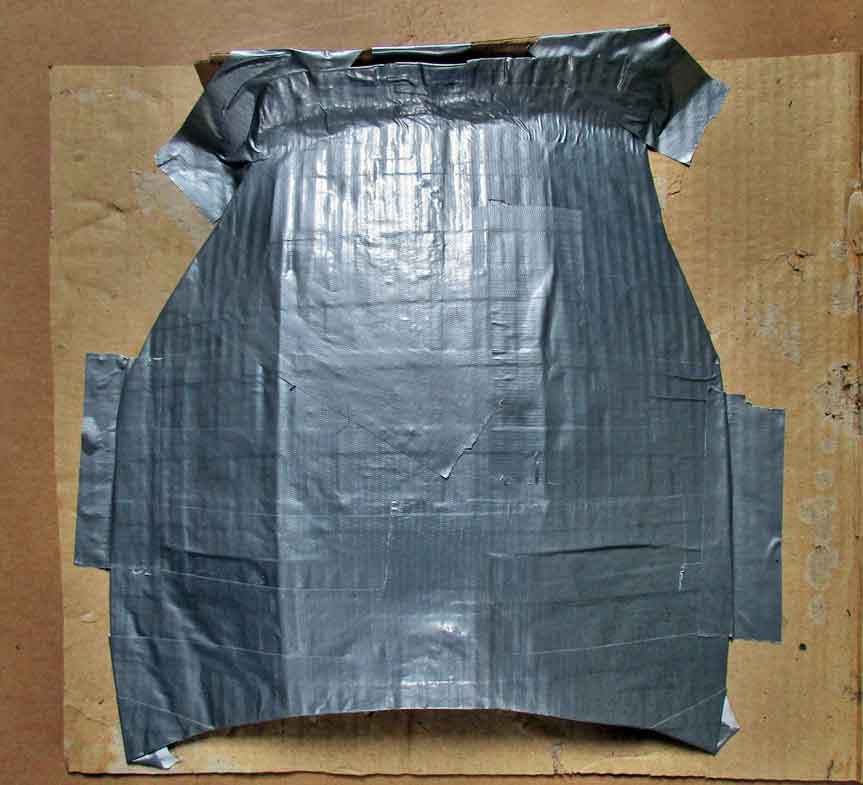
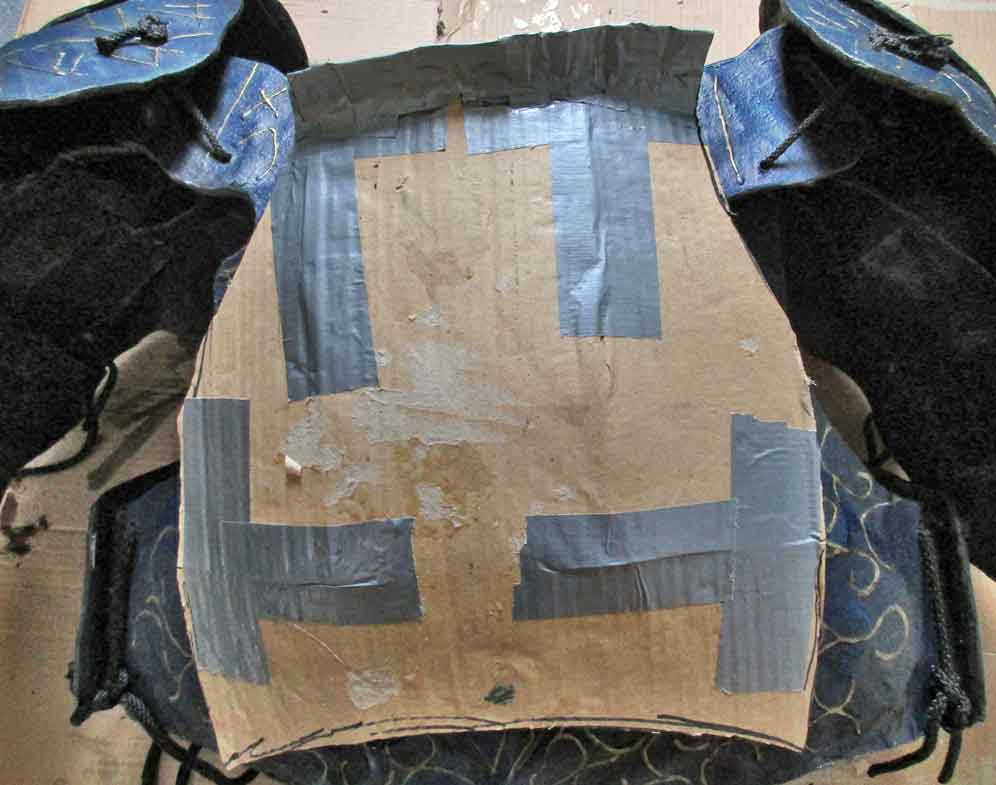
Above left: building the form right onto the original plate. It is arched and has an arrow- repelling outwardly facing upper edge. The edge isnīt symmetric- no problem- it will be cut to shape later. Above right: The form was covered with tape. See the two stabilizing “ridges”?. They wonīt impair the overall impression though. And what is important: This plate was built lying flat. That (and the fact that the layers of cloth I glued on were single pieces instead of overlapping patches) make a good surface. |
|
|
 |
|
So much for the harness. And because helmet and harness alone donīt make a suit of armour thereīs a fourth page in this documentation for the add- ons. If you want to read straight on, just follow the link below. oct 2014, feb 2016, oct 2016, may 2018 |
| [Home] [Deutsch] [English] [about me] [whatīs new] [Contents] [about monsters] [faqs] [other sites] |
